Creating a List is the first step in the SmartForms process. It must be completed first.
Creating a New SharePoint SmartForm List
You will want to create your list at the subsite level. You may want to start by creating a new page for your form to live on, if the page does not exist already. After you have Checked In the page you want to build your form on, you will then create the List within the subsite of that page.
1. Go to the web page where the form you want the form to reside.
2. Click the Gear Icon and select "Add an app".

3. Select Custom List.

4. Give your list a name and click Create.
Your list has been created! You need to populate it with the fields for your form. They can be questions, dropdowns, multiple choice, comment boxes, etc. In the List, the fields are called columns. You should already know what these fields will be. To make things easier, you should create them in the order you want them to appear on the form.
Populating the List
Now we will add all the fields that we want to display in the form (here they are called columns).
The type of the columns can be configured for each field.
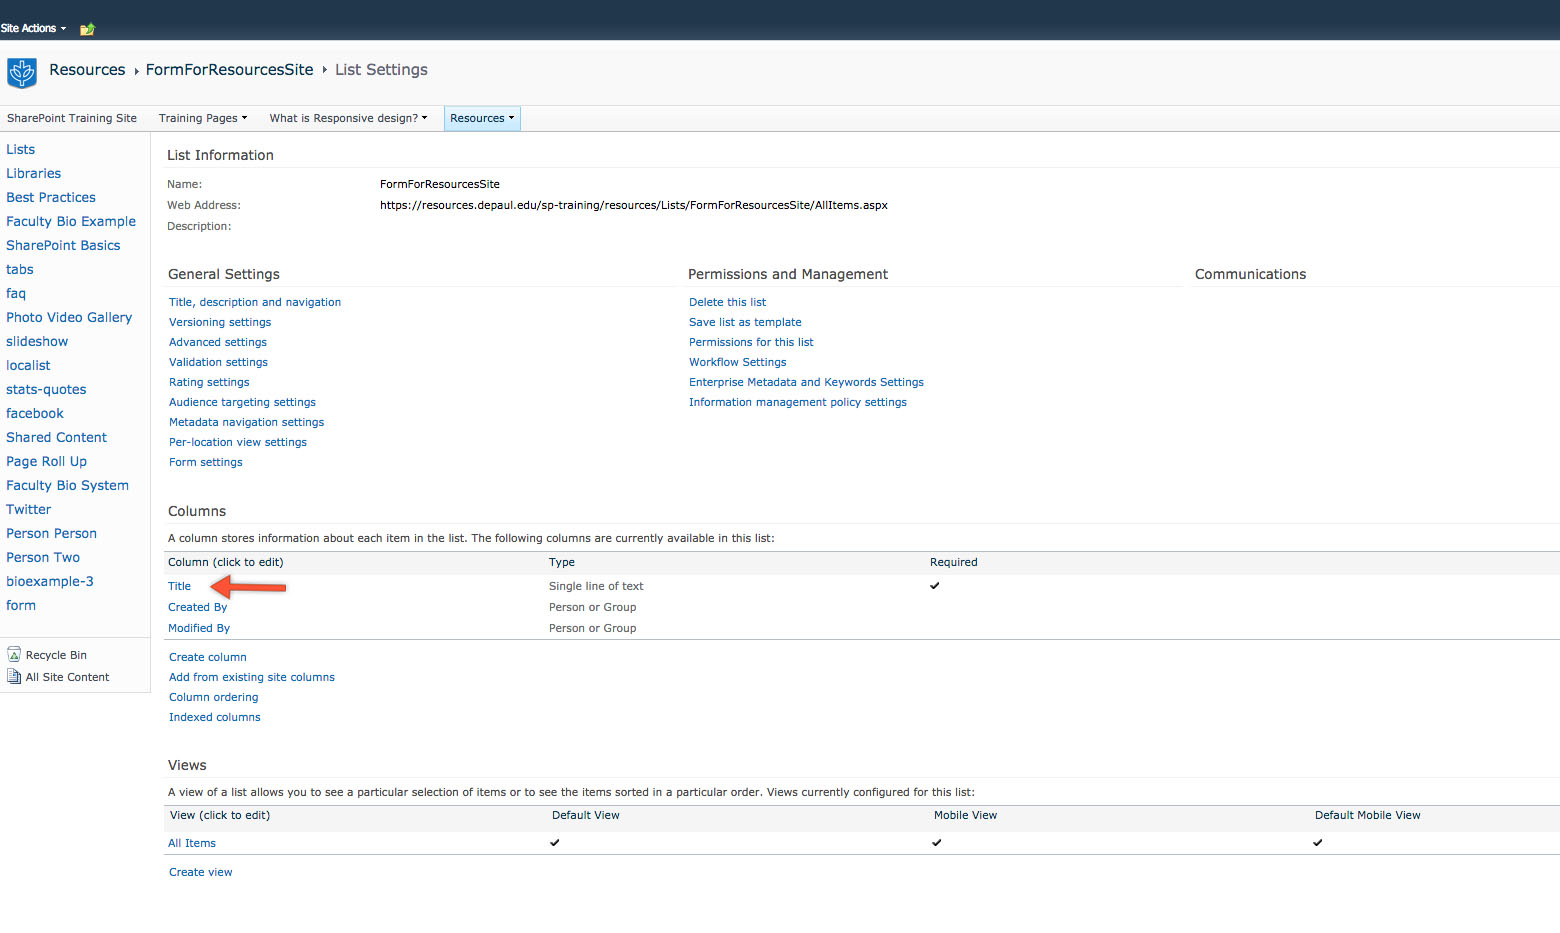
1. In the ribbon, click on the
List Settings button.

By default, all Lists start with a Title column that is set to be a single line of text and is a required field.
Let's change this to not be required. We don't have to use this field in our form later, so it makes sense to make it not required as our first step.
1. Click on the
Title column link.
2. In the Additional Column Settings section, to the right is the "Require that this column contains information" option. Select No and click OK.
 If your first field on your form will be the filler's name, let's start by making that the first field column.
Adding a new field column
1. In your List Settings, under Columns look towards the bottom under the line and click Create Column.

2. Give it a name by entering what you want the field to say in the Column Name area.
3. Select Single line of text for this type of field.
If you want to require that this field be filled out by the user, you can select Yes for "Require that this column contains information", or your can leave it defaulted to No. Click OK.

Now you can create more columns for each type of field you want in your form.
Here's an example of a Choice field that will be a dropdown for the user to select from:

You will most likely use the Single line of text, Multiple lines of text (we suggest selecting the "Plain text" option), Choice, Number, and Date and Time column types.
After your list is complete, go to the Web Part Instructions for a step-by-step guide to adding the SmartForms Standard Web Part to the page where your form will be surfaced.
*****
If you need to edit the list in the future, go to the page where your form lives and view the List via Site Actions > View All Site Content, and select the List. Then, in the ribbon under List Tools, click on the List tab and then click List Settings (to the right, the icon is yellow with a gray gear symbol). Then you can click on the columns you made and edit them.
Setting the List View to show the newest submissions at the top
Form submissions will go directly into the List in the All Items view. They will appear in the order in which they are submitted, which means that the newest submissions will be at the bottom of the List View by default. To change this so that the newest submissions appear at the top of the All Items List View, you can set the List to sort by Created and display in descending order.
1. Go to your form page and go to Site Actions > View All Site Content, and select the name of your list. Then, in the ribbon under List Tools, click on the List tab and then click List Settings (to the right, the icon is yellow with a gray gear symbol).
2. At the bottom of the page, under all of your columns is the Views section. Click on All Items.

3. In the Columns area, you'll see all your columns to the right that are automatically selected. Under your selected columns, there's an unselected one called Created.
Check the box next to Created to select it. This will add a timestamp column to your All Items list view that will let you see the date and time that the submission was created by the user.
4. Under Sort, click the dropdown for First sort by the Column: and select Created. Then choose Show items in descending order.
5. All the way at the bottom or top, click OK to save.
Now your newest submissions will appear at the top of your list view.
If you haven't added the SmartForm web part to the page yet, go to the
Web Part Instructions for the next steps.
Optional Advanced Formula Validation
Let's create the column "Email" with DePaul email address verification through a formula.
1. Create a new field by clicking
Create Column.

2. Type the word "Email" in the column name and set the type to "Single line of text."
3. Select Yes under "Require that this column contains information."
4. Expand Column Validation, and copy and paste the following formula into the Formula box:
=AND(ISERROR(FIND(" ",Email,1)),IF(ISERROR(FIND("@",Email,2)),FALSE,AND(ISERROR(FIND("@",Email,FIND("@",Email,2)+1)),IF(ISERROR(FIND(".",Email,FIND("@",Email,2)+2)),FALSE,FIND(".",Email,FIND("@",Email,2)+2)
5. Copy and paste the following into the User Message box:
Format DePaul Email Address (campusconnectid@depaul.edu)

6. Click
OK.