Saving in SharePoint is a two-step process:
Save and
Check In. When you are done editing a page, you’ll want to save your work. Here's how:
Save & Close
In the ribbon, click on the
Page tab and click
Save (the icon is a purple floppy disc).
The yellow status bar will say "Checked out to you"

After you’ve saved, you’ll want to check the page in. This does several important things: it saves a minor version of the page in the page history in case you ever need to revert, it makes it so the page can be submitted for publishing, and others who have login access can see the changes you made.
Check In
To Check In the page, go to the
Page tab in the ribbon and click
Check In.

Make a comment that summarizes the changes you made and click
Continue.
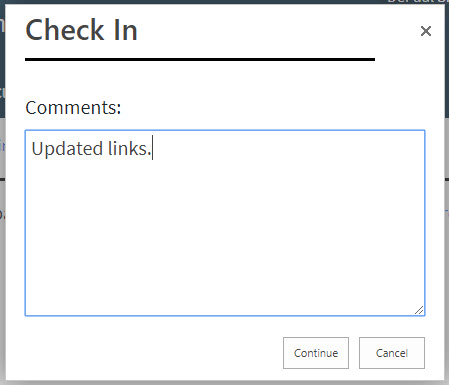
The yellow status bar will now say "Checked In and viewable by authorized users"

Think of a library book: when you edit a page you have it checked out to you, but in order for other editors to see what you've done and to approve it or change it, you need to check it back in. This process also prevents multiple editors from editing the same page at once and discarding each other's edits. It is important to not leave pages checked out to yourself after you are done editing them.
Discard Checkout
If you need to undo all the edits you've made since checking out a page (an oops!), you can click the arrow beneath the Check In button and select Discard Checkout. This will return the page to the state it was in before you edited it.
Submitting, Approving and Publishing
If you are an Editor, you will need an Approver to approve your changes and then publish the page. To submit a page for approval to be published by an Approver: after Checking In a page, go to the
Publish tab next to Page in the ribbon and click
Submit.

When the white page comes up, click
Start
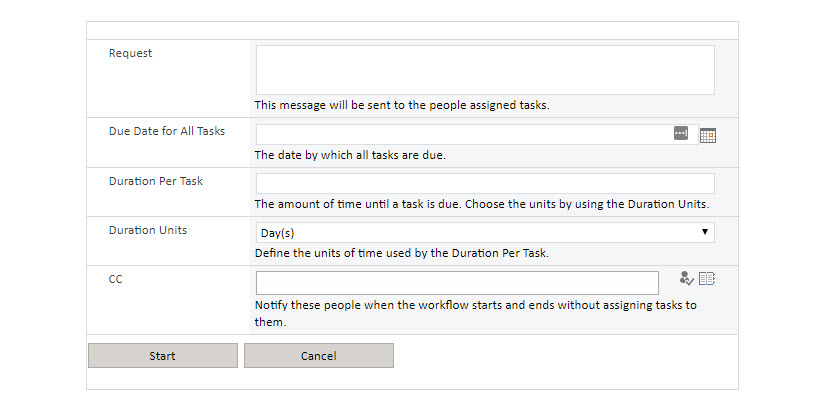
You have now started the publishing workflow. Note that the yellow status bar says "Waiting for Approval"

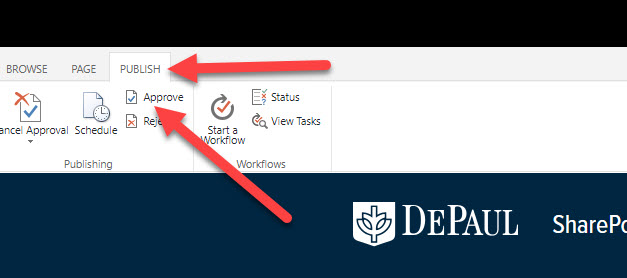
If you are an Approver, you can approve a page that has been submitted to be published by clicking on the
Publish tab and clicking
Approve
Then click
Continue
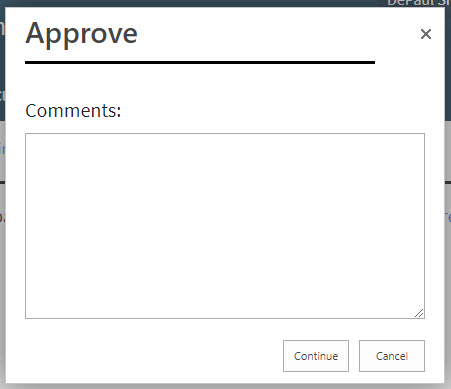
Next, click
Approve.
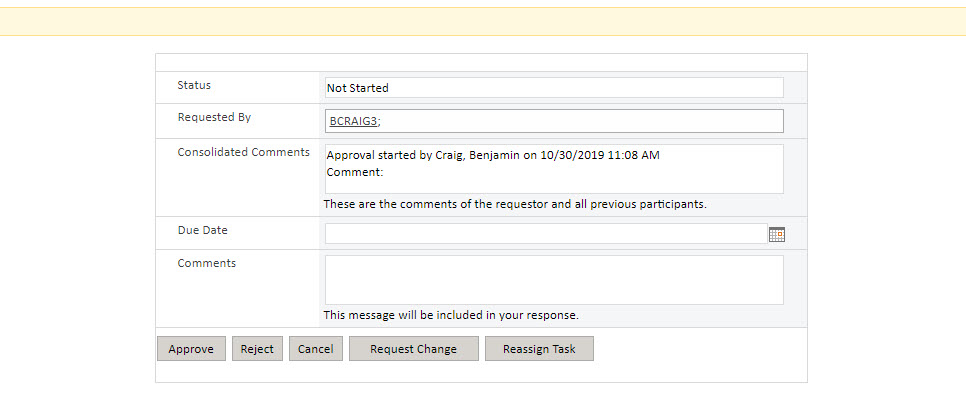
Your page is now published and live to the world.
More on these
terms and how Workflow works can be found
here.
It may be helpful to you to set up a rule in Outlook to filter approval emails to a separate folder. Learn how by following these instructions.