Have image files saved somewhere you’ll remember on your computer with a recognizable file name. If you have multiple images for your SharePoint site, we suggest keeping them in a designated folder for organizational purposes and future reference.
**IMPORTANT** Content editors must follow
image best practices requirements when resizing an image
before inserting it on a page.
Video Tutorial
Step-by-Step Tutorial
After
logging in to your site, go to the page where you want to insert the image. When you are on the page, click the
Gear icon (top right of page) on the black bar and select Edit Page. If you're not sure how to do these steps, review this Basic Editing page.

Click in the Main Content area wherever you would like the image.

Click on the
Insert tab in the ribbon and then click on
Insert Image.

A box will pop up, click
Browse…

Make sure to navigate to the correct Images folder where you want to upload the image. At the top of the box that shows your SharePoint Image Library, select "Click to add new item"

Select an image from your computer and click
OK

Add Alt Text (REQUIRED. Also known as the alternate text for the image, this important step is for screen-readers and SEO. It is a 3 or 4 word summary of the image. Use this handy tool for deciding what an image's Alt Text should be: https://www.w3.org/WAI/tutorials/images/decision-tree/)
Choose the
Image Size (we use a percent of the page layout width – 100% will consume the entire width of the layout, 75% will consume ¾ of the page, 50% will consume half, and so on).
If you want the image to stand on its own line, leave the Image Position at “No positioning”
If you want the image to wrap with the surrounding text, select either “Float Left” or “Float Right” depending on where you want the image.
Click
OK

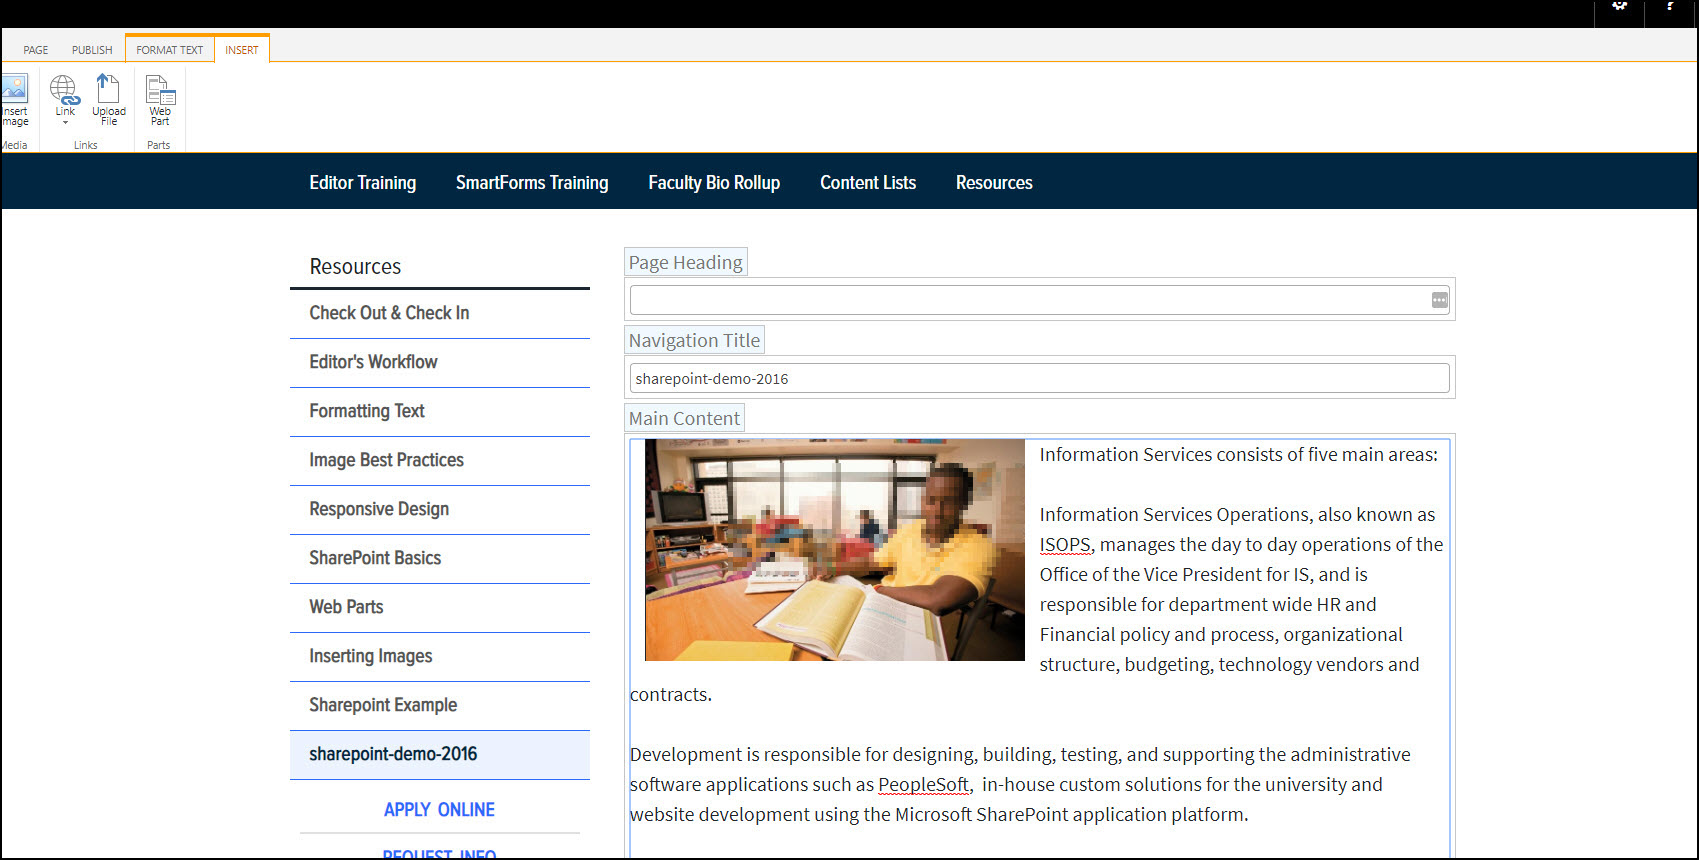
Your image will look like this on the page in edit mode:

When you are done editing the page, don’t forget to
Save & Close and Check In
Steps for pre-uploading multiple images
If you are going to insert a couple of images on a page, we suggest first uploading them to the site's Images library.
On the page where you would like to insert the images, go to the
Gear Icon dropdown menu and select
Site Contents.

You are now taken to a view showing the subsite that includes the image and document libraries for your page. Click on
Images.

You are now in the Images library. You should see a small up arrow with the word Upload next to it.

**We suggest that you make sure your
images are properly sized before uploading them to the SharePoint Images library.
Click the
Choose File button and find the image you would like to upload. Select the image and press
Open. Click
OK. The "Add a Document" pop-up window will appear. Fill in all information including Title, Keywords, Comments, Photo Author, Date Picture Taken and Copyright information. Click
Check In.
Repeat the process above for all images.
Now go back to the page where you want to load the image. A link to this page will usually be on the top right corner.
Click Edit in the page, if you haven't already done so. Click on the
Insert tab in the ribbon and then click on
Insert Image.

A box will pop up, click
Browse…
You are now in your SharePoint Images library and can select the image you want to insert by highlighting it. Click
OK.
Add a title (also known as alternate text for the image – a 3 or 4 word summary of the image)
Choose the
Image Size (we use a percent of the page layout width – 100% will consume the entire width of the layout, 75% will consume ¾ of the page, 50% will consume half, and so on).
If you want the image to stand on its own line, leave the Image Position at “No positioning”
If you want the image to wrap with the surrounding text, select either “Float Left” or “Float Right” depending on where you want the image.
Click
OK.
When you are done editing the page, don’t forget to
Save & Close and Check In.
Bulk Upload
You can now bulk upload multiple images all at once. If you are going to insert several images on a page, like in a Photo Gallery, we suggest first bulk uploading them to the subsite's Images library.
On the page where you would like to insert the images, go to the Site Actions menu in the upper left, and from the dropdown menu, select Site Contents.
You are now taken to a view showing the pages, images, and documents libraries for the subsite. Click on Images.
You are now in the Images library. **We suggest that you make sure your images are properly sized before uploading them to the Images library in SharePoint.
You can now drag files from your computer into the image library. As you drag the images over the SharePoint library, you'll see the window prompt to "Drop here...".
Once all images have finished uploading, the images will be ready for use.
Now all your images will be in your images library. If they do not appear right away, refresh the browser.