As always, log in to edit the page in SharePoint by clicking
Editor Login in the bottom right corner of the page, and enter your Campus Connect username and password. Next, click the Edit symbol at the top of the page, or go to the Page tab and click
Edit. If the ribbon does not appear, you can access it through the Gear icon dropdown by selecting Show Ribbon.
IMPORTANT: Conventional and effective Accordion label names are usually one or a maximum of two words. Efficient non-verbose label naming maintains responsive integrity at narrow viewports, where horizontal space is at a premium.
Inserting Accordions
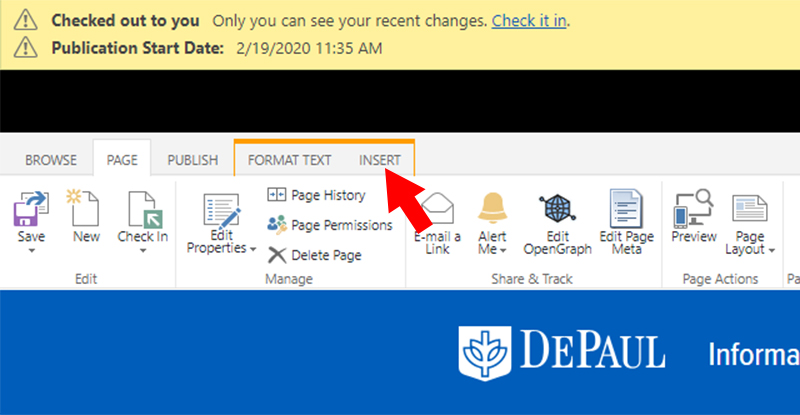
1. Go to the
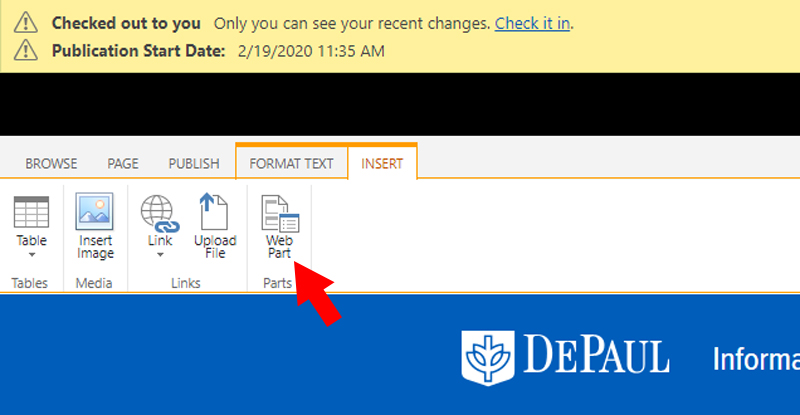
Insert tab in the ribbon, and click on
Web Part.
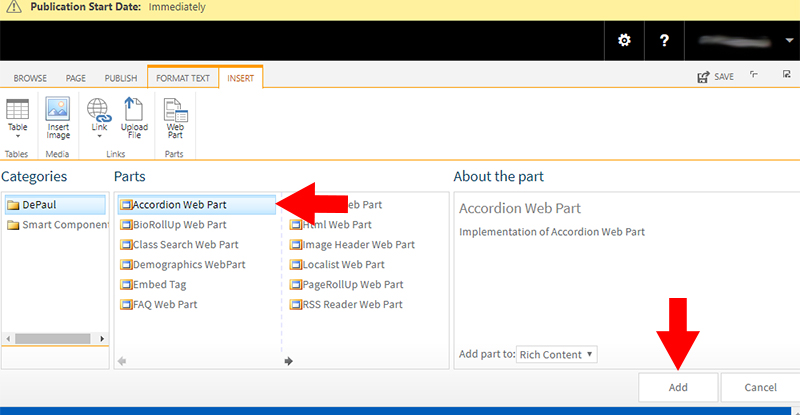
2. Select
Accordion Web Part, and hit
Add.
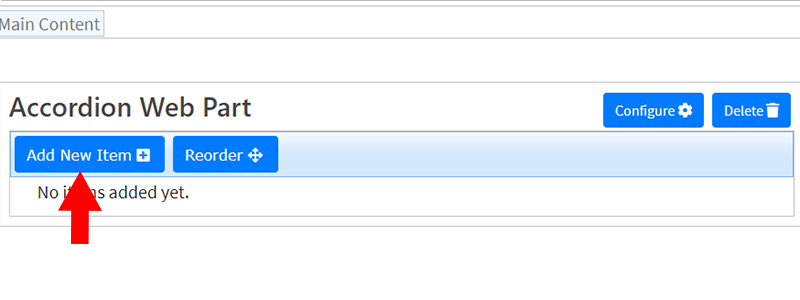
3. Click on
Add New Item, and enter a Title (this is the name of the accordion card). In the HTML zone, type in the content, and
click OK.
4.Save & Close and
Check In the page in the ribbon.
Step-by-step Image Guide
Click in the Main Content area, and in the ribbon click the
Insert tab.
Select Accordion Web Part, and click Add.
Click
Add New Item.
Enter text into the Accordion Title field.
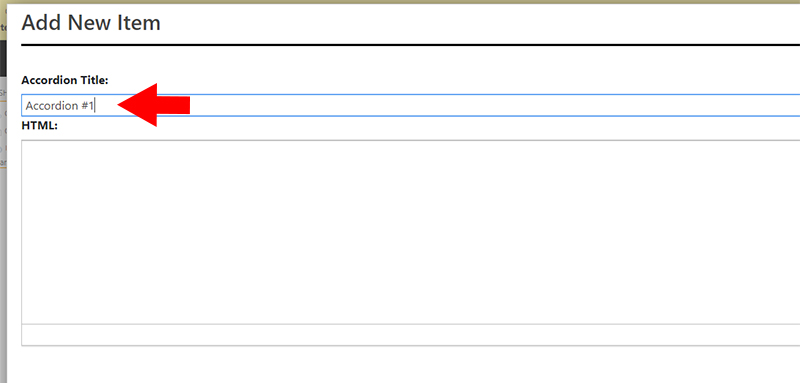
Enter the content text in the HTML field, and click
Save.
To add another accordion card, click Add New Item.
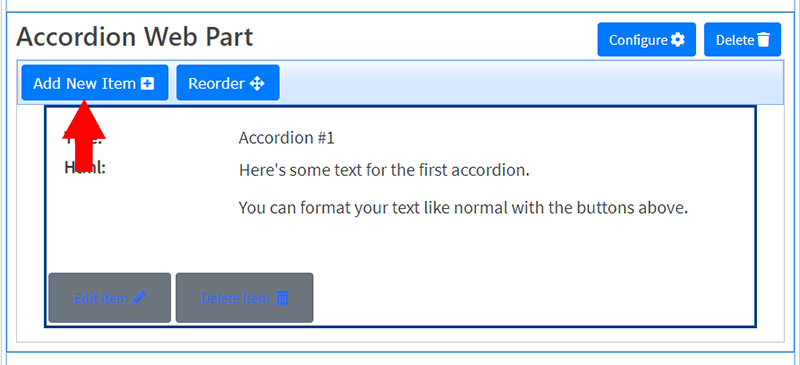
Follow the same steps above to add as many accordion cards as you need. It will look something like this:
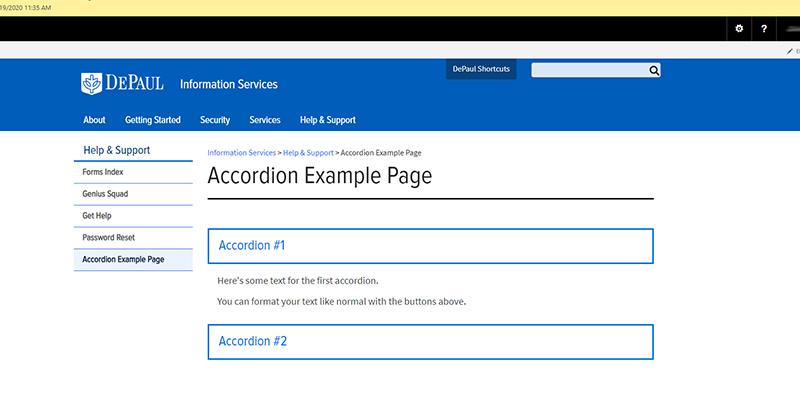
Save & Close and Check In the page when you are done.