As always, log in to edit the page in SharePoint by clicking Editor Login in the bottom right corner of the page, and enter your BlueKey login credentials (username@depaul.edu email address and password). Next, click the Edit symbol at the top of the page, or go to the Page tab and click Edit. If the ribbon does not appear, you can access it through the Site Actions dropdown by selecting Show Ribbon, or edit the page directly from the dropdown menu.
Inserting the Class Search Web Part
1. Click in the main content area where you'd like to insert the web part.
2. Go to the Insert tab in the ribbon, and click on Web Part.
3. Select Class Search Web Part, and click Add.
 If you are not setting defaults for the web part, you can click Apply and then when the page refreshes, click OK.
 Now you can Save & Close and Check In your page. Submit it for publishing when you are ready for the changes to be live.
Setting defaults in the Class Search Web Part (optional)
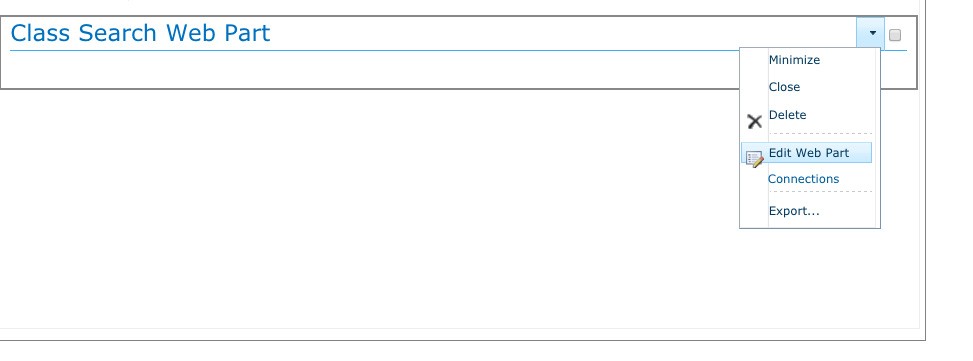
1. In the upper right corner of the web part, across from where it says Class Search Web Part, click on the little black arrow to expand the menu. Select Edit Web Part.
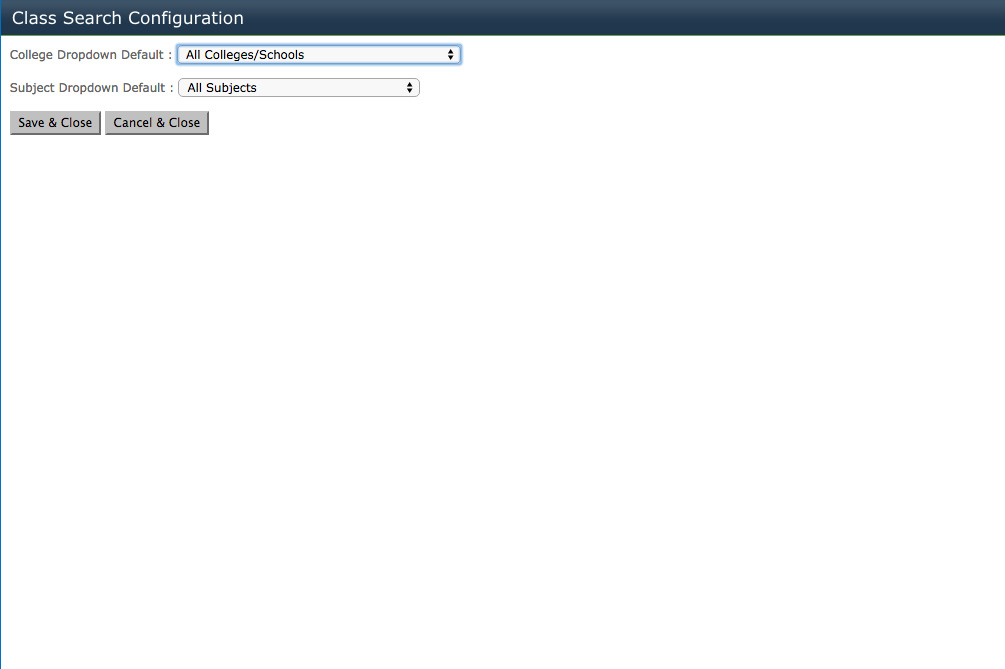
 2. Click Class Search Configuration.
3. Select from the dropdown menus which college/school you would like the web part to default to.

4. Select from the dropdown menus which subject you would like the web part to default to (optional).
5. Click Save & Close.

6. Click Apply and then after the page refreshes, click OK.
Now you can Save & Close and Check In your page. Submit it for publishing when you are ready for the changes to be live.
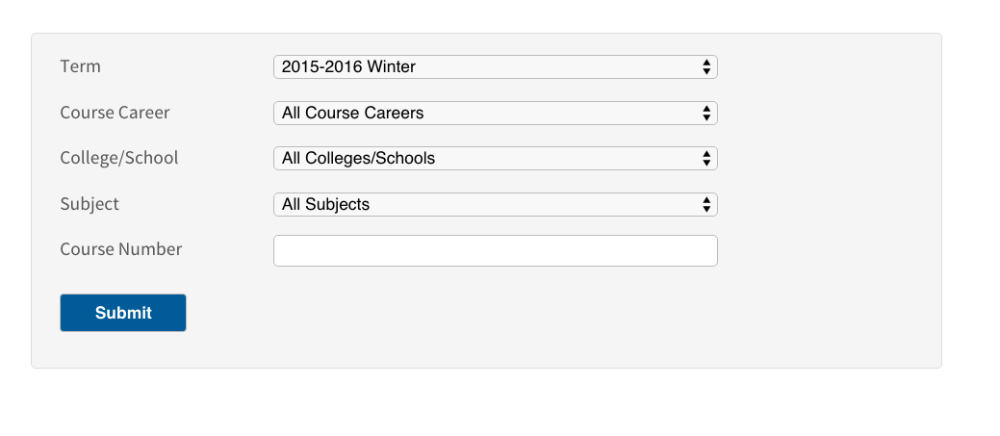
It looks like this after you Save & Close the page:
