As always, log in to edit the page in SharePoint by clicking
Editor Login in the bottom right corner of the page, and enter your
BlueKey login credentials (username@depaul.edu email address and password). Next, c
lick the Edit symbol at the top of the page, or go to the Page tab and click
Edit. If the ribbon does not appear, you can access it through the Site Actions dropdown by selecting Show Ribbon, or edit the page directly from the dropdown menu.Preparation
Before inserting the web part, you must set up the Rollup Info for each page that will be contained in the rollup. Navigate to the first page within the subsite that will be included in the Rollup, and hit Edit. At the bottom of the page, next to the Page Info tab is the Rollup Info tab. This is where the content that the PageRollup Web Part displays lives.
1. Add a Rollup Image (a thumbnail image that will show up in the Rollup that is 120px by 120px, optional).
2. Under Rollup View Order, select 0 if you want it to show up first in the list, 1 if second, 2 if third, and so on.
3. Add a Rollup Description (explanation of what the viewer will find on the page).
Repeat this for each page in the subsite, and then publish all the pages.
The pages will not show up in the rollup until they're published.
Inserting the PageRollup Webpart
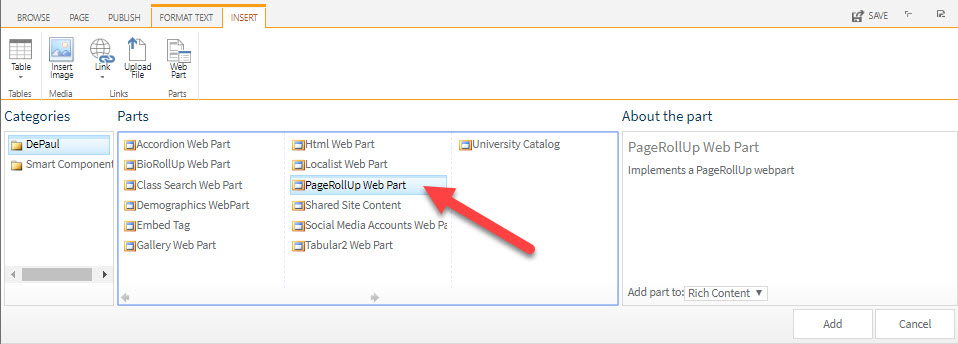
1. Go to the
Insert tab in the ribbon, and click on Web Part.
2. Select
PageRollup, and hit Add.
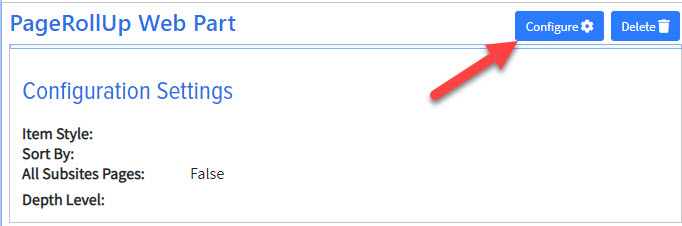
3. Go to
Configure Web Part and under
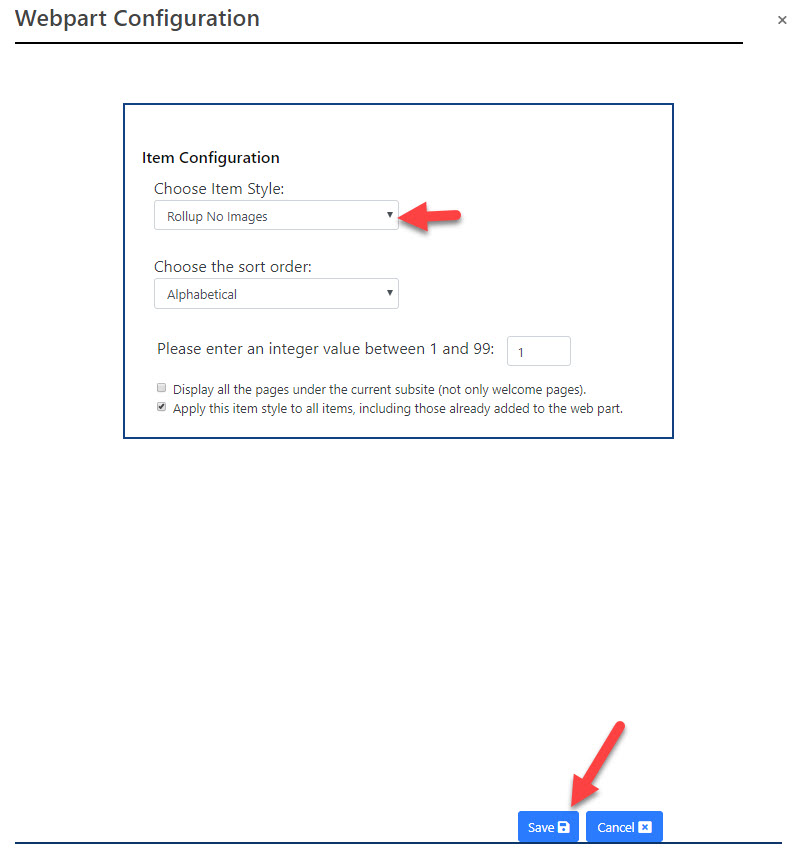
Choose Item Style, select either Rollup No Images or Rollup With Images. Check the box marked "Check this box if you would like this item style to be applied to all items already added to your web part." Hit OK.
4.
Save & Close and
Check In the page in the ribbon.
Step-by-step Image Guide
Click in the Main Content area, and in the ribbon click the
Insert tab.

Click on
Web Part.
 Select
PageRollup, and click
Add.
Select
PageRollup, and click
Add.
Go to
Configure Webpart.
Under
Choose Item Style, select either Rollup No Images or Rollup With Images. Check the box marked "Check this box if you would like this item style to be applied to all items already added to your web part." Click
OK.
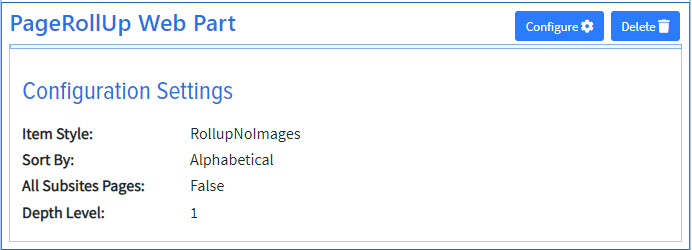
Now the web part should look like this:
Save & Close and
Check In the page.
If you add a page to the subsite at a later date, you do not need to edit the web part for it to show up in the Rollup list. Once the page is published, it will automatically be added.