As always, log in to edit the page in SharePoint by clicking Editor Login in the bottom right corner of the page, and enter your BlueKey login credentials (username@depaul.edu email address and password). Next, click the Edit symbol at the top of the page, or go to the Page tab and click Edit. If the ribbon does not appear, you can access it through the Site Actions dropdown by selecting Show Ribbon, or edit the page directly from the dropdown menu.
To prepare, have your social media profiles open in another browser tab or window.
Inserting the Social Media Web Part
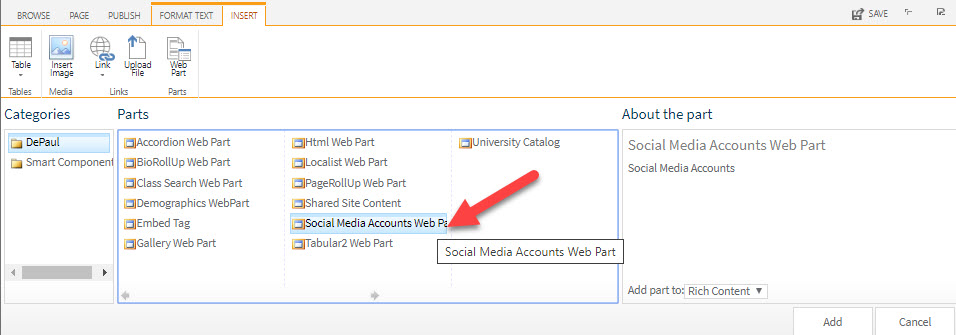
1. On the page that you'd like to place the Social Media Web Part, go to the
Insert tab in the ribbon, and click on
Web Part.
2. Select
Social Media Web Part, and click
Add.
3. Click on the
Social Media Accounts Configuration button.
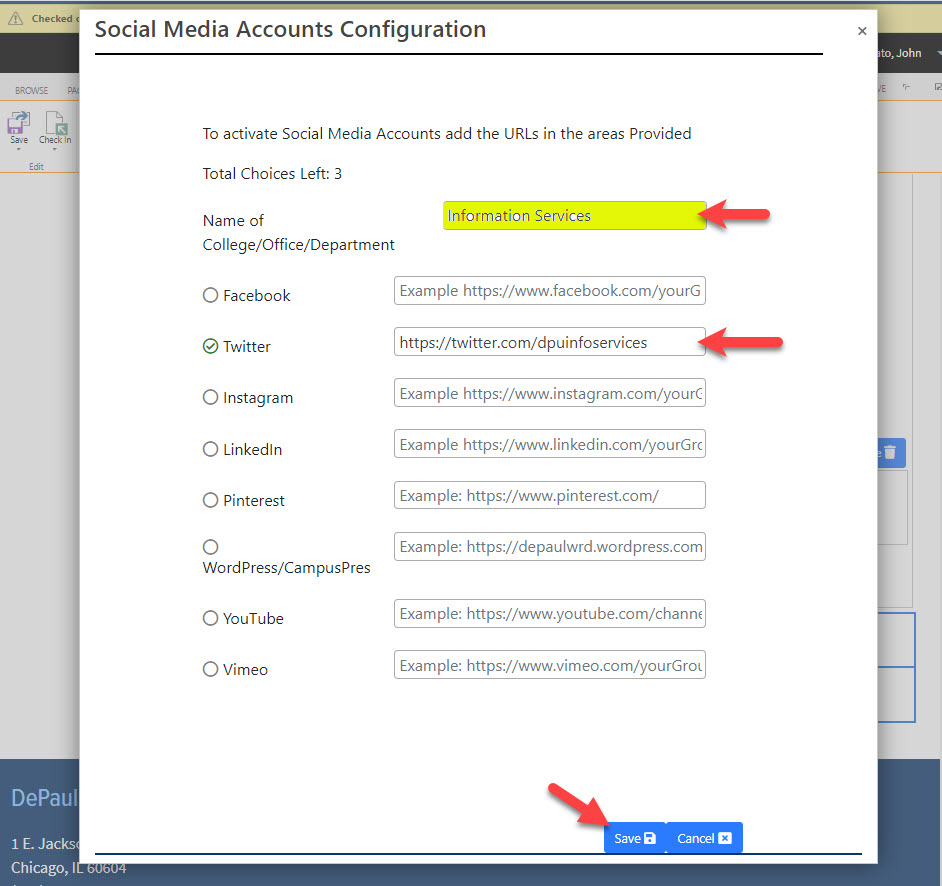
4. Enter the name of your department/office/school/center or whatever the unit is that you are adding social accounts for.
5. In another browser tab or window, have your social media profiles open. Go to the first one, and copy the URL of your profile page (Example: https://twitter.com/DPUInfoServices) and paste it into the corresponding platform field. Once you have entered a URL in the field, you'll see a green checkmark next to the platform name.
6. Once you have entered all of the accounts that you want to display (choose up to four for best results), click
Save & Close.
7. The configuration will close and you'll be back to the web part menu. Click
Apply and wait for the page to refresh. Then click
OK and wait for it to refresh again.
To save your changes to the page, click the
Save & Close button in the ribbon and then click the
Check In button in the ribbon.
Step-by-step Guide
To prepare, have your social media profiles open in another browser tab or window.
Inserting the Social Media Web Part
1. On the page that you'd like to place the Social Media Web Part, go to the
Insert tab in the ribbon, and click on
Web Part.
2. Select
Social Media Web Part, and click
Add.

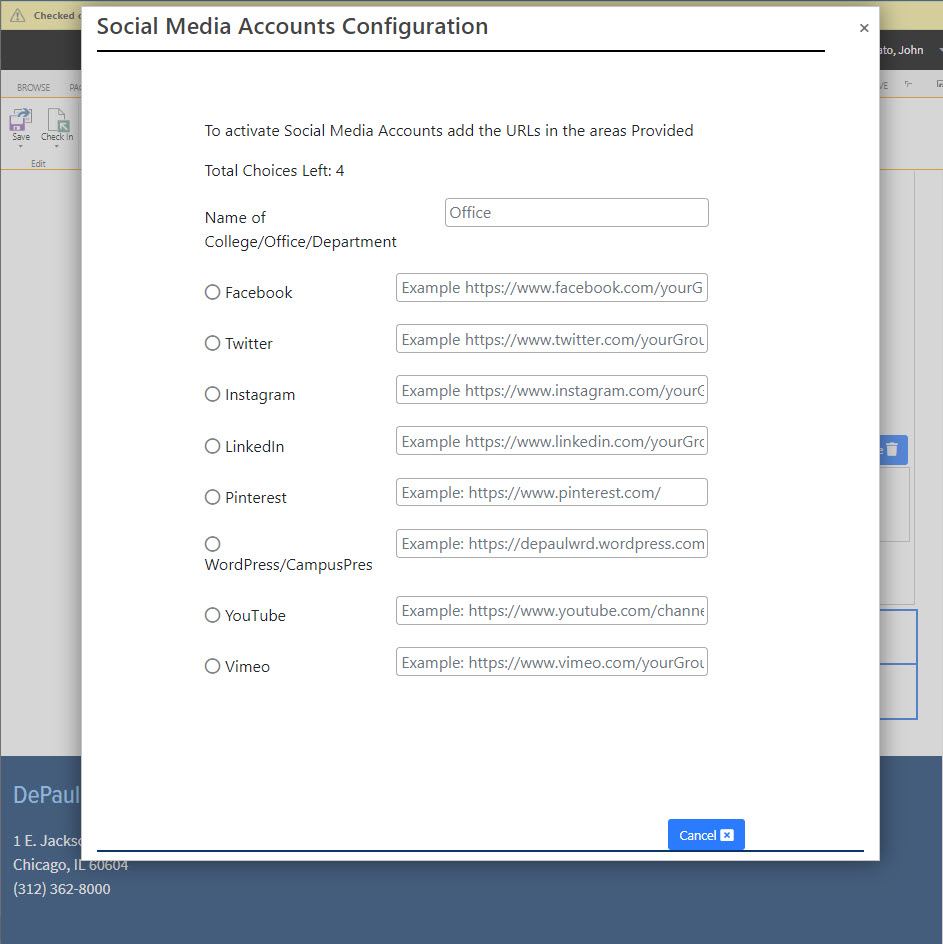
3. Click on the
Social Media Accounts
Configure button.

The configuration menu looks like this:
 4. Enter the name of your department/office/school/center or whatever the unit is that you are adding social accounts for in the first field titled "Name of College/Office Department".
5. Copy the URL of one of the account's profile pages (Example: https://twitter.com/DPUInfoServices) and paste it into the corresponding platform field.
Remember to paste the full URL and make sure it's the URL of the account profile and not of your account feed -- check it by opening a different browser (that you're not logged into the account on) and paste in the URL there. Once you have entered a URL in the field, you'll see a green check mark next to the platform name. Repeat for each platform.
 6. Once you have entered all of the accounts that you want to display (choose up to four for best results), click
Save & Close.
7. The configuration menu will close and you'll be back to the web part menu. Click
Apply and wait for the page to refresh. Then click
OK and wait for it to refresh again.
 After the page refreshes and the web part menu closes, it will look like this:
To save your changes to the page, click the
Save & Close button and then click the
Check In button in the ribbon.
On the checked-in page, the final result will look like this:
