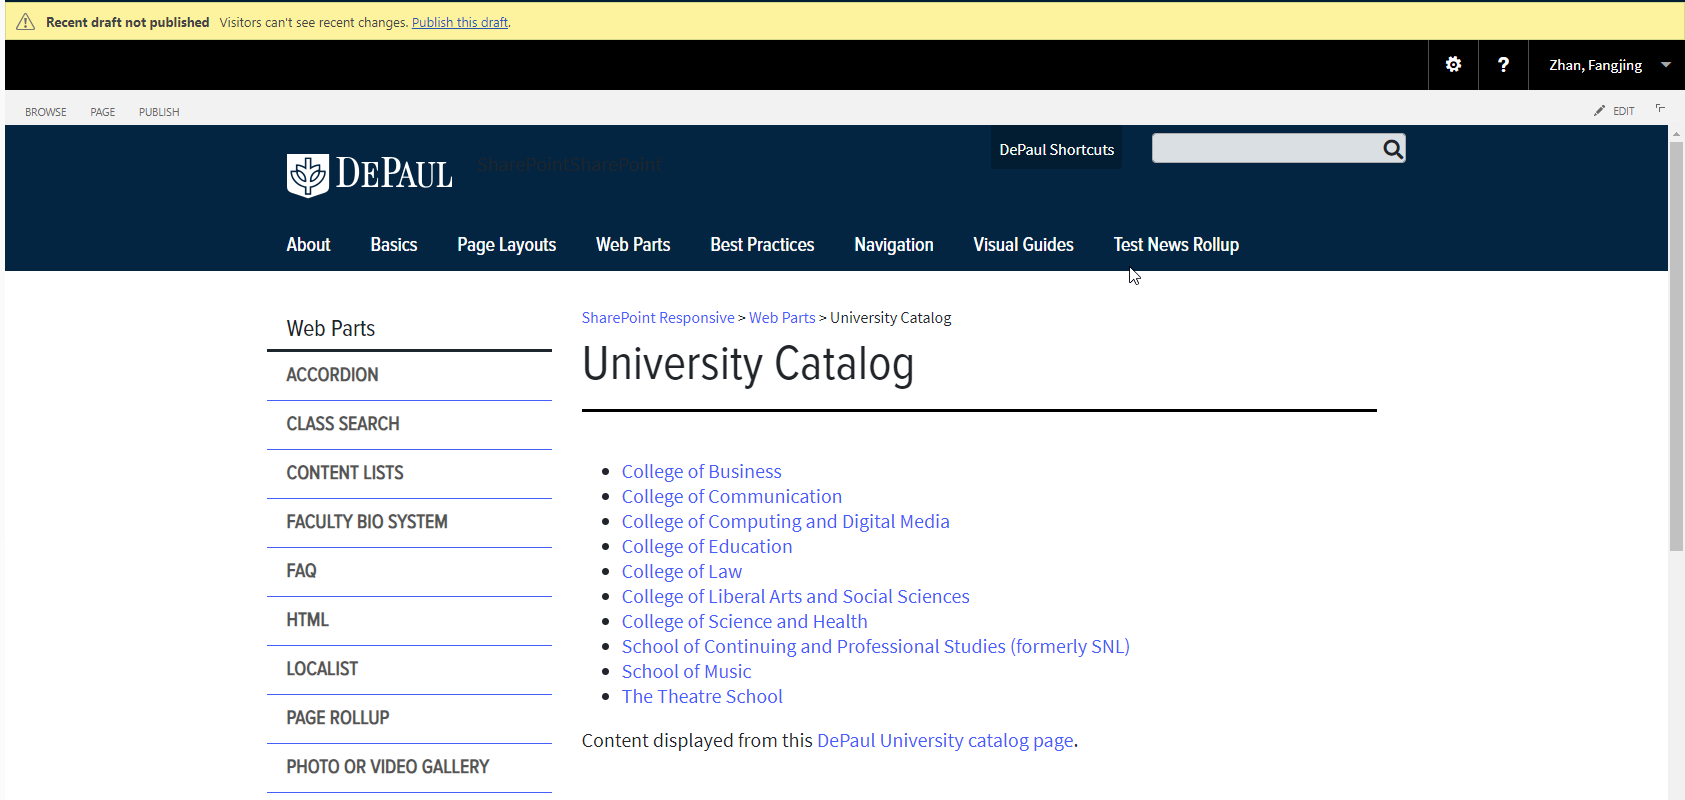
As always, log in to edit the page in SharePoint by clicking Editor Login in the bottom right corner of the page, and enter your Campus Connect username and password. Next, click the Edit symbol at the top of the page, or go to the Page tab and click Edit. If the ribbon does not appear, you can access it through the Site Actions dropdown by selecting Show Ribbon, or edit the page directly from the dropdown menu.
Inserting Shared Content
1. Go to the Insert tab in the ribbon, and click on Web Part.
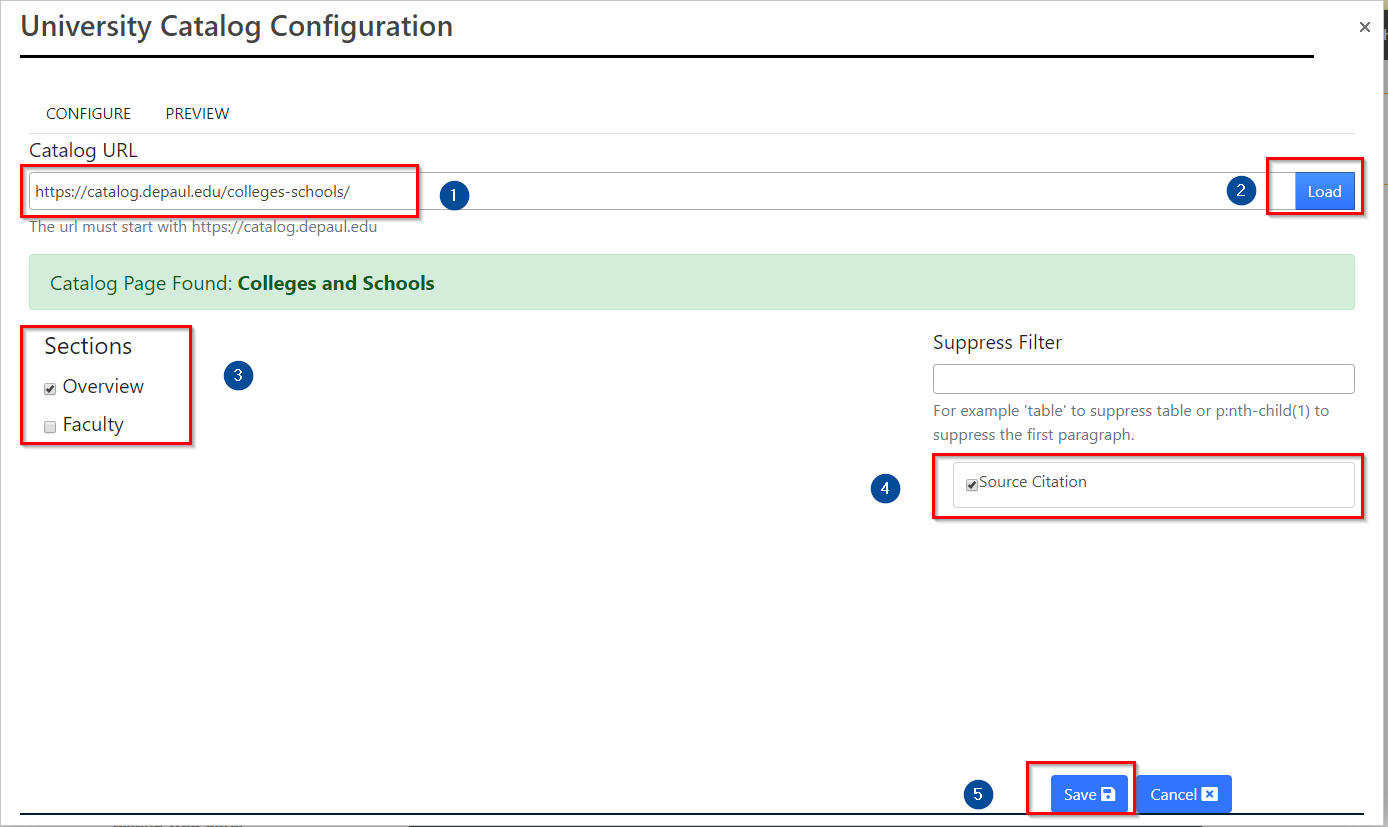
2. Select University Catalog, and hit Add.
3. Copy the Catalog URL that corresponds to the information you want to surface and paste it into the URL field, click Load. A multiple selection checkbox will appear with the various element of the catalog (Overview, Faculty, Major Requirements, etc.), select the element you wish to surface. To add automated citation text to the bottom (it informs the user where the content originates), check the box Source Citation to Show Citation.
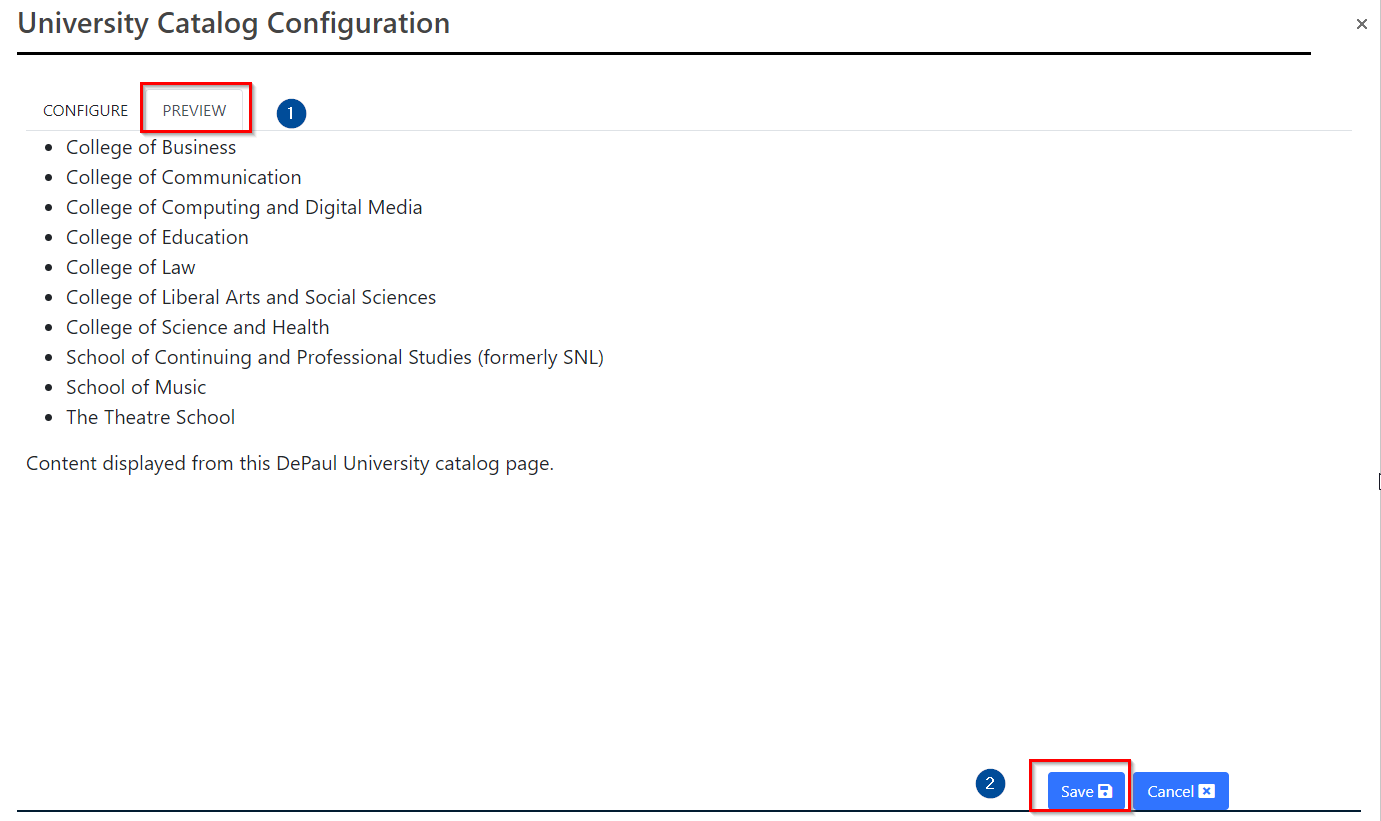
4. To see what the content will look like and make sure it displays the content correctly, click on Preview tab.
5. Click Save.
6. Save and Check In the page in the ribbon.
Step-by-step Image Guide
1. Click to edit the page

2. Click in the Main Content area, and in the ribbon click the Insert tab. Then click on Web Part.

3. Choose University Catalog, and click Add.

4. Click
Configure Webpart.
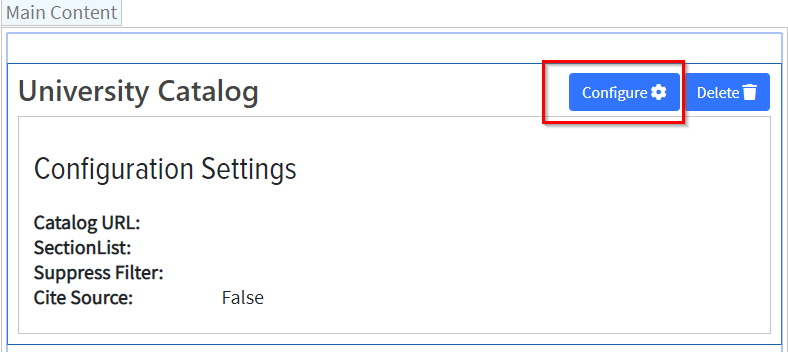
5. Copy the Catalog URL that corresponds to the information you want to surface and paste it into the URL field, click Load. A multiple selection checkbox will appear with the various element of the catalog (Overview, Faculty, Major Requirements, etc.) Select the element you wish to surface and click Save. (Option: You can check the box Source Citation to show citation)
6. You can also click the Preview tab before clicking Save to verify the correct information will be pulled.
7. Now your page should look something like below.
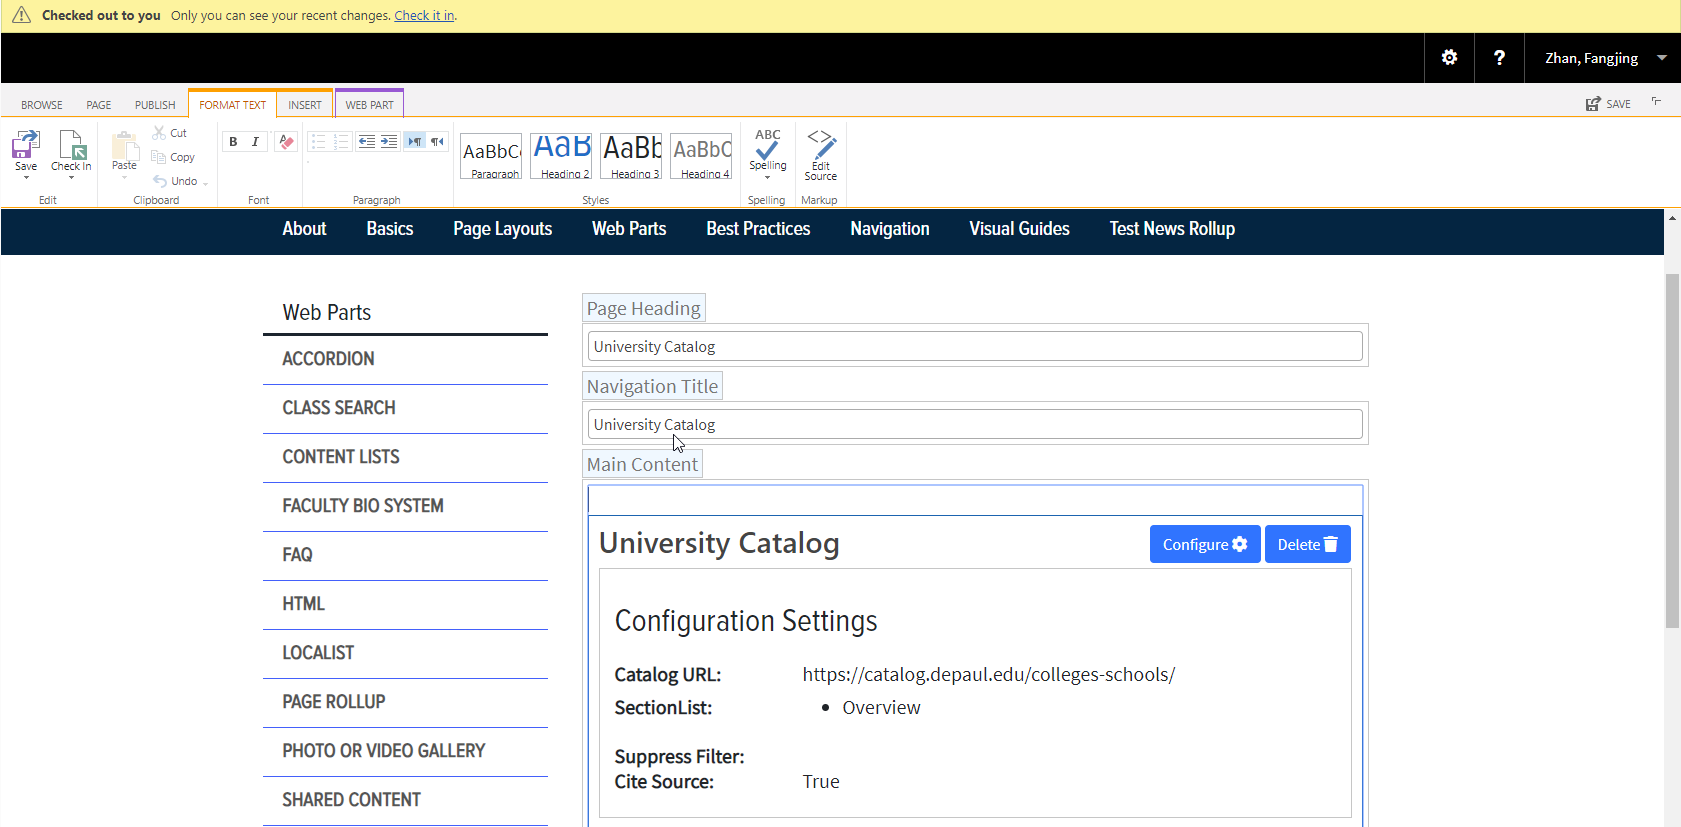
8. If it looks correct, Save and Check In the page.
