Note: This section does not go over editing the list columns or settings, just maintaining content in a list. You will only need to edit a list if you are creating a SmartForm. To edit a list you need a special set of permissions that are given after attending SmartForms training. See the
SmartForms section for more info.
Maintaining content in a list
List content is maintained through
Site Actions > View All Site Content.
If the corresponding list for a piece of functionality (Tab2 Web Part or SmartForm) does not exist within its parent subsite, the list might be located at the root of the site.
You can edit, add or delete content in the list, but be aware that all additions or edits to a list are applied as they are saved -- edits appear in real time. Lists do not use the standard two-step workflow process. Your changes will be live immediately if the page that the web part is on is published.
Below is an example from the College of Communication. Your list might have completely different fields and/or be named differently, but this a good example of a simple content list that powers a Tab2 web part.
Editing a existing item
Go to the list through
Site Actions >
View All Site Content.
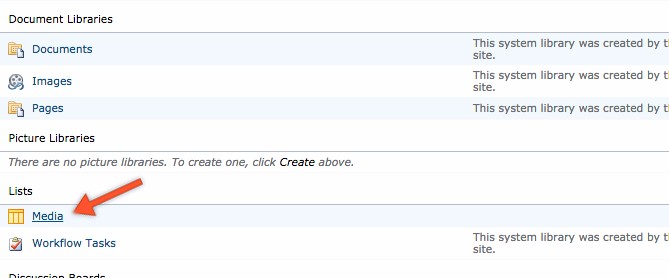
When you click on the name of the list, you'll be taken to the All Items view of the list.
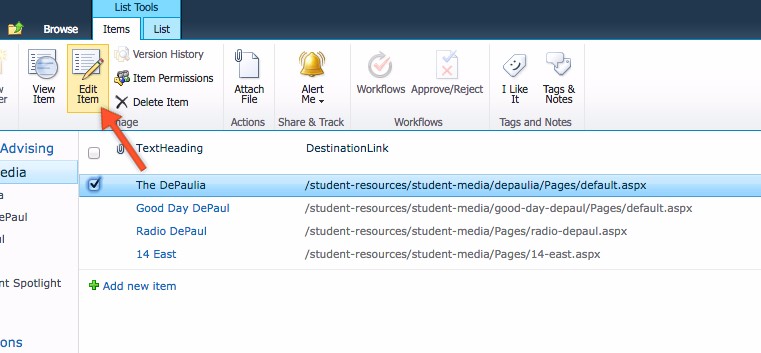
Select the item you want to edit by clicking the checkmark to the left of the item, and in the ribbon, click on
Edit Item.
 OR
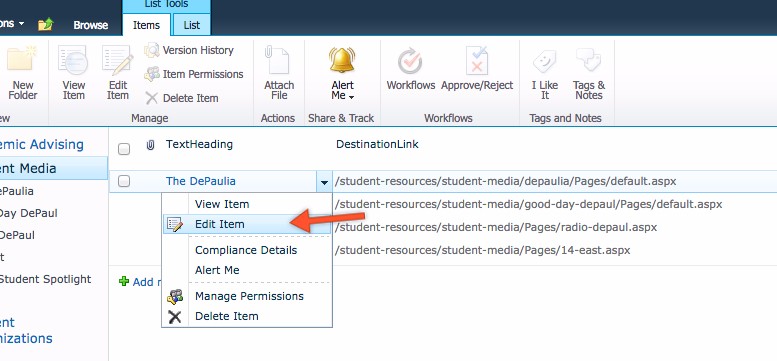
ORHover over the first column of the item and select
Edit Item from the dropdown menu.
You are now able to edit the item.
Does your list have an Image field that needs to be updated? In a separate window/tab, upload the image you wish to use to the Images folder (make sure it is first sized properly). Once the image is uploaded to the images library, click on the thumbnail, and the image will open in a new window/tab. Copy the relative part of the URL (everything after ".edu") from the browser and paste it into the image field in your list.
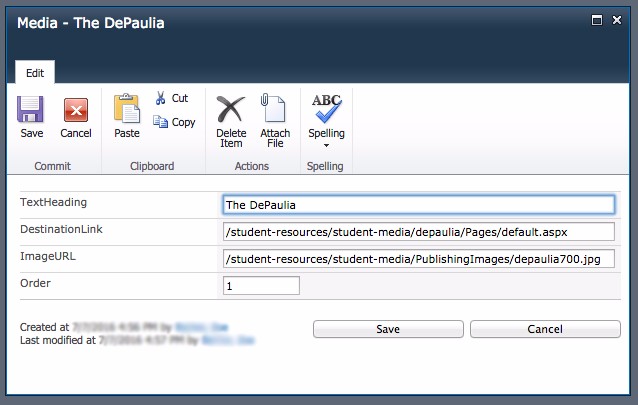
When you have finished making changes, click
Save.
Adding a new item
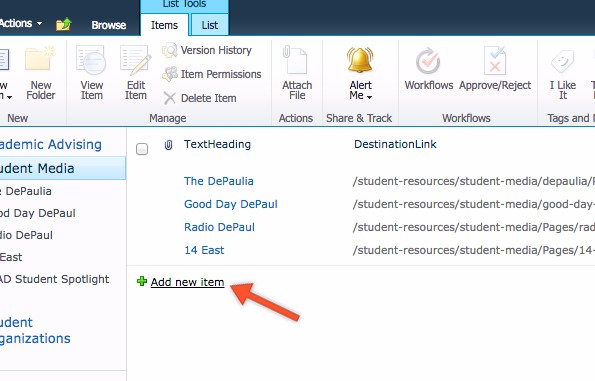
At the bottom of the items in the All items view, click
Add New Item.
Enter the corresponding content in each relevant field. (Note: Some fields may be required.)
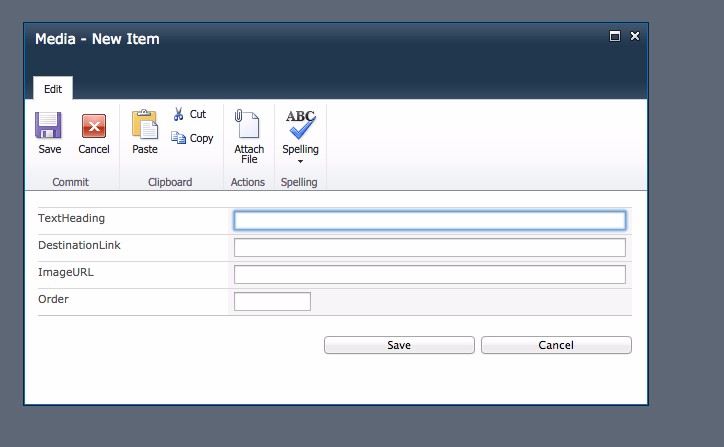
Does your list have an Image field? In a separate window/tab, upload the image you wish to use in the list to the Images folder. Once the image is uploaded, click on the thumbnail, and the image will open in a new window/tab. Copy the relative URL (everything after ".edu") from the browser and paste it into the image field in your list.
You may also need to select an "Active" checkmark (that would allow the item to appear on the page vs. hide it), depending on the type of list and type of functionality.
Click
Save when you are finished.
Deleting an item
Select the item you want to delete by clicking the checkmark to the left of the item, and in the ribbon, click on
Delete Item.
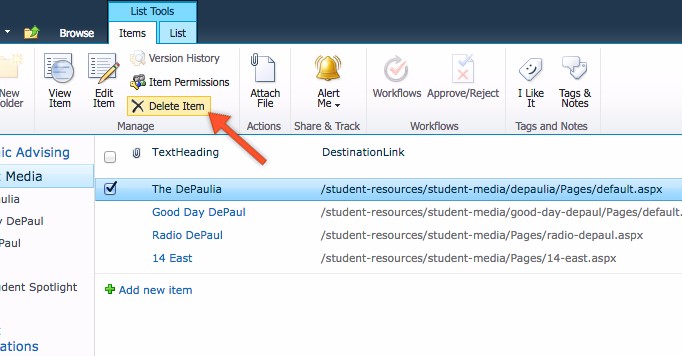 OR
OR
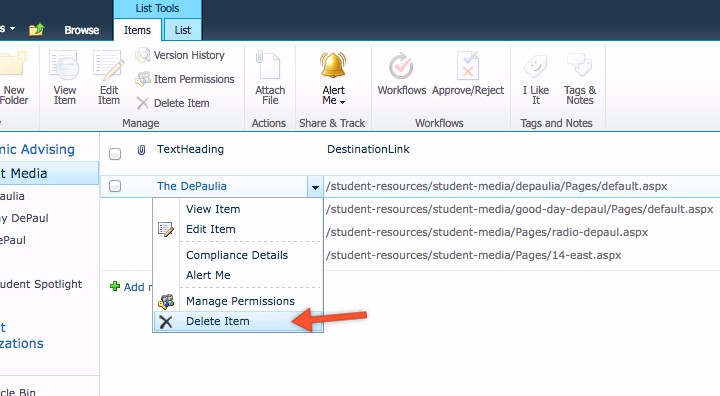
Hover over the first column of the item, and select
Delete Item from the dropdown menu.
Confirm that you want to delete this item by clicking
OK. (Note: Deleted list items can NOT be recovered.)
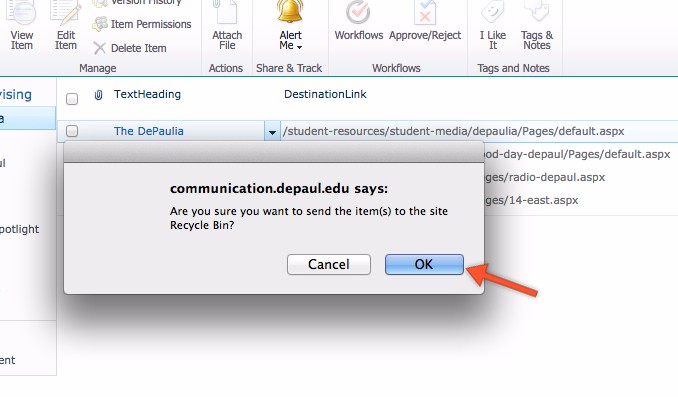
The item has been deleted.
We do not recommend downloading List data but understand sometimes it is unavoidable. Before accumulating, downloading, and storing List data, review the University’s policy on
Access to and Responsible Use of Data.
Internet Explorer is no longer supported by Microsoft to download SharePoint Lists. Please use the following directions to export your list using other browsers.
Via Chrome, Firefox, or Edge
- Open Excel and open a new workbook.
- Navigate to the Data tab > Get Data > From Other Sources > From SharePoint List
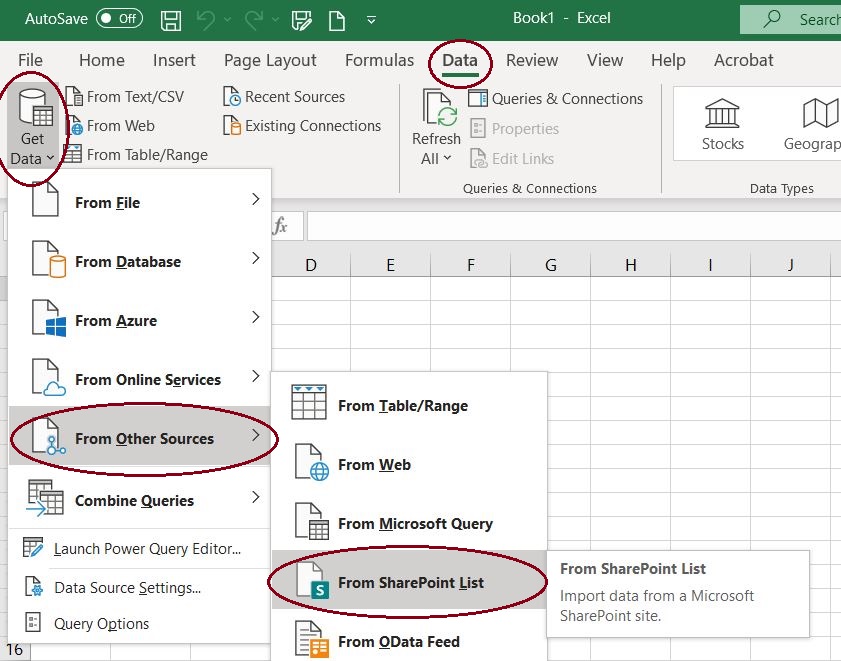
- Enter in the path to the website and subsite your data is located in and click OK. For example, if I wanted to review list data in the same subsite as this page, I would enter https://resources.depaul.edu/sharepoint/webparts/content-lists/

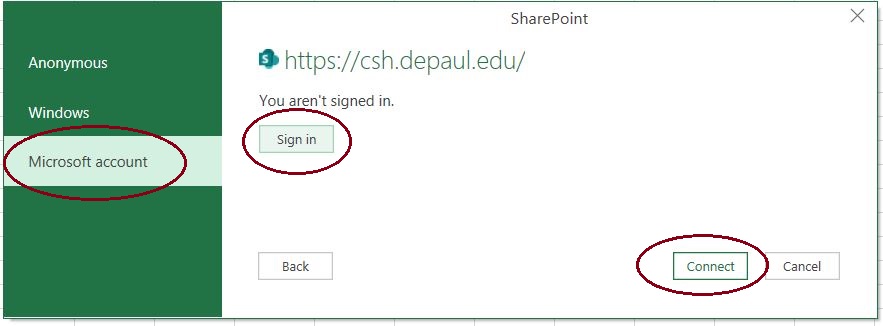
- You may be asked to log in.
Choose the Microsoft Account option and log in with your BlueKey credentials. Then click Connect.
- Locate the List name you want to download in the left panel of the Navigator, and click Load. Depending on the amount of data in your list, it may take some time for the List to load.
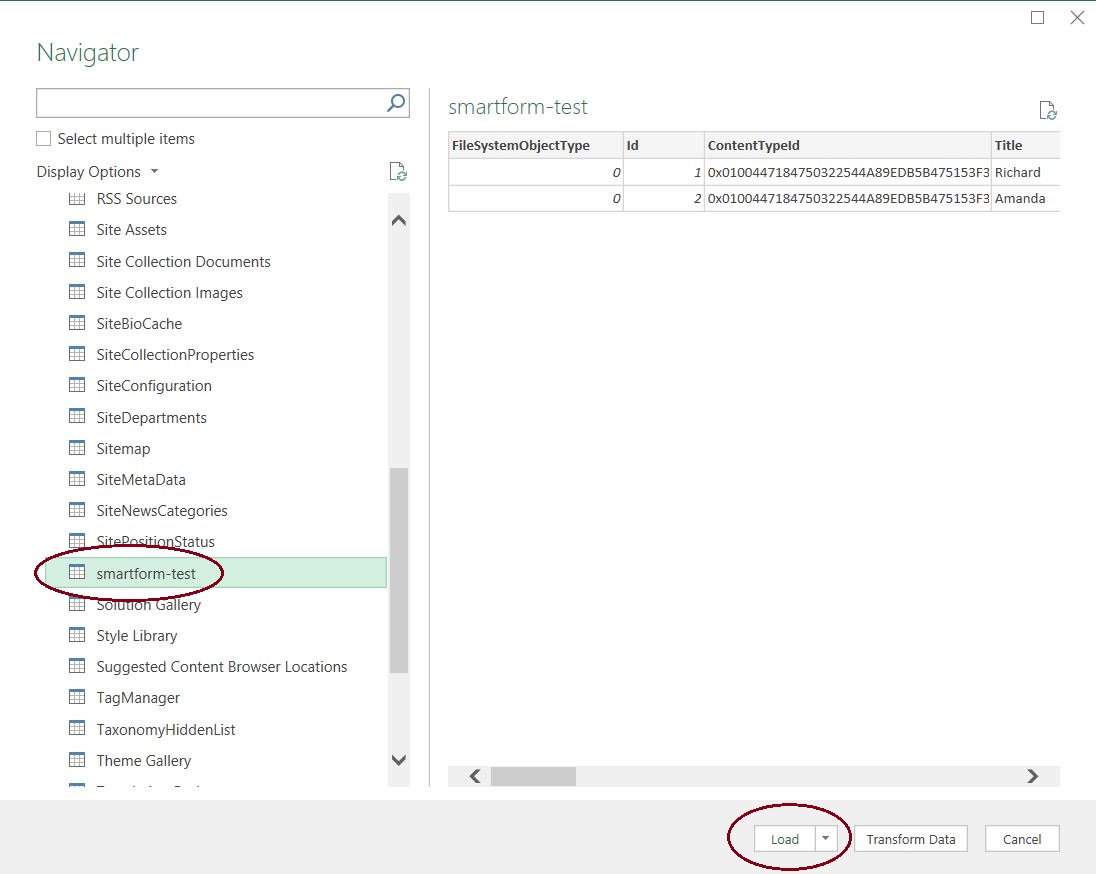
-
PLEASE NOTE:
- Unlike when previously downloading via Internet Explorer, this method will download
all data from the list, including some usually hidden SharePoint metadata fields. You will not be able to download custom list views.
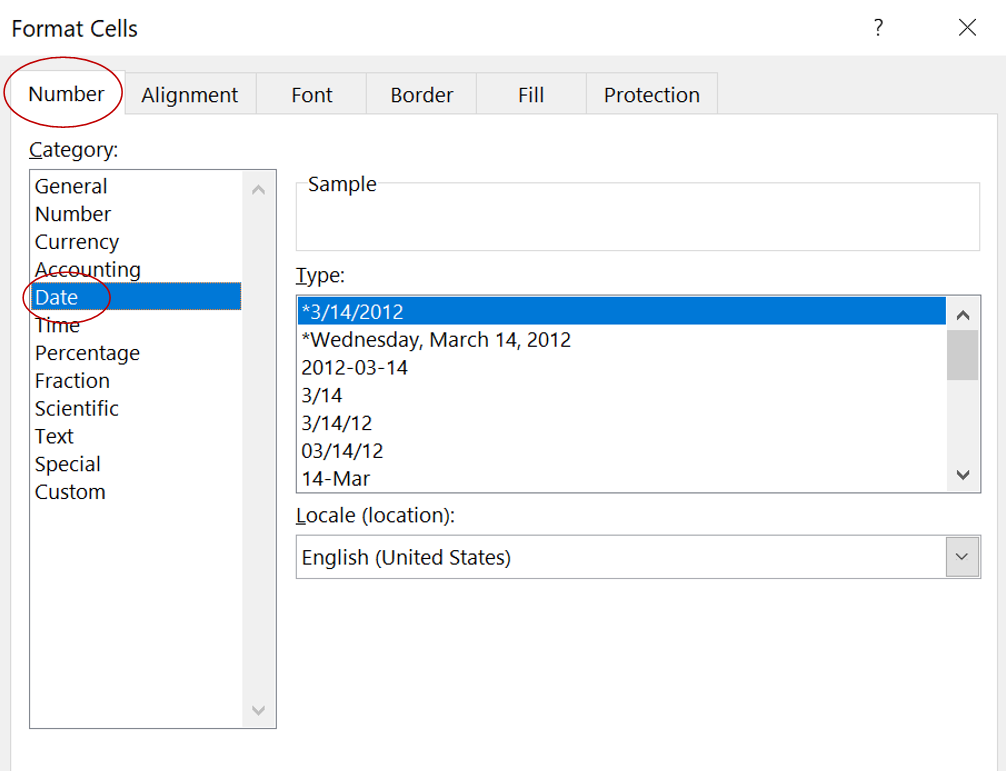
- Your date columns may no longer be formatted in Date format. To correct this, highlight the entire column, right click, and choose Format Cells. Under the Numbers tab, choose Date, and then the date format you wish to use. Click Ok.
