Show off the faculty in your college using our
faculty bio system. This system uses the Bio Page Layout in conjunction with the Bio Rollup Web Part. Editors can add new faculty pages by following the instructions below.
A standardized way to display your faculty, the Bio Page Layout uses fields to structure key information about the person such as their name, title, email address, phone number, office location, department and other biographical information. Make sure you have this information ready, as well as a headshot. You'll need to
resize the headshot to
255px by 300px before
uploading it to the images library.
This two-column layout shows the left navigation, and the Main Content Area is structured for a headshot, contact info and biographical information.
Instructions
1. Create a new page and name it the faculty's name, using all lowercase letters with dashes between words, like so: ______.depaul.edu/faculty-and-staff/Pages/ron-swanson.aspx.
2. In the ribbon, click on the
Page tab, and click the
Page Layout dropdown menu.
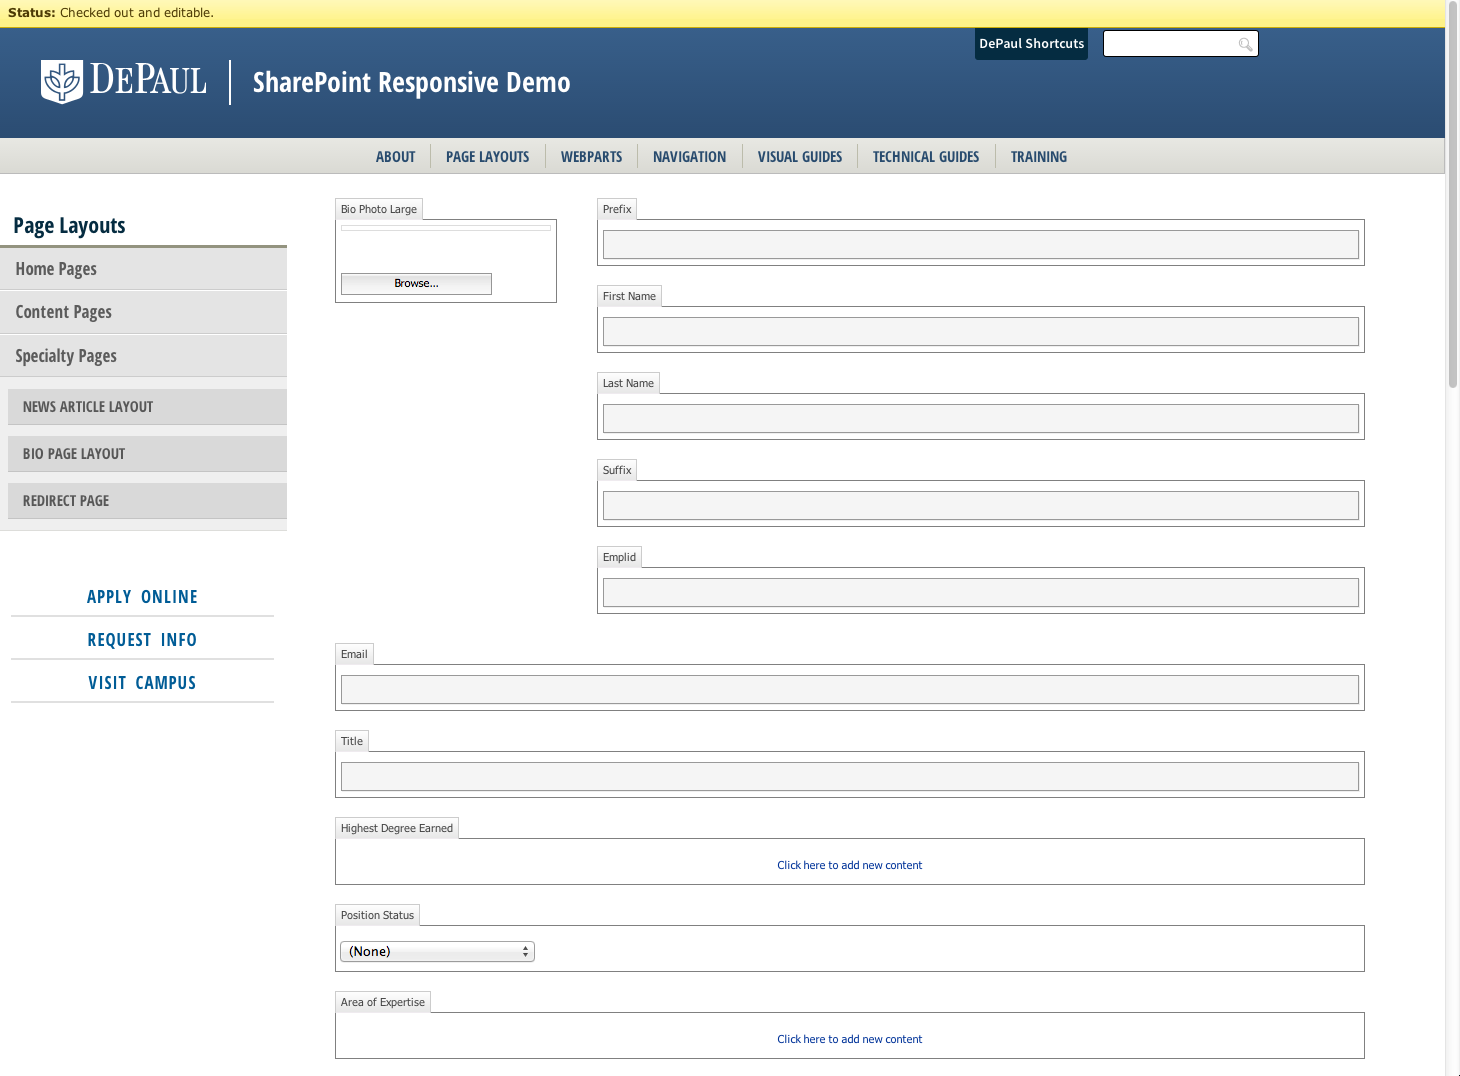
3. Select Bio Page, and when the page refreshes, it should look like this:

4. Insert the faculty member's headshot by clicking
Browse under Bio Photo Large (top left). The Select an Asset window will pop up, and at the top click on the word
Upload to upload an image from your computer.
The image must be
sized 255 x 300 pixels before uploading to SharePoint for the Bio Page Layout.
Important: All bios using the bio layout must have a headshot. If a headshot is not available, please use our
image placeholder. (Drag it from the browser window to your desktop, and then upload it to the appropriate Images folder.)
5. Enter the information in the fields for First Name, Last Name, Email, Title, Highest Degree Earned (optional), Position Status (optional), Area of Expertise (optional), Phone Number, Office Hours (optional) and Address.
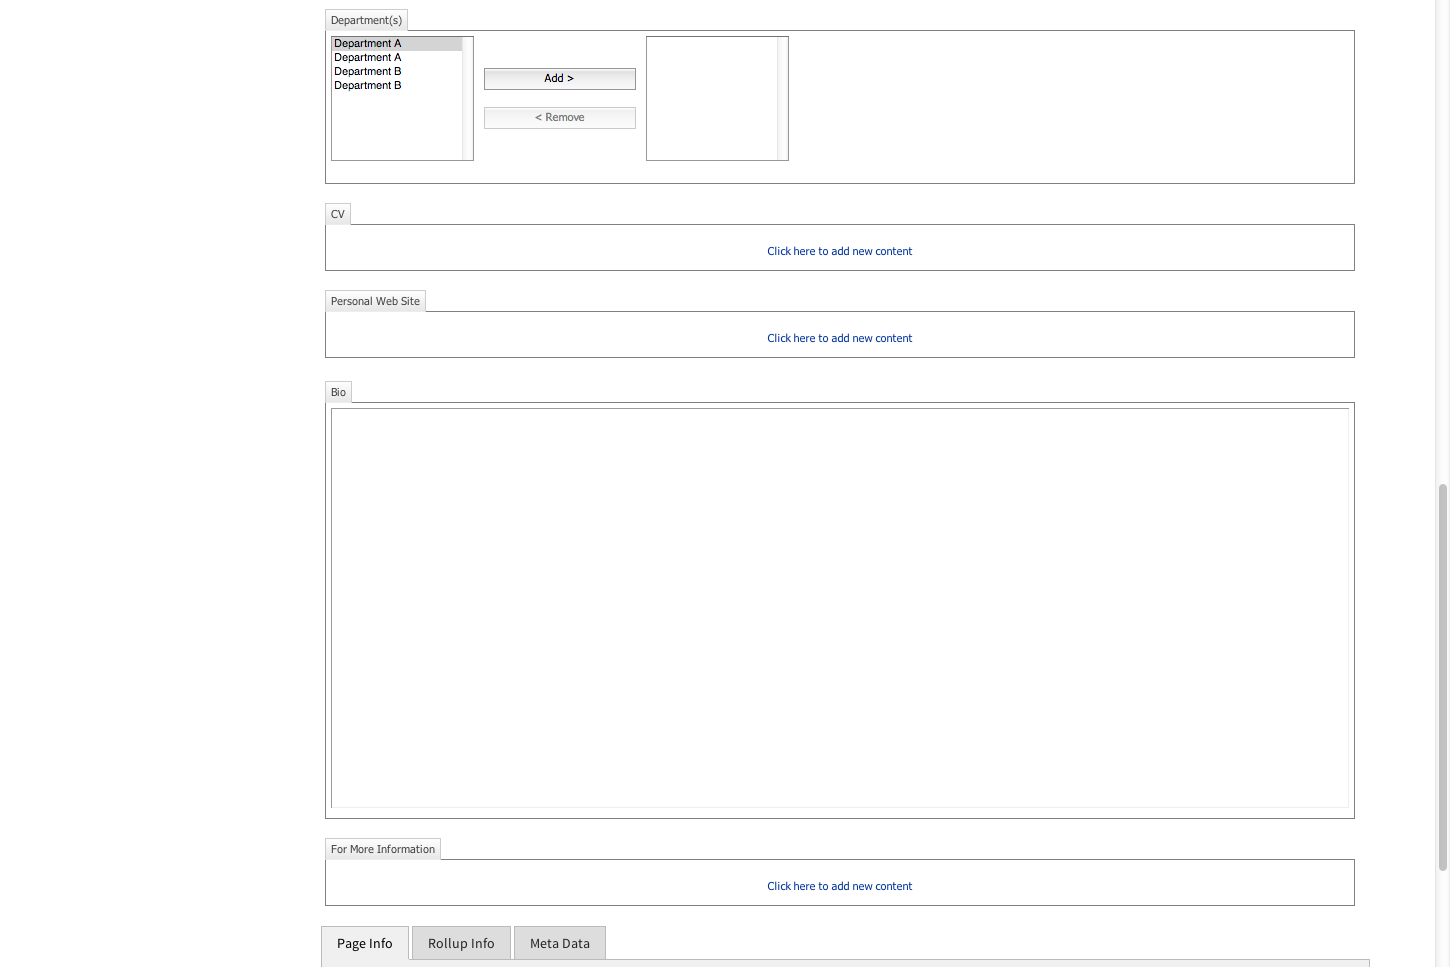
Scroll down to see the rest of the fields.

6. Enter the faculty member's Department from the list by highlighting it and clicking Add.
To add or remove available department categories to choose from, go to the site root (aka homepage), and in Site Actions (top left drop-down menu), go to View All Site Content. In the Lists section click on the SiteDepartments list. You can add a new category by clicking Add New Item or edit existing categories.
If you wish, you can enter the faculty member's CV and/or Personal Website by linking them in the corresponding content area.
7. Add content to the Bio content area next. This is a main content area where you can format text like you would on a normal page. Usually, this content area contains either a couple-paragraph bio or a bulleted list of the faculty member's educational background, research interests, select publications and courses taught.
8. At the very bottom of the page under Page Info, add the Navigation Title and
Heading. This is usually the same and is the name of the faculty member.
9. Save & Close and Check In the page when you are finished. Publish when you are ready.
After the page is published and the cache refreshes, the new bio page will appear in your Faculty A-Z and in the rollups of the corresponding department(s).
Important Notes: the bio cache refreshes three times per day - please be patient if the new page doesn't appear in the rollup right away. The same goes for deleting pages - see more about this on the
Bio System page. Please wait until after 4:30p.m. on the day you Published the bio page, and if it does not show up in your rollup then, feel free to
contact DXA - this may indicate that the cache did not refresh as it was supposed to.
Troubleshooting: Some of the Bio Page Layout fields are especially sensitive. Let's say you click or tab to the Website field, but then don't enter any content. When you Save & Close, you may notice that the Website field renders but looks empty. To remove that field, edit the page, click in the empty field, and hit delete/backspace a few times. Save & Close, and double check that the field is now gone. If it's especially sticky, you may need to click in the empty field, go to Edit > HTML, and clear out any markup that may be in there.