These instructions are based on using Adobe Photoshop CC, which is
available for university Faculty and Staff.
Cropping and Resizing
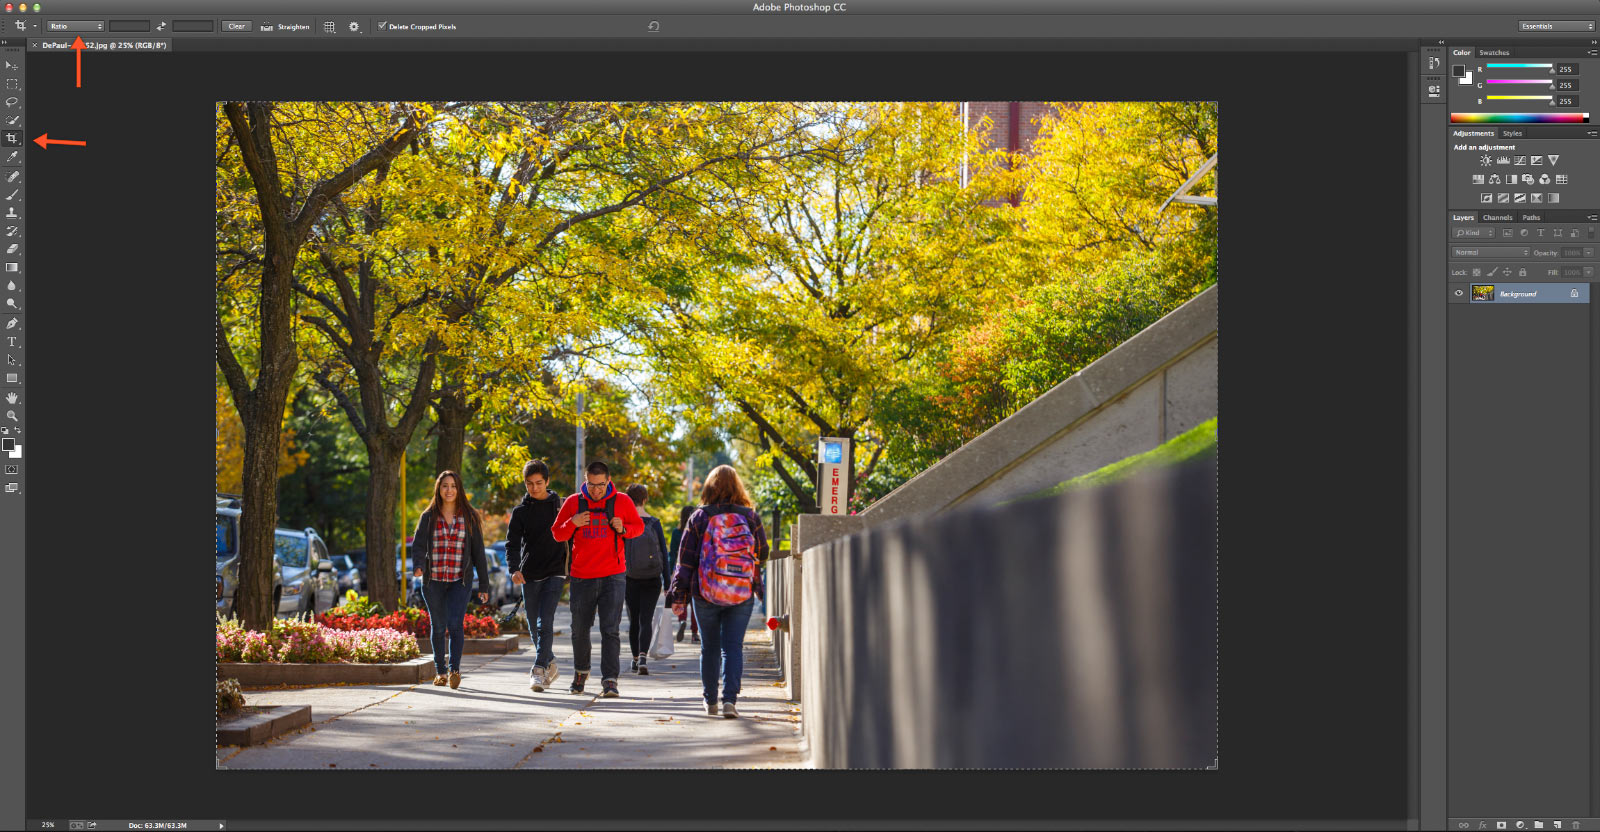
Crop your photo by first clicking on the
Crop icon. Make sure it is set to crop by
Ratio and then put in the ratio at which you'd like to crop the photo (ex: 1600 px by 900 px).
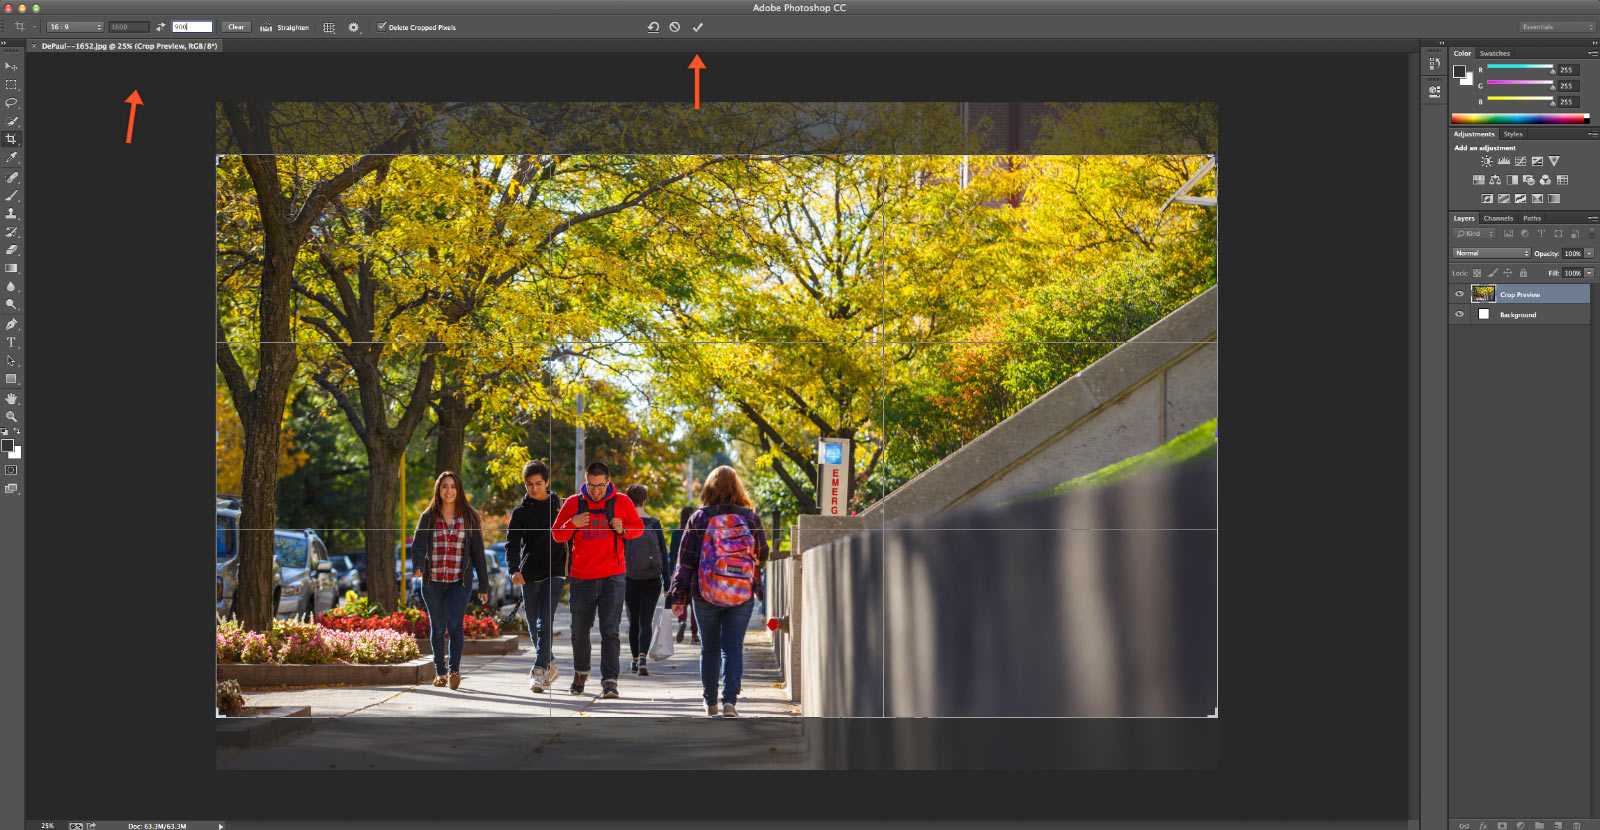
Drag the image to select where you'd like it to be cropped at this ratio. Check the checkmark to confirm the crop.
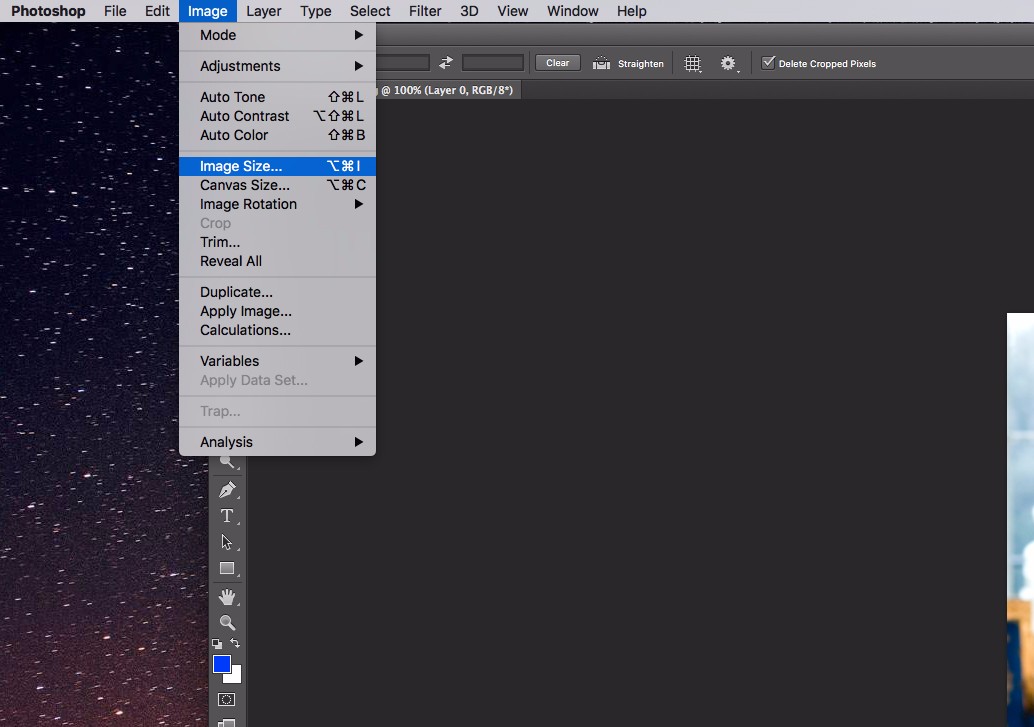
In the menu, go to
Image and select
Image Size.
Set the resolution to
72. Enter the size you'd like to crop the photo to (see our
guide to sizing), and make sure resample is set to
Bilinear.
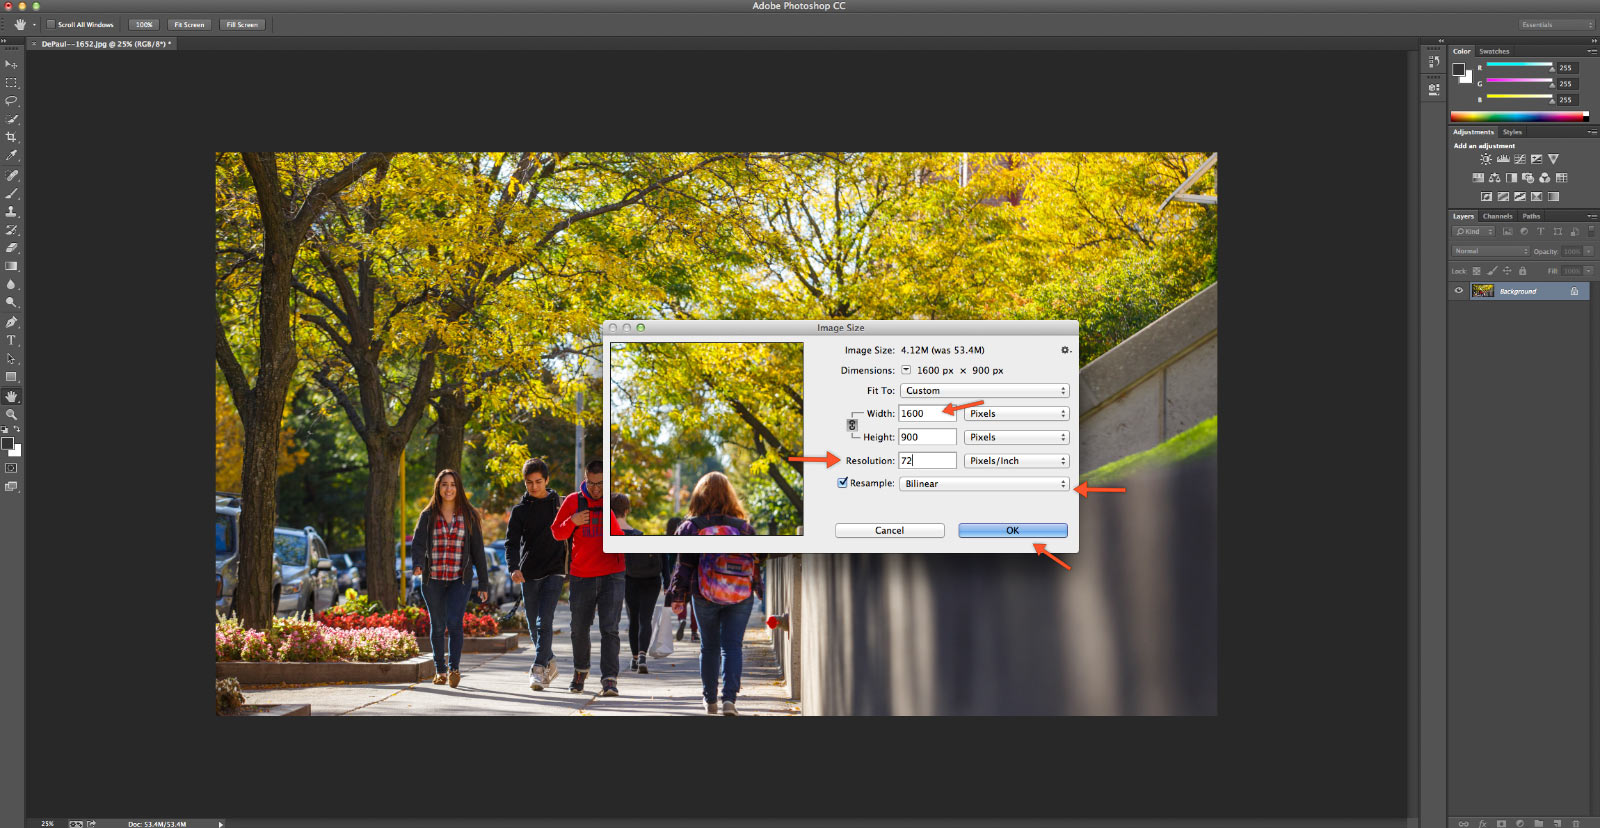
Click
OK.
Optimizing and Saving for Web
Next you'll need to save your resized and/or cropped photo and optimize it for the web.
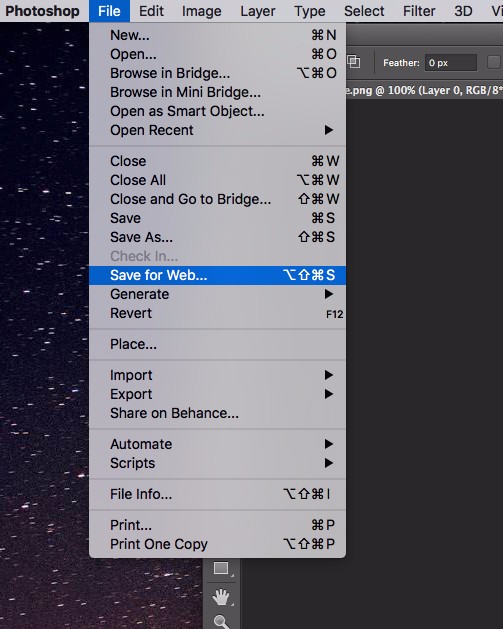
In the menu, go to
File and click
Save for Web. (In some Photoshop versions, this has moved under File > Export > Save for Web.)
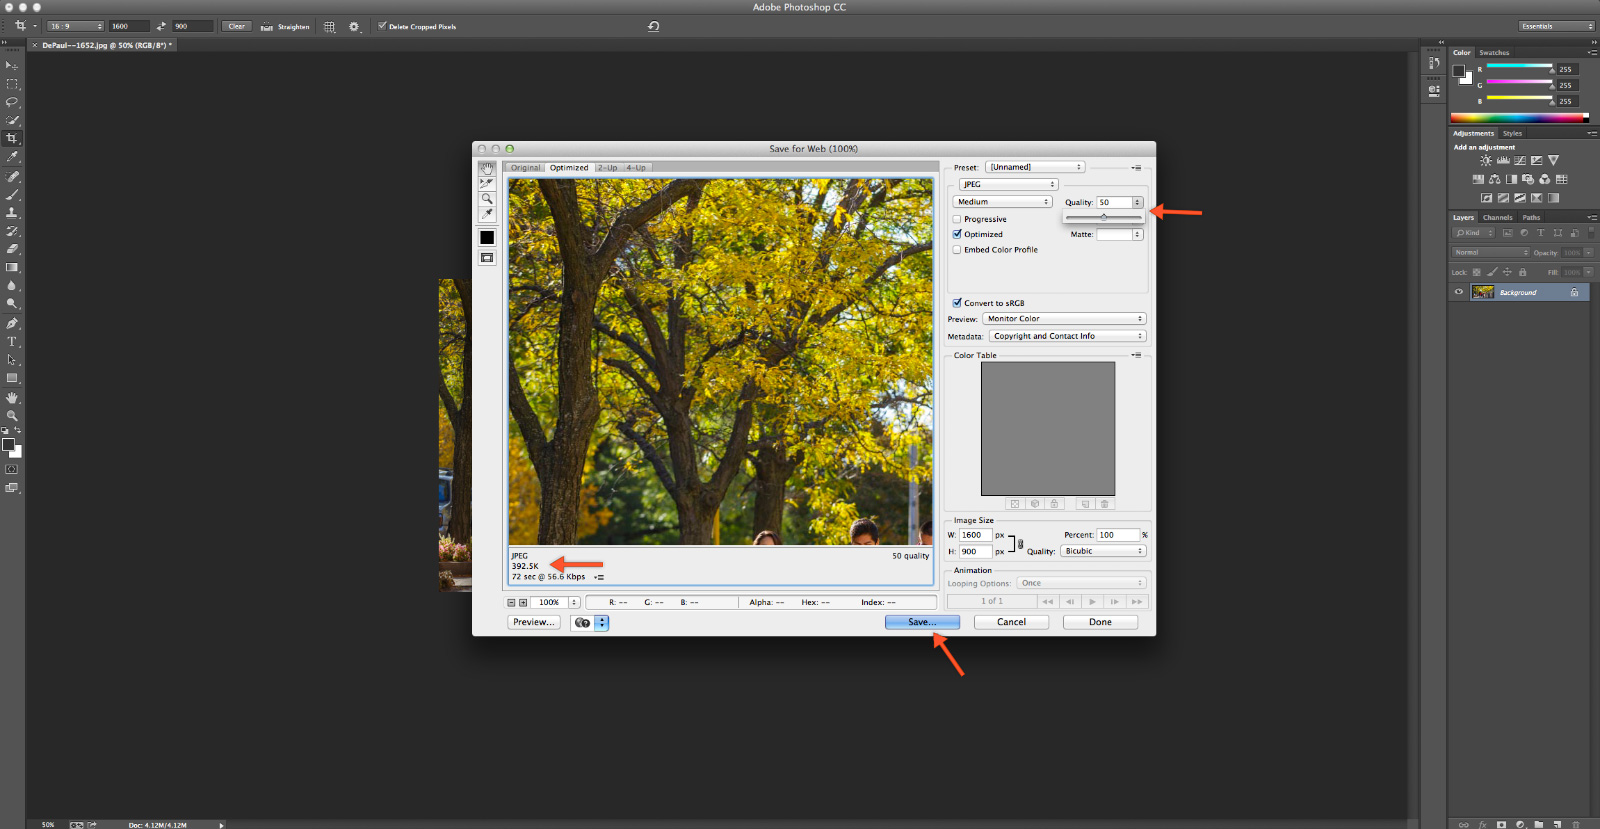
Make sure that it will save as a JPEG and at the top of the box where it says Quality, set it to anywhere between
100 and 80, depending on that it says the file size is in the bottom left of the window. Using the scroll bar, look under the image in the bottom left corner and as you scroll it lower try to get it
as close to 400K as possible (try for no lower than 75).
[If you're resizing an image for a bio page you won't have to adjust the Quality, as the photo at 255px by 300px will already be small enough to be considered optimized. Skip this step and continue to the next.]
Click
Save and then save it to your computer with a clear file name, with
no spaces or special characters in it (ex: depaulstudents.jpg).
Now you are ready to upload it to your SharePoint site's images library.