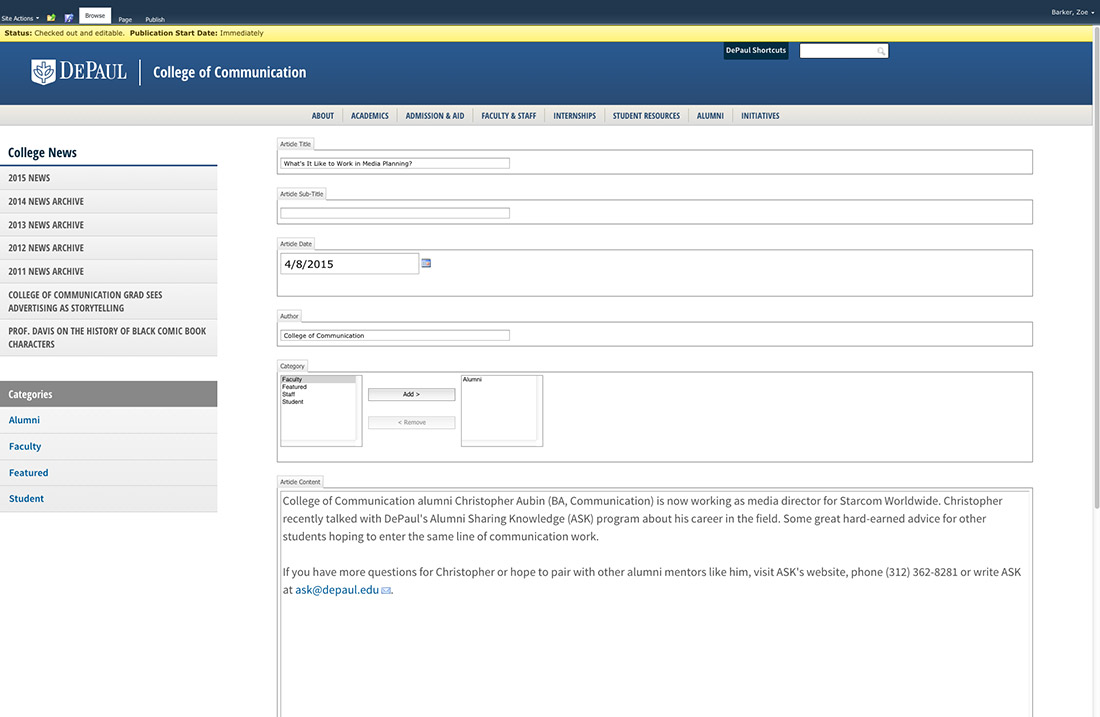
Maintaining your News subsite is easy. You're able to add new article pages and edit existing ones. To add a new article, you'll add a new page and change the layout to News Article2, fill out the fields, and Save & Close, Check In and Publish.
IMPORTANT: Content editors must follow image best practices requirements when using the News Article2 layout.
News Article2 should be used with News Rollup2 on the landing page of the subsite.
Instructions
1. Create a new page in your news subsite, and name it using all lowercase letters with dashes between words (i.e.: fantastic-news-story).
2. In the ribbon, click on the Page tab and click the Page Layout dropdown menu
3. Select News Article2.
4. Enter the Article Title — it becomes the heading of the page. Choose the Article Date using the calendar picker, or by entering it in the format of month/day/year (00/00/0000). Put the name of the author in the Author field — the field will automatically populate with the word "By" before the name you type in. If you'd like to add a Category to the article, select one from the list by highlighting it and clicking Add.
To add or remove categories, go to your site's root, or homepage, and in Site Actions (top left drop-down menu) select View All Site Content. In the Lists section click on the SiteNewsCategories list. You can add a new category by clicking Add New Item, or edit existing categories).
5. Add the news/blog main content to the Article Content area by clicking "Click here to add new content." You can format the text just like on a normal page and add images by going to the Insert tab and selecting Insert Image. Remember: If you copy/paste from an existing source, like a Word document, clear the text formatting with the Clear Formatting button in the ribbon.

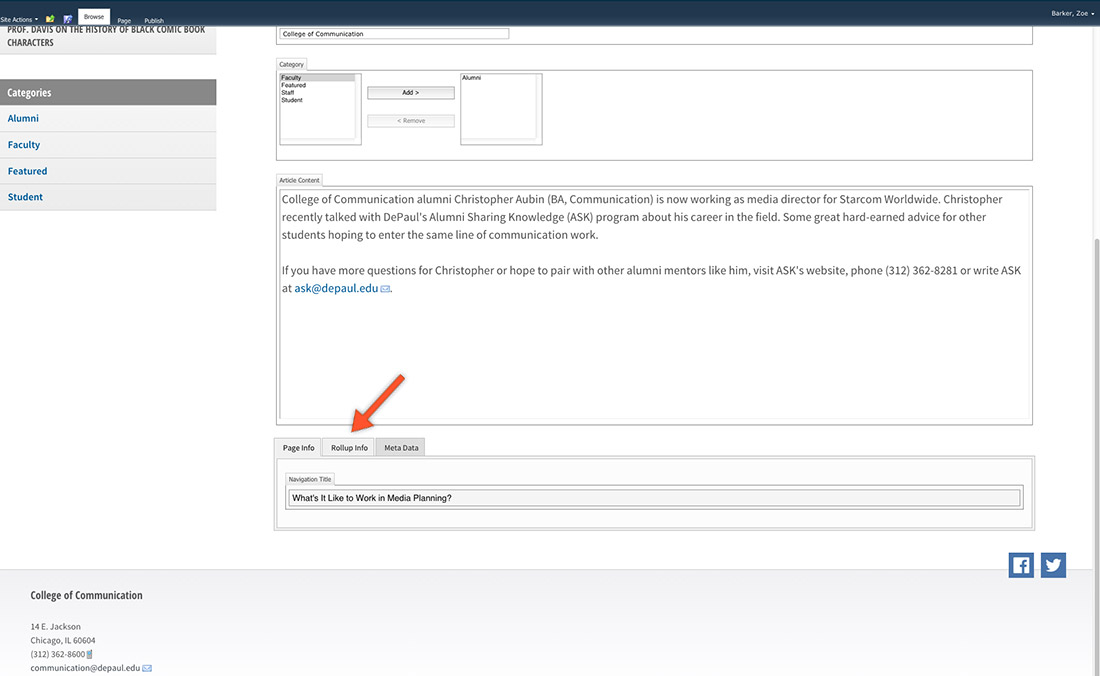
6. Scroll down to the bottom of the page, and under Page Info, add the Navigation Title. This is usually the same as the article title.
7. (OPTIONAL) Skip this step if there no images are included in the article. Make a thumbnail version of an image used in the article (resize a copy of the image to 120px by 120px). All the way at the bottom of the page, click the Rollup Info tab (next to Page Info). Click Browse and then Upload to add the thumbnail to the Images folder. If you do not include an image, it will default to a standard gray university logo. Note: If there are numerous images in the article, you only need to select one to crop and use as the thumbnail image.

8. Save & Close and Check In the page when you are finished. Then submit for publishing.
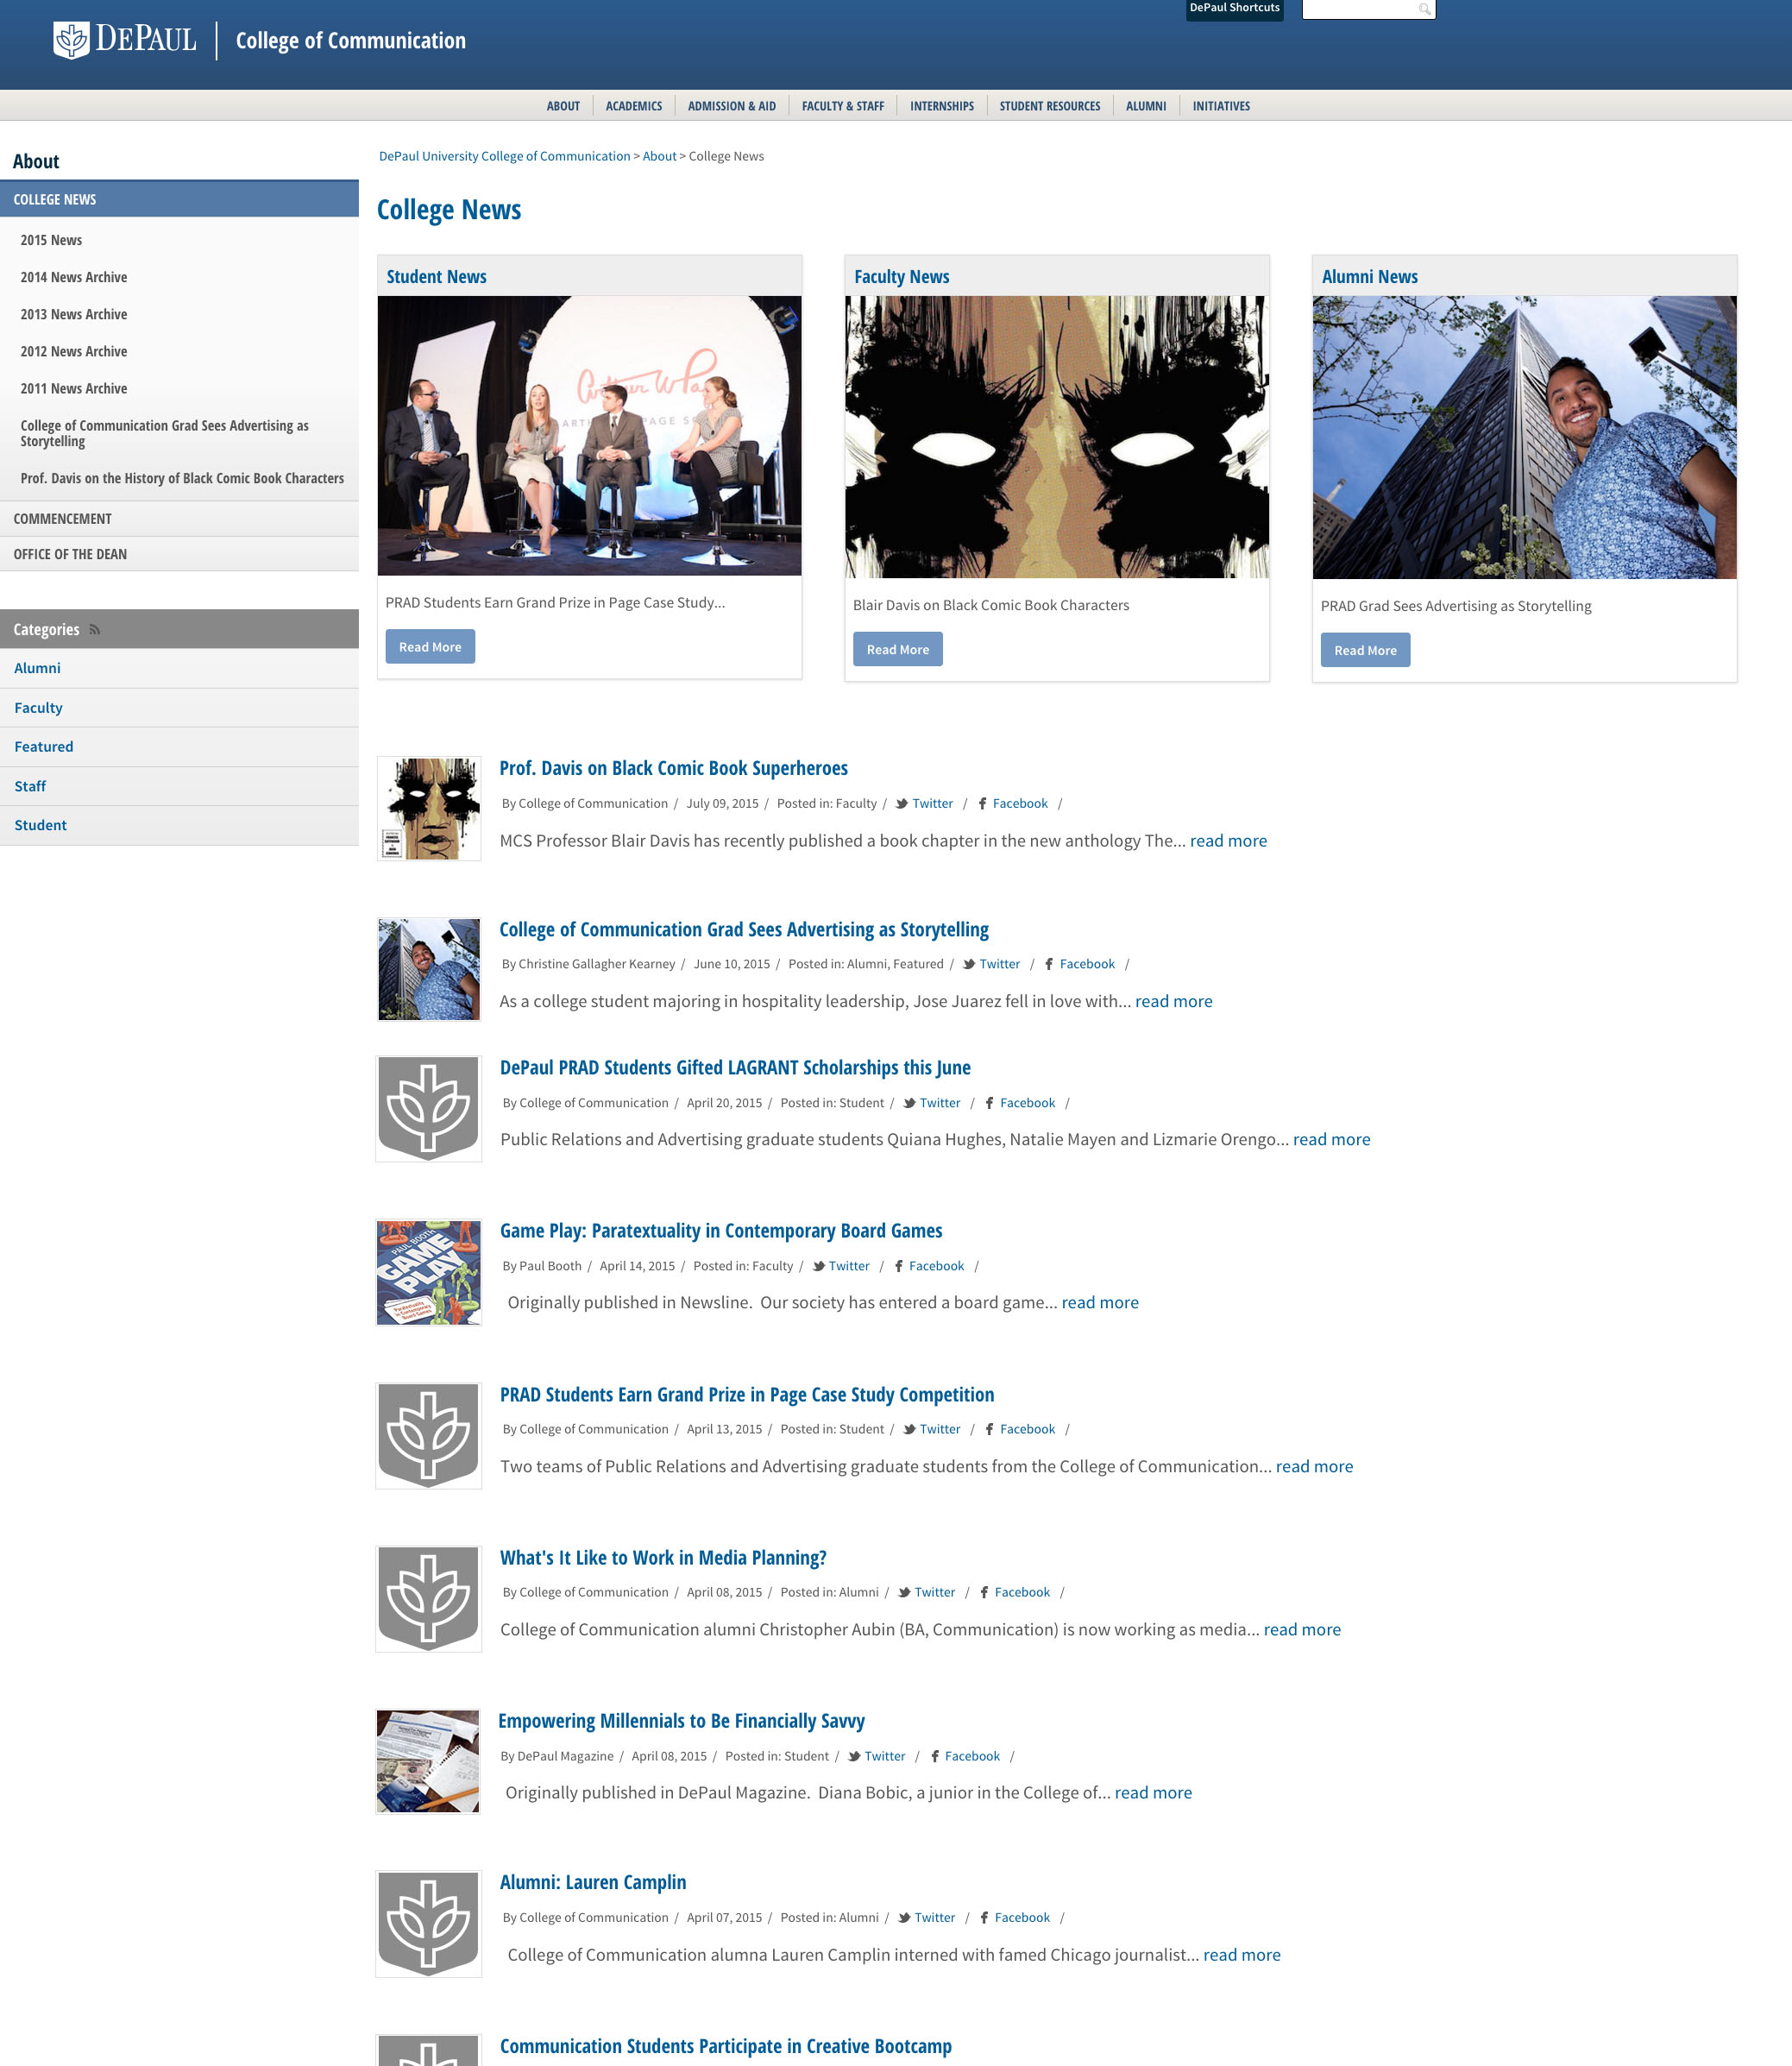
Once it is published, the article will automatically appear in the rollup.
**See below images for an example of how the News Rollup2 looks when the user scrolls down the page.
