The next step in the updated version of SmartForms is to set up the configuration settings in the web part. We'll select the list to display from, set up the fields, and customize the way the form displays.
We'll add a Submit button, configure the Thank You message that appears after a user submits the form, and customize the email that automatically alerts you when a new form submission has been received.
Configuring your SmartForm
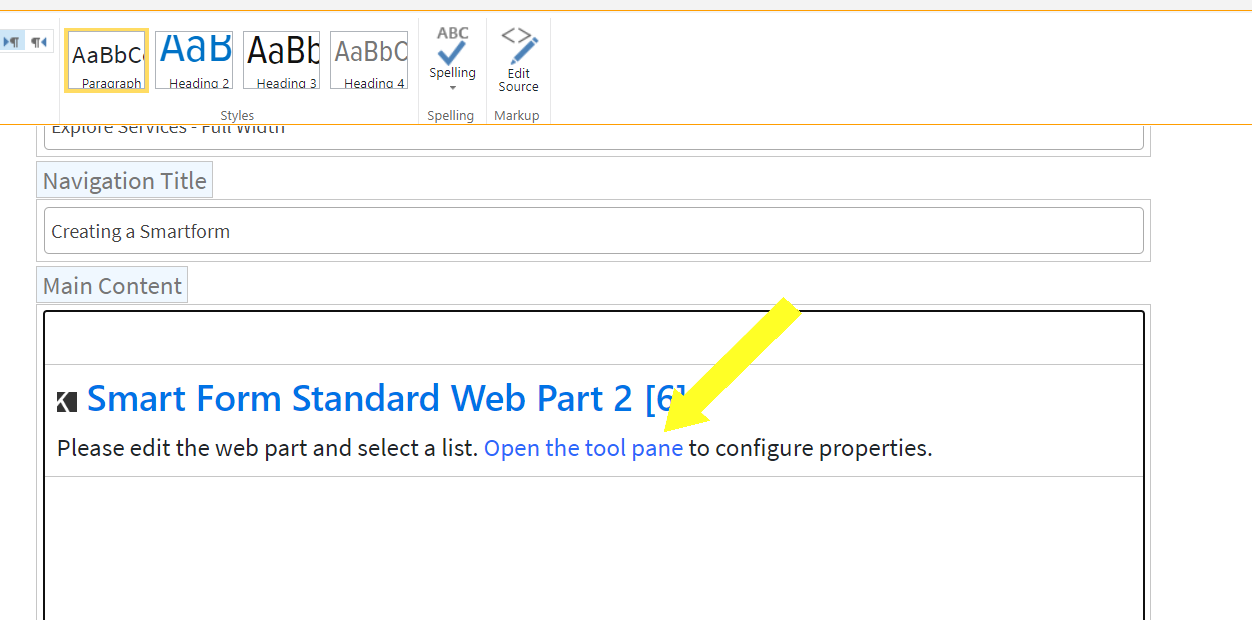
Now that the Smart Form Standard Web Part 2 is on your page, click the
Open the tool pane link in the web part box.

Important: In the tool pane, scroll down to the "Chrome Type" and change the selection from Default to None.
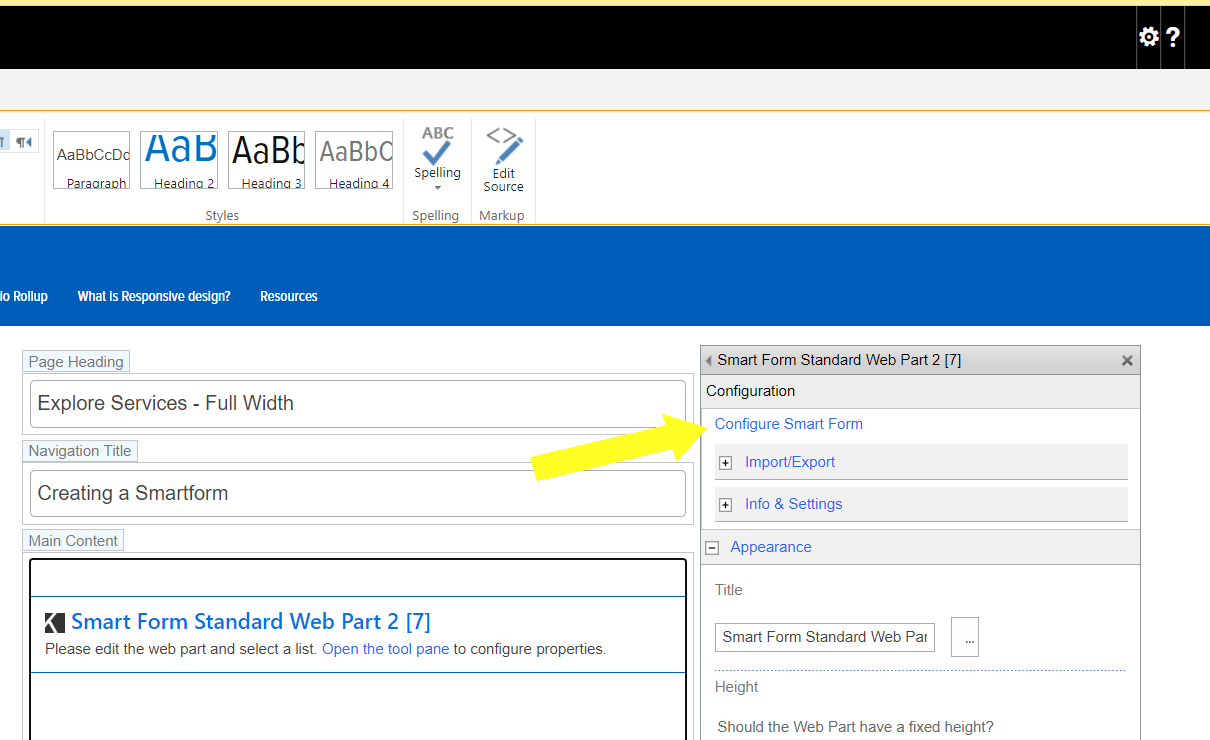
After the Chrome Type change has been made, click
Configure Smartform.

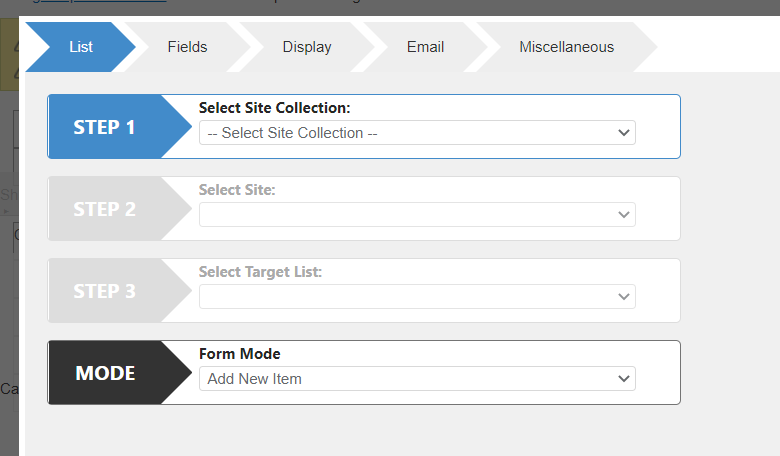
A window with five tabs will open. You will use the List, Fields, and Email tabs to configure the form.
List tab

Go to the
List tab. In the first dropdown menu titled Select the Site Collection, select the site where you created the list. Wait for the box to refresh - it will turn green.
Under
Select Site, select the subsite where you created the list. Wait a few seconds for the box to refresh - it will turn green.
Under
Select Target List, select the name of the List. Wait a few seconds for the box to refresh - it will turn green.
Ignore the Mode dropdown menu. Next, we'll go to the Fields tab.
Fields tab
Click on the
Fields tab. On the left-hand side of the window you will see all of the columns (here they are called fields) from your List. Drag the fields you wish to include in your form from the left to the box on the right. You can arrange them in any order you see fit.
To edit how a particular field will display on the form after dragging it to the right of the screen, hover over an orange field and click the Edit Settings icon (it is shaped like a pencil).
In the pop-out menu you can:
Edit the text that will be displayed on your form under Field Label
Make the field a required field by checking Required
Change the default value under Default Value.
Widgets
Add the Submit button and other functionality
Still within the Fields tab, after you've added your fields to the right column, you can add widgets. Widgets allow you to add even more functionality to your SmartForm. The
Submit button is the widget you'll want to use for every form.
Click the
Add a Widget tab next to the Add a Field tab on the left side of the window.
Drag the
Submit widget to the right side, to the very bottom of your form fields.
Hover over the newly placed Submit widget and click the
Edit Settings icon in the top right corner (it looks like a pencil).
In the pop-out menu, change the Submit Button Text from Submit1 to just "Submit".
In the Submit Form Option menu, you can specify the behavior of the page once the form has been submitted by the user. Select either:
-
Thank You Text - Displays a thank you/confirmation message on the same page as the form (new functionality allows you to make the form disappear and the thank you message to appear by itself on the page - this is the suggested method with this version of SmartForms)
-
Landing Page URL - Redirects the user to a separate page with a thank you/confirmation message on it. You must create the page before linking to it.
If you select
Thank You Text, type the message you want to appear after the user submits the form - you can use the toolbar to format the text as needed.
Uncheck the
Display Form and
Fade text after 10 seconds boxes (you may need to scroll down within the box to see these options). In the top right, click
Save & Close.
If you select Landing Page URL, please paste the URL of the page that you would like it to redirect to. Often you will have to create the page first, so do so in another browser tab or window. Name the page thank-you, place the content you want for the page in the main content area and Save & Close and Check In the page. You can put in a TSC Case to request to have the thank you page hidden from the left navigation. Remember to publish it once you are ready. This was previously the recommended option, but is not necessary unless you would like to track the analytics of the Thank You page.
Optional: Allow Attachments
If you would like users to be able to attach documents with their form submission, you will need to add the Upload Attachments widget to your form. From the Add a Widget menu, drag the Upload Attachments widget to your form, usually just above the Submit widget. Click on the Edit Settings Icon that appears in the top right corner of the field when you hover over it. Edit the Name of the field with any text or instructions for the attachments (ex: "please upload only PDFs" or "please upload only MS Word files") that you want to display on the form. Users can upload multiple attachments in this version of SmartForms.
Ignore the Display tab.
Captcha
To add Captcha verification to your form, drag the Captcha widget to the right column, usually best at the bottom of the form before the Submit button. Click the Edit icon (pencil) and copy and paste the Captcha Public Key and Private Key listed below into the corresponding fields. Save & Close.
Public Key (Site Key): 6LfypCsUAAAAAHlPL8E83UXx0HTV5wTiq5YRkJDA
Private Key (Secret Key): 6LfypCsUAAAAAE4wjN4HivLG7mmR1WmERENYjHZU
Email tab
While optional, the email tab allows you to have an automated email sent to you or a shared inbox to alert you that a new submission has been received.
If you would like to receive an email notification for each form submission, go to the Email tab and switch the Send Email toggle button to
ON.
Enter the email address(es) or inbox you would like the email to be sent to in the
To field.
In the
Message field, enter the body of the message.
**Make sure you have set the Send Email toggle button to ON at the very top, it will turn from gray to blue if you have selected ON, otherwise the email will not send.**
Customizing Email Notifications:
If you have configured your form to send an email when a new submission has been received, you'll need to format the message within that email.
Including a direct link to the List's All Items view makes it easy and quick to view the submission data. In a new browser window or tab, go to the subsite where your form and List live. Go to Site Actions and select View All Site Content. Click on the name of the List for the form. Now you are in the All Items view of the list, where all of the form submission data will be stored. Copy the URL from your browser. Back in your form configuration, click Insert and select Insert Link. Paste in the URL.
Ignore the Miscellaneous tab.
Save & Close
In the bottom right corner, there's an orange Save & Close button. Click
Save & Close to save all of the configuration settings you have chosen.
Now you can view your form and
Check In the whole page.
When you are ready for the page to be live, Publish it.