Now that we've created the fields for our form by adding Columns to the List, we have to create the form on a page in our site. Adding the SmartForms web part is the next part of the process.
The web part is called Smart Form Standard Web Part 2, and it is in the Smart Components folder under Insert > Web Part.
The web part needs to be inserted on the page in order to display the form. If you haven't created the new page for the form to live on already, create it now (see our instructions).
1. Edit the page, and click in the Main Content area. In the Insert tab in the ribbon, click Web Part.
2. Under categories, click on the Smart Components folder, select Smart Form Standard Web Part 2, and click Add.

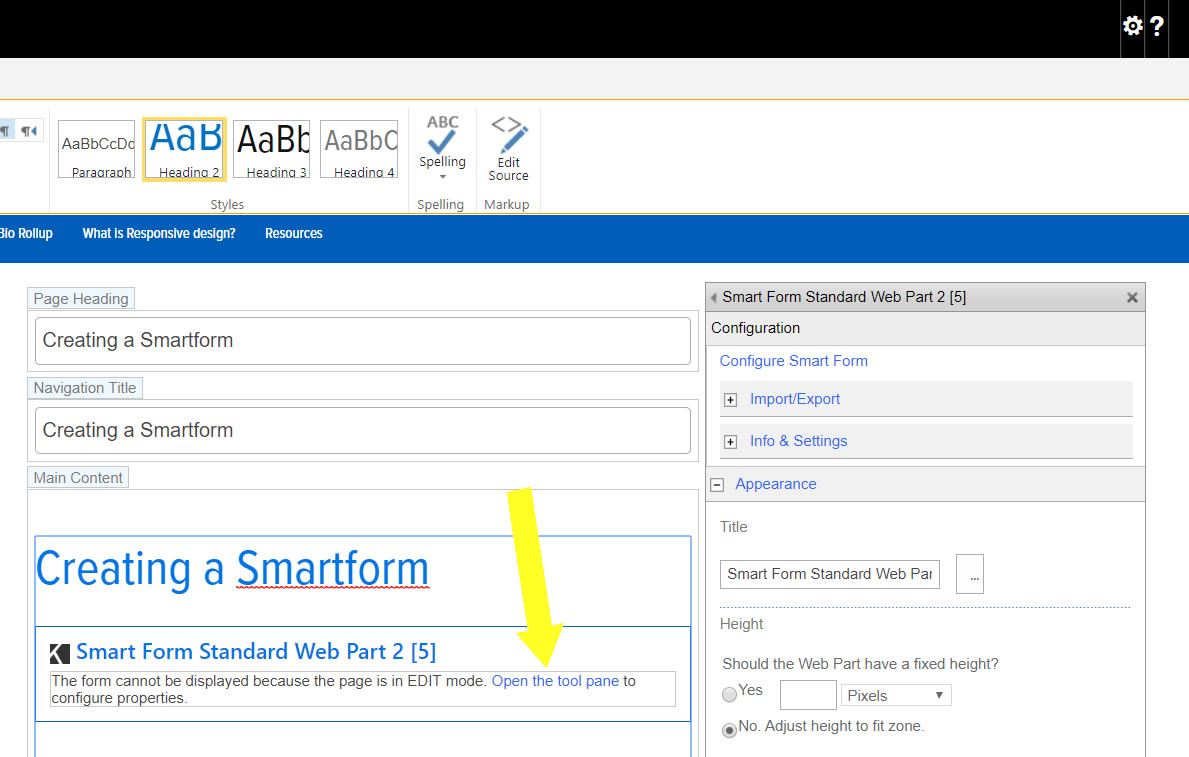
3. Click the Open the tool pane link in the SmartForm Web Part. The Configuration Panel will appear on the right side.

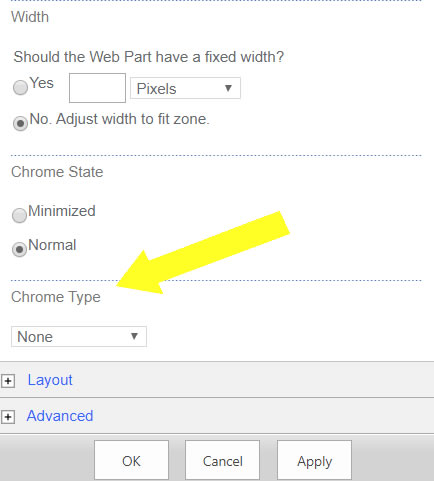
4. Before configuring the web part, you must first make a change in the Configuration Panel on the right. Scroll down to the Chrome Type option and change it from Default to None.

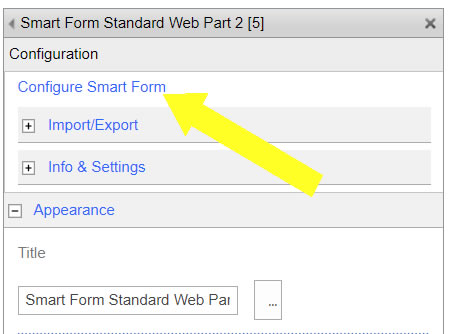
5. Scroll back to the top of the Configuration Panel and click Configure SmartForm.

Go on to the Updated Configuration Guide for instructions on how to configure the web part. We'll select the list and the fields from the list that we want to appear, then configure the buttons and show you how to send a link to the form submissions to an internal email inbox.