Once a VoiceThread link has been added to a class, instructors can choose a display option for the link. These options depend on the purpose of the VoiceThread and the way that students will interact with it.
See the
VoiceThread support page for videos on creating presentations.
Create a VoiceThread for Discussion
If VoiceThread will be used for discussions, the display option to choose is Individual VT. When students select the VoiceThread link, they will see just this one VoiceThread, to which they will be able to add comments.
- After VoiceThread has been added to Content (see
Adding VoiceThread), select
Individual VT.
- If the VoiceThread needs to be created, select
Create New VoiceThread.
Note: If the VoiceThread already exists, see
Sharing a VoiceThread for information on re-populating a previously created VoiceThread.
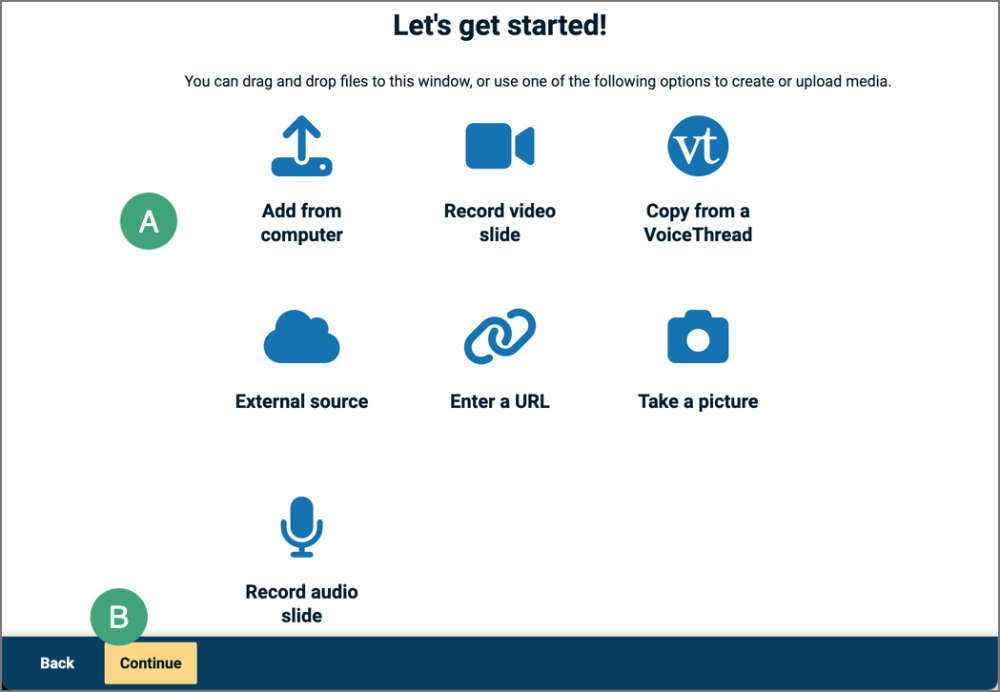
- Select the
type of media to use for the start of the VoiceThread [A].
- Upload or record as needed based on the selection.
- Select
Continue [B].
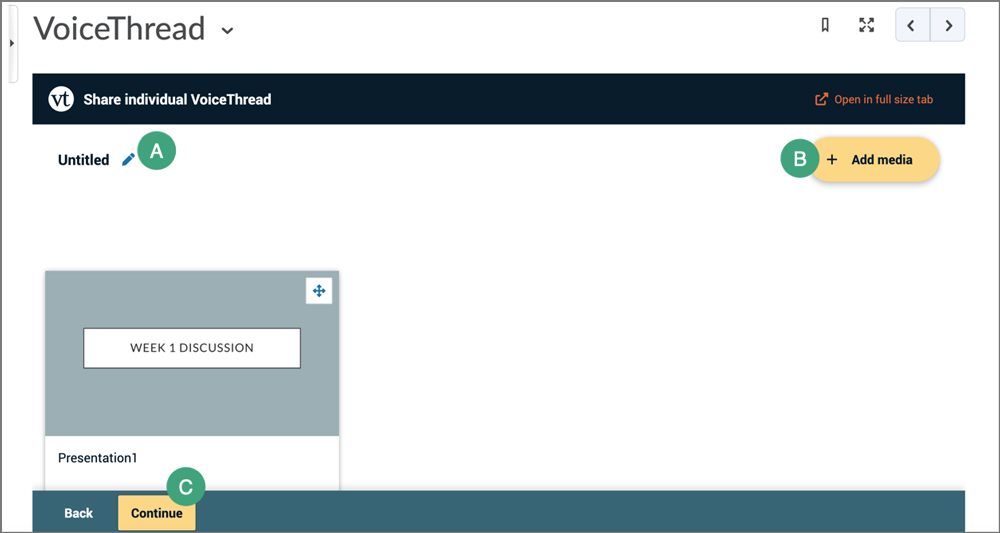
- Enter a title for the VoiceThread [A].
- (Optional) Add more media [B].
- Select
Continue [C].
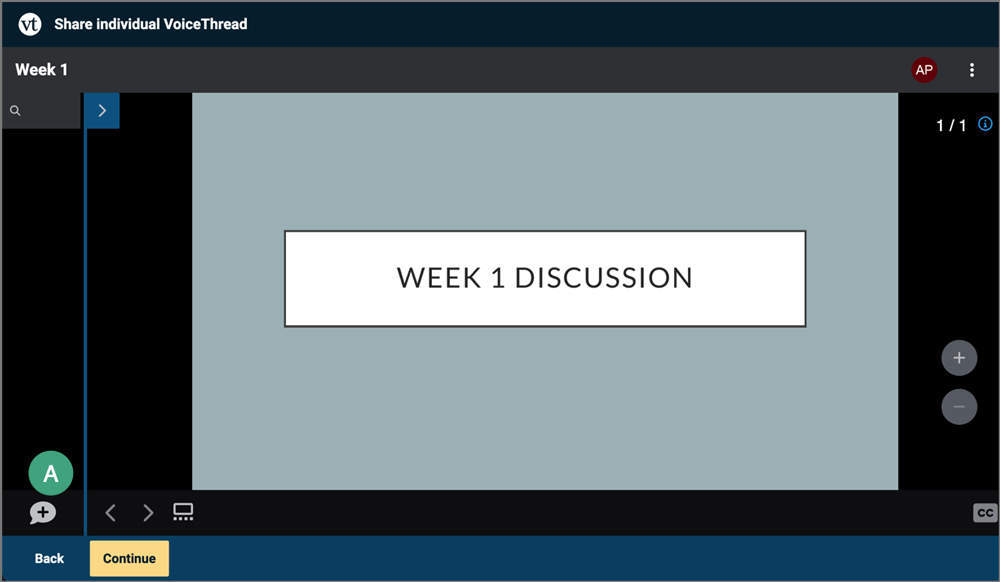
- To add audio, video, or another kind of comment to the VoiceThread, select the
plus dialogue [A].
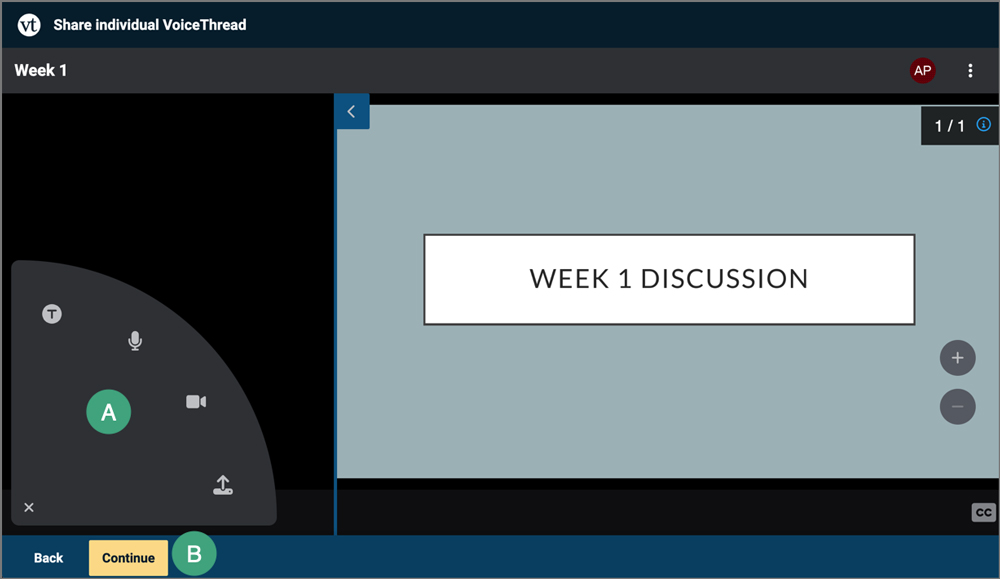
- Select the type of comment to add [A].
- When finished, select
Publish [B].
- Provide students with instructions for
Adding Comments to a VoiceThread Discussion.
Use VoiceThread for Student Presentations
If VoiceThread will be used for class presentations, the display option to choose is Course View. This will show the collection of VoiceThreads that have been shared with the course. Anything that has not yet been explicitly shared with the course will not appear. (See
Sharing a VoiceThread for more information.) Students will be able to add comments to individual presentations when selected.
- After VoiceThread has been added to Content (see
Adding VoiceThread), select
Course View.
- When students use the VoiceThread link, they will be shown all of the VoiceThreads that have been added to the class or shared with the class.
- Provide students with the instructions for
Creating a VoiceThread Presentation.
Adjust Playback Settings
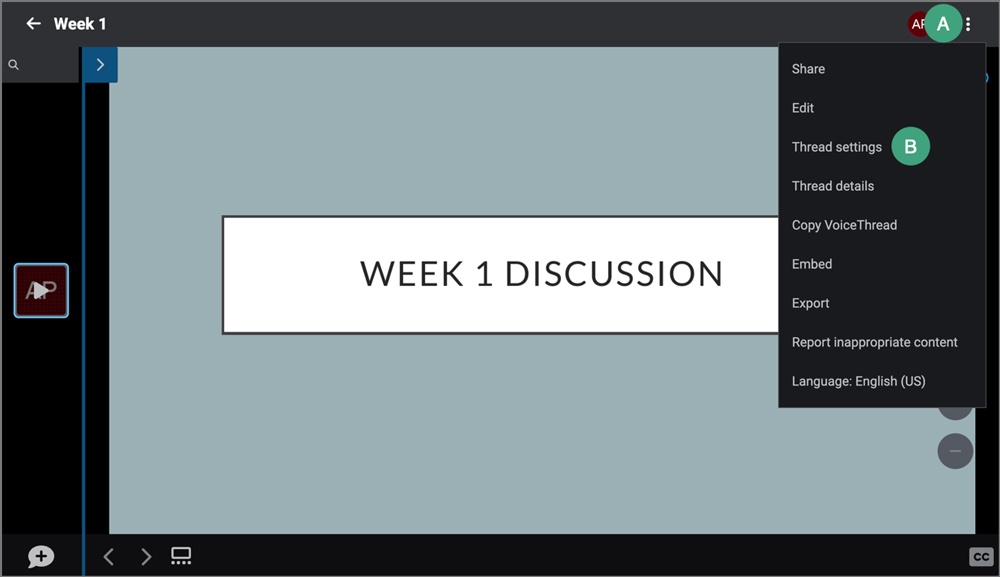
- From an individual VoiceThread, select the
three dots menu [A].
- Select
Thread Settings [B].
- Change playback settings for a VoiceThread depending on its purpose:
-
If the VoiceThread is being used for a discussion, leave the "Enable Threaded Commenting" box selected.
-
If the VoiceThread is being used as a presentation, select the "Automatically advance to the next slide after __ seconds box" and enter a number in the text box. (This is the number of seconds between when the comment ends and the presentation advances to the next slide. For fast-moving presentations, it is recommended to enter 0.)
-
If students should not be able to download the original presentation slides, de-select the "Allow others to download original media". This option allows students to download the PowerPoint file only, not any narrations.
- Select
Save when done.
Note: Detailed information on each playback setting option is available on
VoiceThread's website.
NEXT STEPS
If a VoiceThread is created within a D2L class, it will automatically be shared with that class. For information on how to share a previously-created VoiceThread with a class, see
Sharing a VoiceThread.