After following the instructions for
Creating Groups, instructors will need to add students. When creating groups, one of three enrollment types can be selected.
-
Auto Enrollment: D2L enrolls students in groups automatically.
-
No Auto Enrollment: Instructor or an administrator enrolls students to groups manually.
-
Self Enrollment: Students enroll in groups themselves.
Note: If automatic or self-enrollment is selected, it is necessary to manually modify groups if students withdraw after the start of the term.
Enroll Students in Groups Manually
- Select
More in the course navigation bar.
- Select
Groups from the dropdown menu.
- Select the
View Categories dropdown menu (only required if there is more than one set of groups).
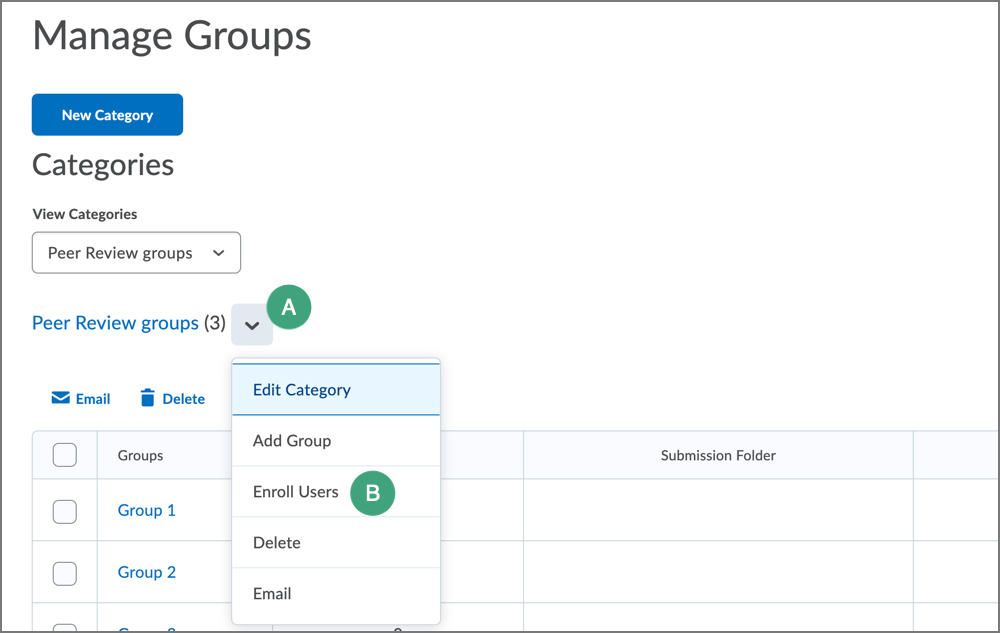
- Select the
dropdown arrow [A] next to the group category name.
- Select
Enroll Users [B].

- The Enroll Users page will open. Select the
checkbox for the appropriate group for each student.
- Select the
Save button.
Provide Students with Instructions for Self-enrollment
As a best practice, it is recommended to add a Groups link in the course navigation bar (see Navigation Bar for instructions), then share these instructions with them.
- Select the
Groups link in the course navigation bar.
- Select the
View Available Groups button.
- The "Available Groups" window will open. Select the
Join Group link.
NEXT STEPS
After creating and enrolling students to groups, set up group submission folders or discussion topics. See
Creating Submission Folders and
Creating Group Discussions for more information.