Use the D2L HTML editor to create a new page within the Content of a course. The page can contain text, links, images, and embedded video. The page can also support interactive elements with the Insert Element option and Insert Practice option. Templates for creating pages are also available.
A module must be created first before creating a new page. See
Creating a Module for more information.
Creating a New Page
Without downloading and setting up the HTML Templates, instructors can create new pages that are supported by the HTML editor and have basic functions for editing the look of text. Images can also be used, and videos from Panopto can be embedded (See
Embedding Panopto Videos for more information).
- Go to the module where the new page will be added.
- Select
Upload/Create.
- A dropdown menu will appear. From the dropdown menu select Create a Page.
- In the Create a Page area, enter a title in the top textbox.
- Enter content in the main textbox. (See the HTML Editor Guide for more information.)
- Select
Save and Close.
Use Creator+ Templates
D2L offers templates for creating new pages in Content. These templates provide structure and organizational elements which instructors can modify and add to as needed.
- Once a
new page has been created, select
Select a Document Template [A].
- From the dropdown menu, select the
template to be used [B].
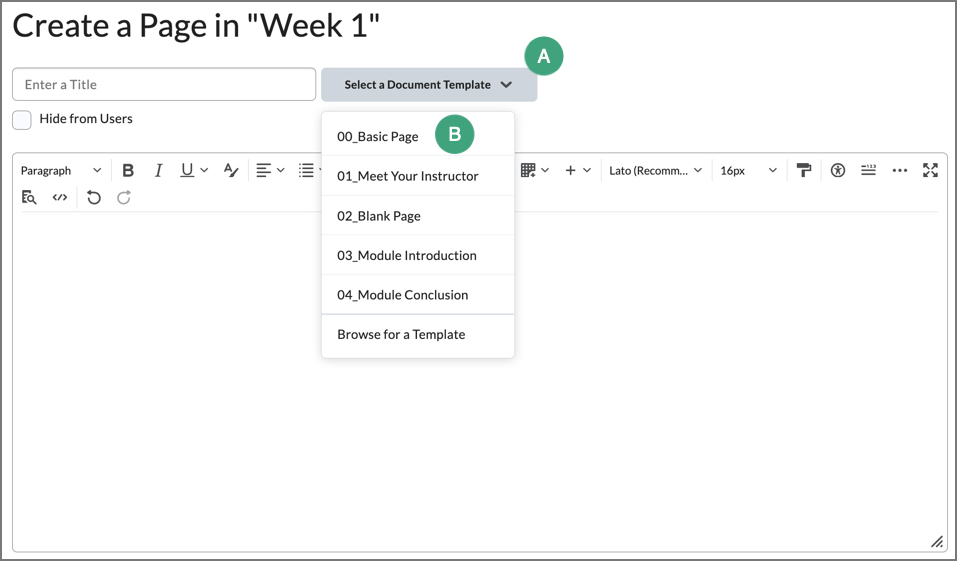
- Once selected, the template will appear in the HTML Editor. Add text and images as needed.
- Once finished, select
Save and Close.
Use Insert Element
Insert Element is launched from the HTML editor when creating a page in the Content area of a D2L site. For information on creating a page in Content, see
Creating a Page.
- Within the HTML Editor, select the
paintbrush and pencil icon [A].
- Select
Insert Element [B].
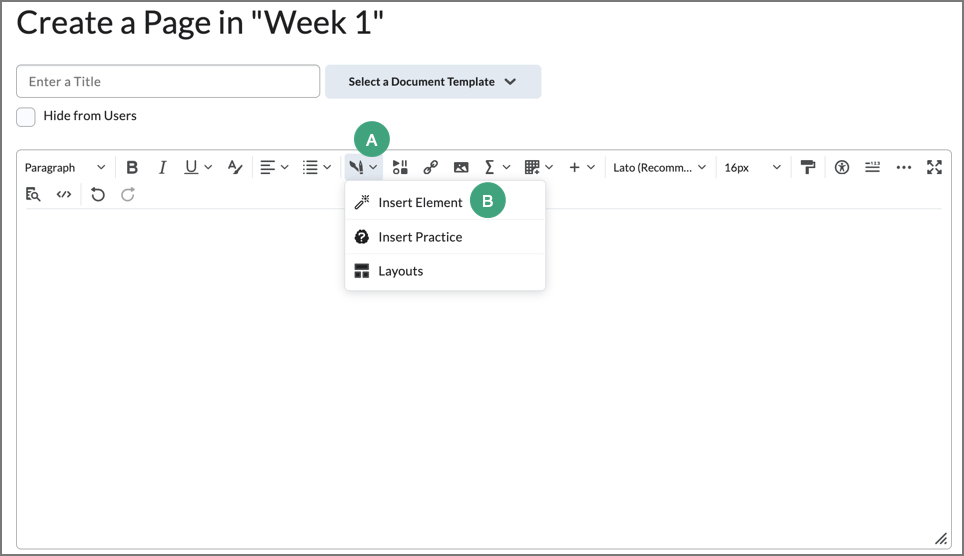
- Select the
type of element to insert.
Note: For descriptions of individual elements and how they display information, see
Types of Elements.
- Input text and/or media.
- Select
Preview.
- Review the element. When finished, select
Insert.
- Select
Save and Close.
Types of Elements
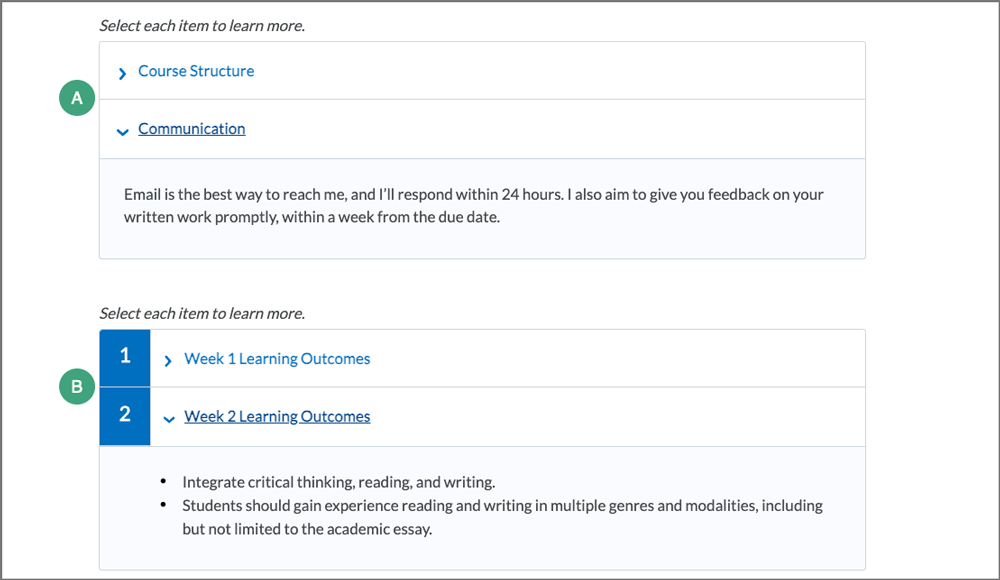
Accordion
An interactive list of topics stacked vertically, each of which can be released to reveal more information when selected. Accordions can be unnumbered [A] or numbered [B].
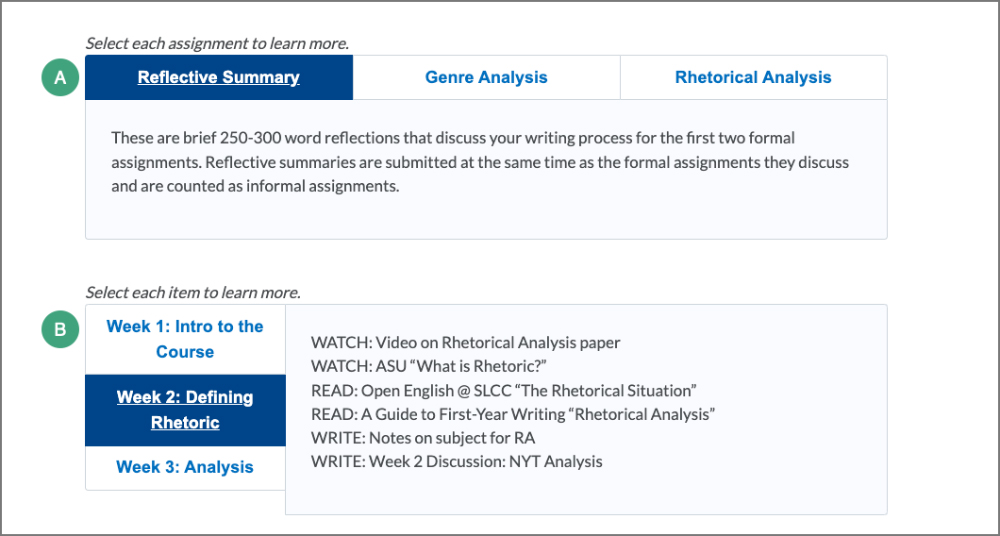
Tabs
An interactive table for organizing information into parts or presenting steps in a process. The tab element can be structured horizontally [A] or vertically [B].
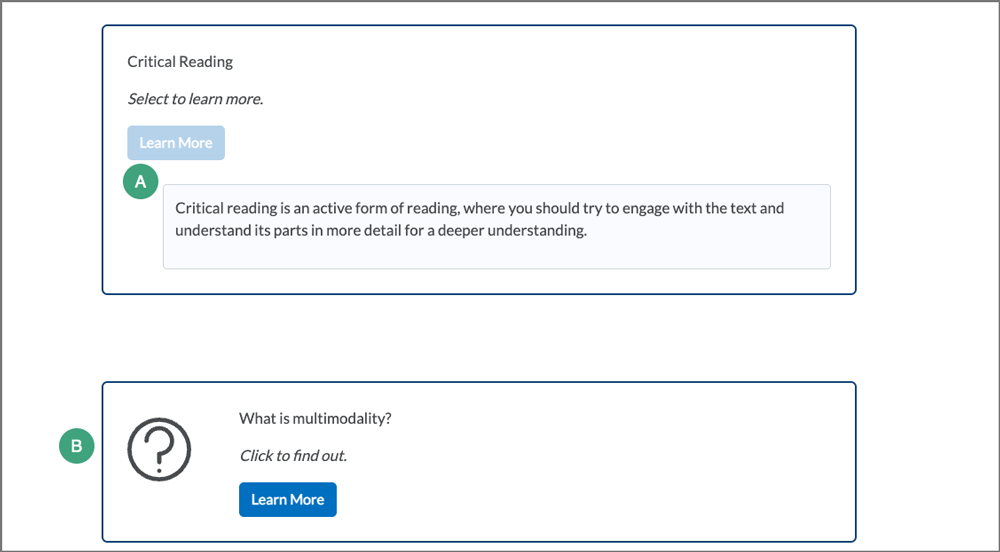
Click and Reveal
A card that poses a question or presents content along with a link to click for more information [A]. Click and reveal elements can be accompanied with a question mark icon if posing a question [B].
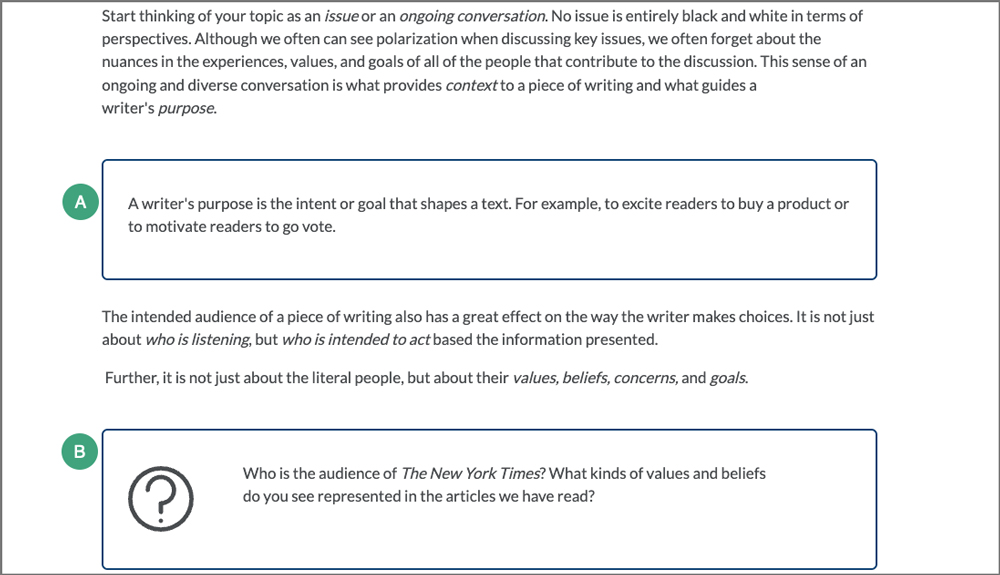
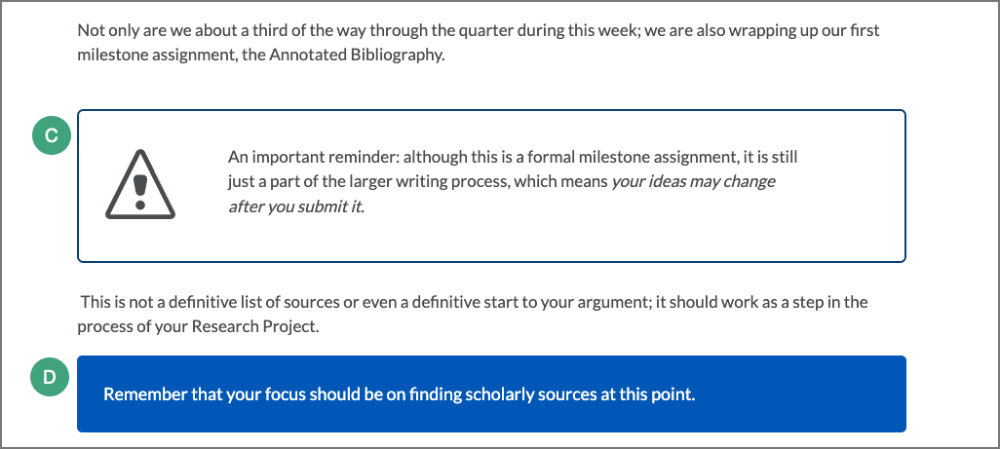
Callout
An aside or segment of content separated in a box. Used to insert content that is related to but not a direct part of the main content. A callout can be just text [A], include a question icon [B], include an attention icon [C], or be formatted as a “jumbo” callout to emphasize information [D].
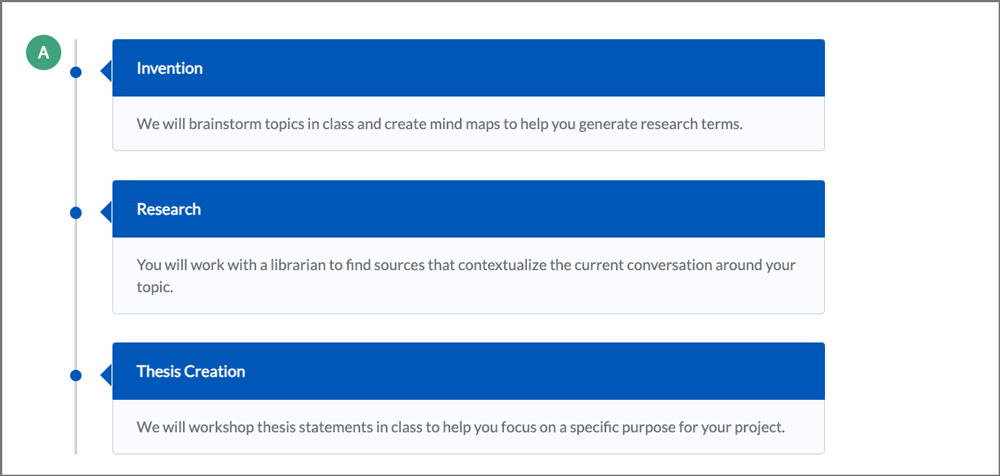
Timeline
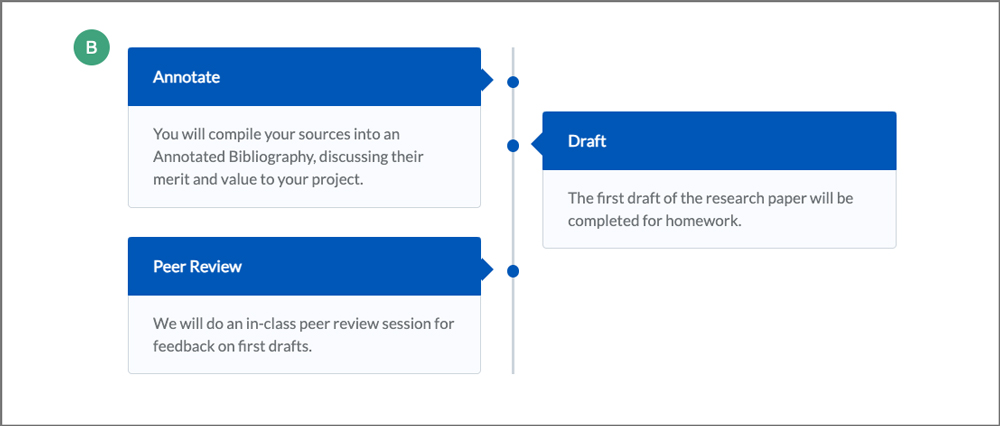
A list of steps presented in boxes from earliest to latest. A standard timeline will have all steps aligned on the left [A]. An alternating timeline will display steps on alternating sides of the center line [B].
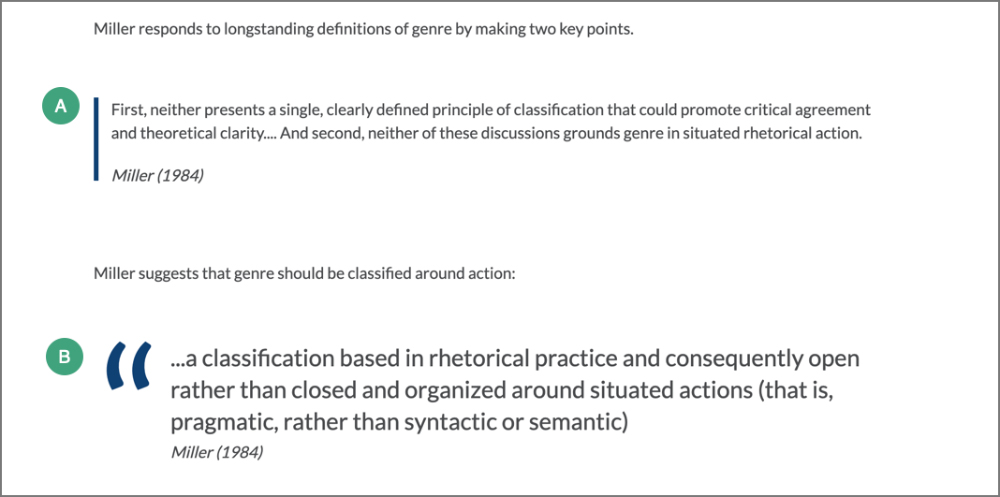
Stylized Quote
Formats a segment of text into a blockquote. The stylized quote element has a standard form [A] and a large focus form [B].
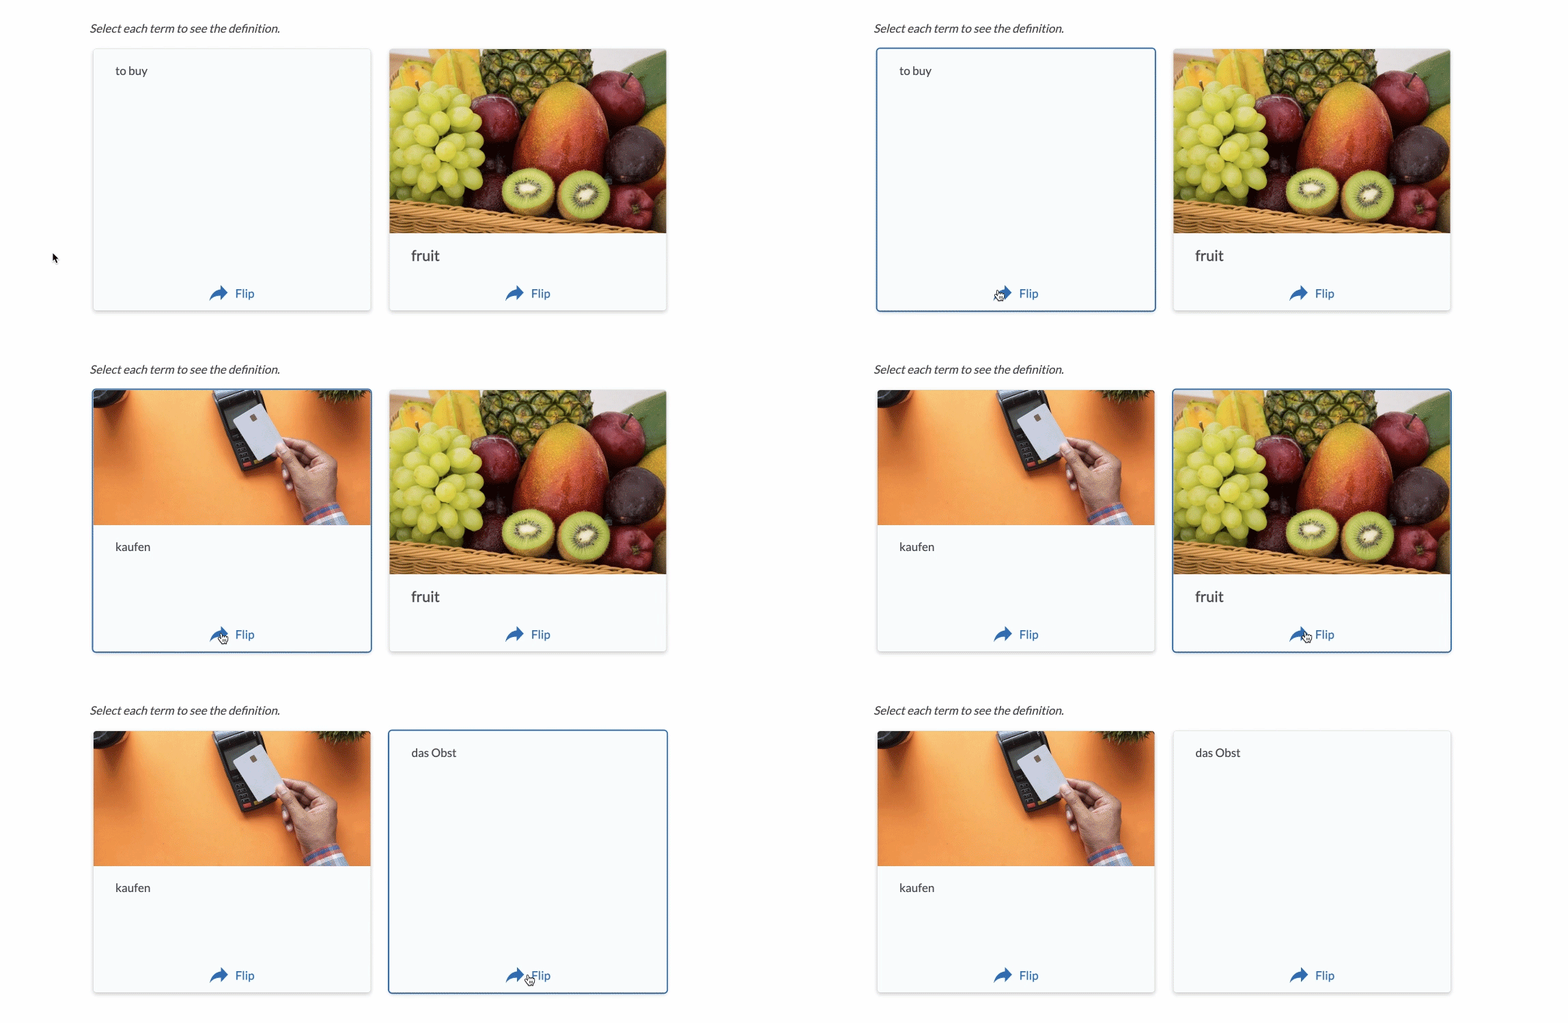
Flip Cards
An interactive set of content boxes that allows learners to create associations between paired content items. Once clicked, each box will flip to reveal related content on the other side.
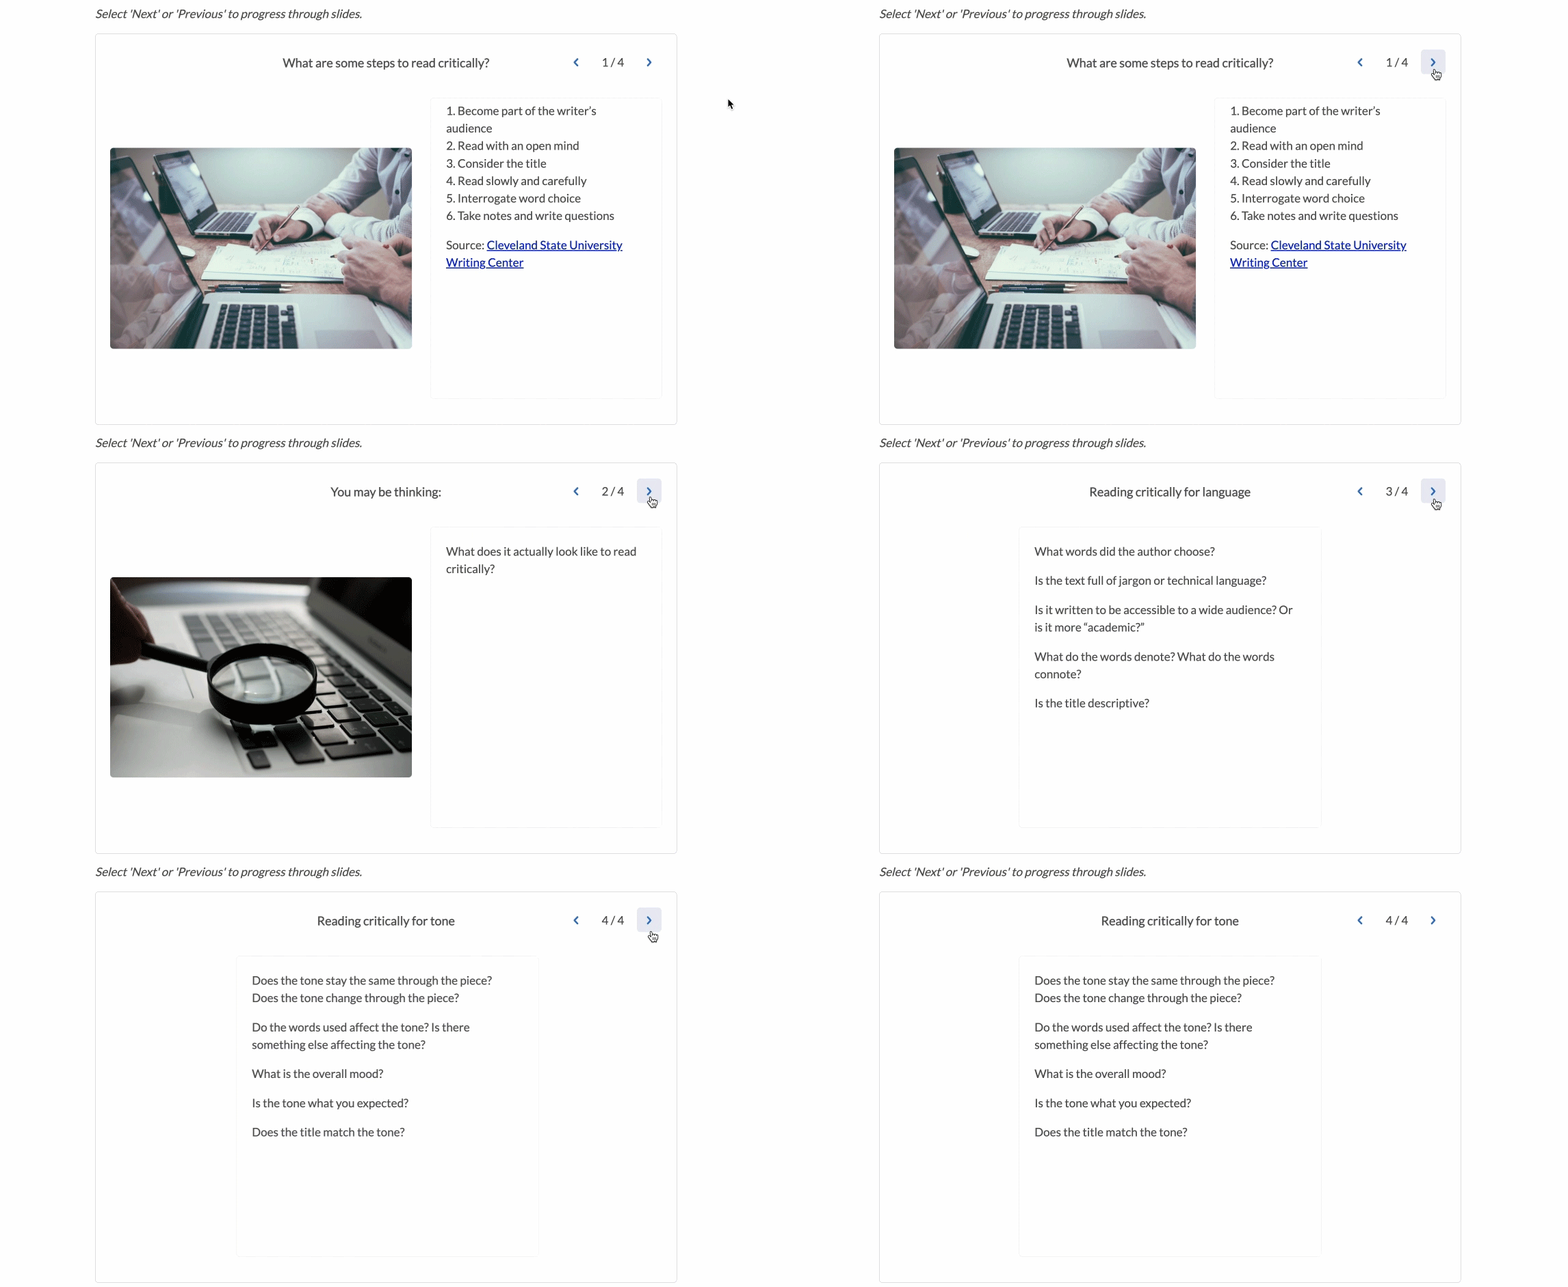
Carousel
A slideshow of text and/or images with navigation controls for learners to move forward or backward.
Use Insert Practice
Practices are informal, interactive learning activities that allow students to test their comprehension and get immediate feedback. Practices can be inserted into a page in Content. For information on creating a page in Content, see
Creating a Page.
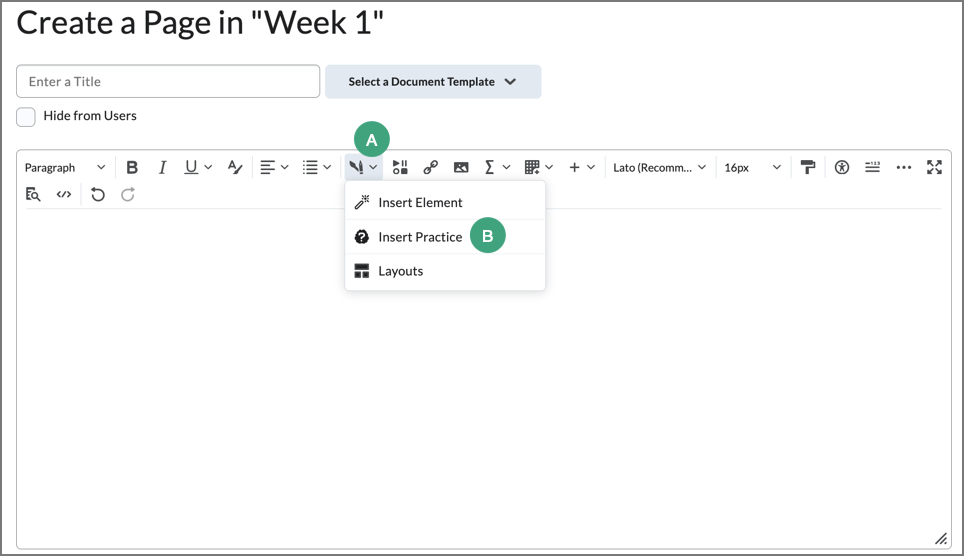
- Within the HTML Editor, select the
paintbrush and pencil icon [A].
- Select
Insert Practice [B].
- Select the
type of practice to insert.
Note: For descriptions of individual elements and how they display information, see
Types of Practices.
- Input text and/or media.
- Select
Preview to see what the practice will look like or select
Insert to insert the practice into the page.
- Close the dialog window.
- Select
Save and close.
Types of Practices
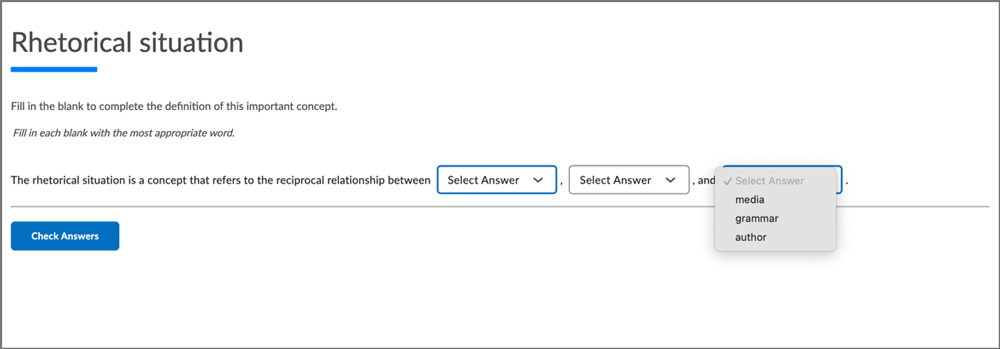
Dropdown Fill-in-the-Blank
Create a Fill-in-the-Blank question that allows students to choose their answer(s) from a list of options.
Fill-in-the-Blank
Create a question in which students type in the correct answer.

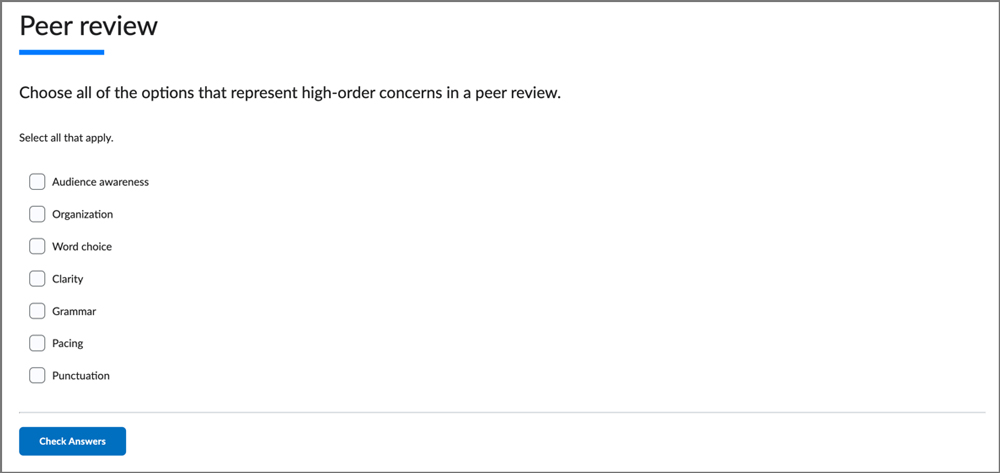
Multi-Select
Create a question that allows students to select more than one correct answer.
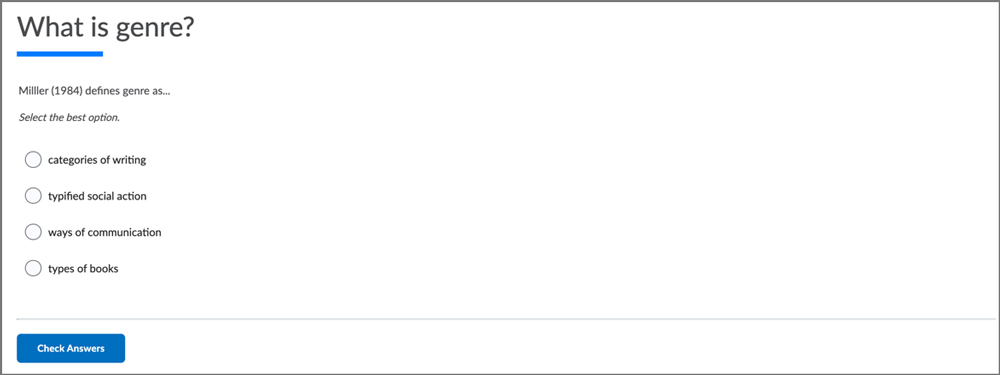
Multiple Choice
Create a question that allows students to choose an answer from a list of options.
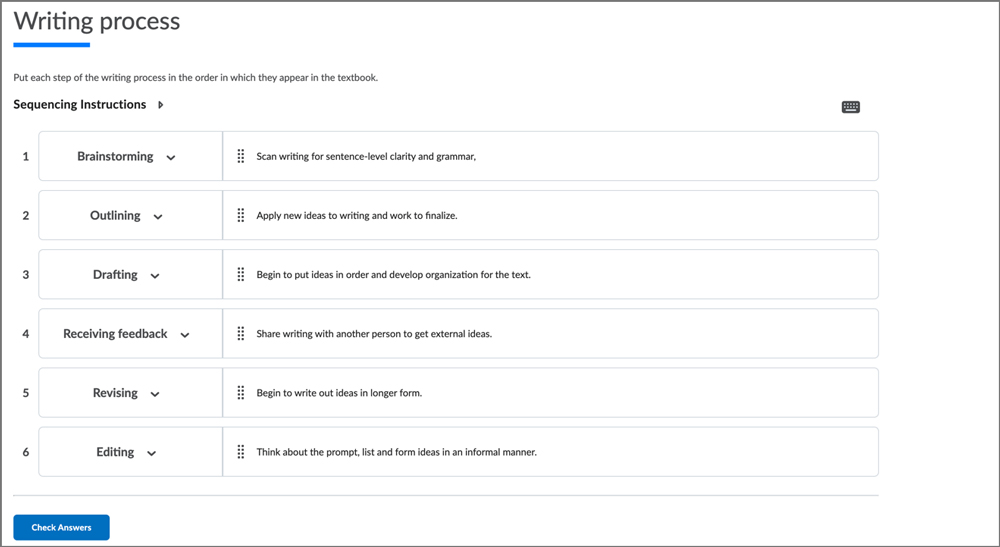
Sequencing
Create a question that asks students to place items in a sequence by matching steps in a process to their descriptions.
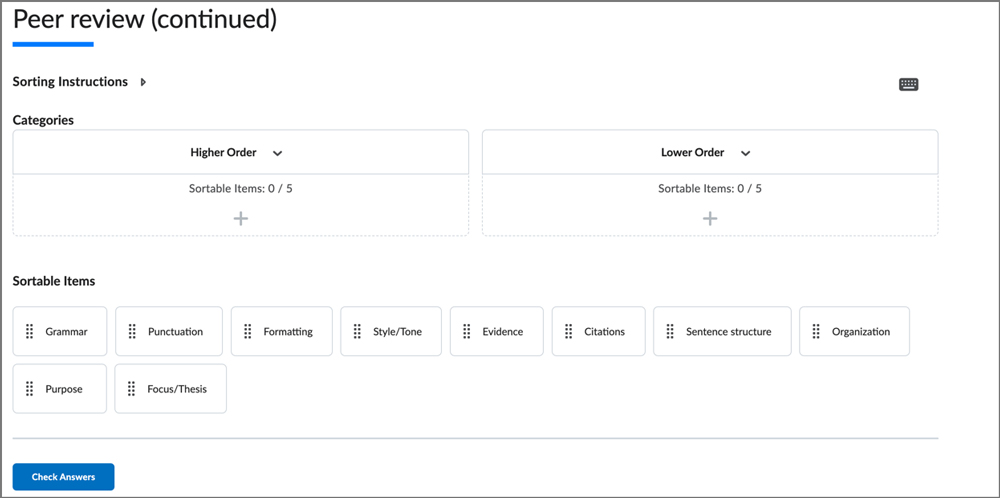
Sorting
Create a practice in which students place items into different categories.
True or False
Create a question that asks students to indicate whether it is correct or incorrect.

NEXT STEPS
When a new page is created, it will always appear as the very last topic in a module. To reorganize the content area view Reordering Modules and Topics for more information.