OneNote Class Notebook is an External Learning Tool that allows for collaboration and sharing of materials and assignments through OneNote. Once OneNote Class Notebook has been
added to a class and
set up with sections, instructors can provide readings and handouts, assign activities,
review student work, and
facilitate asynchronous collaboration between students. OneNote Class Notebook can be accessed online or through Microsoft Office. For instructions on how to download Microsoft Office, see the information on
Office 365 Education Plus for DePaul.
Add OneNote Class Notebook to a D2L Course
To provide students with an access point for OneNote Class Notebook, add a link to the class in D2L.
- Go to the course to which to add OneNote Class Notebook.
- Select
Content from the course navigation bar.
- Navigate to the module to which to add the Class Notebook.
- Select
Existing Activities.
- Select
External Learning Tools.
- Select
Microsoft Education.
- A link will be created within the module.
- To begin setting up the Class Notebook, select the new
Microsoft Education link.
- (Optional) to rename the link, select the title "Microsoft Education" and input the correct title.
Create or Load a Class Notebook
The process for setting up OneNote Class Notebook involves creating sections, populating content, and adding students.
- Select the
Microsoft Education link.
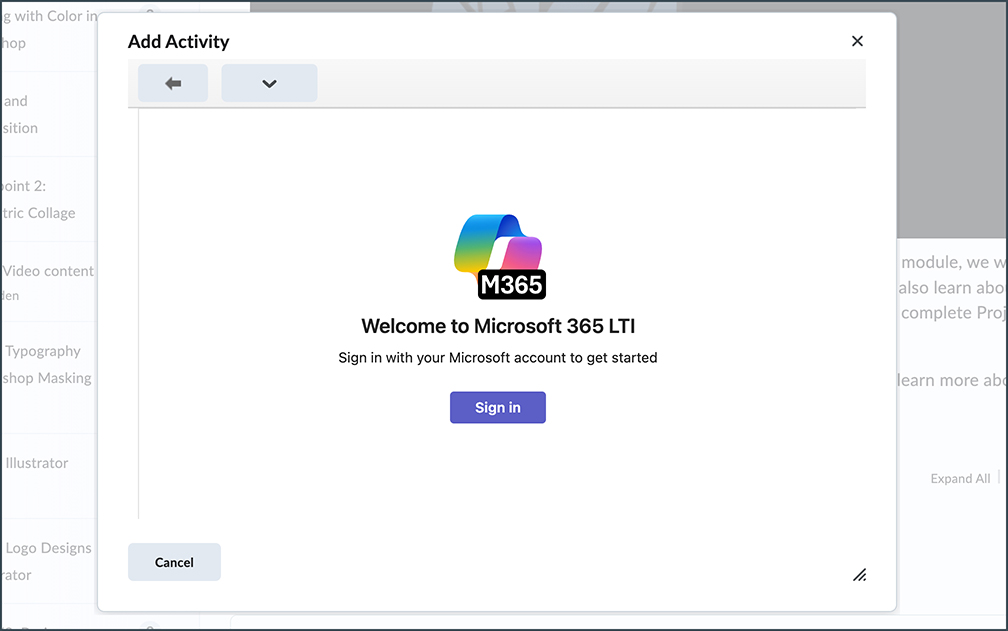
- If a login screen appears, select
Sign in and log in using DePaul credentials.
- Select
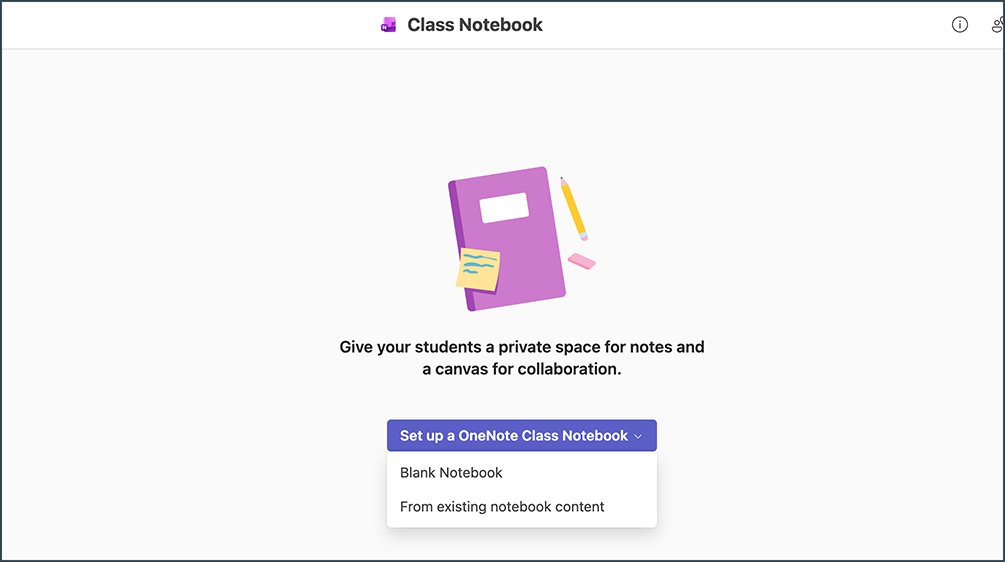
Class Notebook.
-
To create a new Notebook, select
Blank Notebook.
-
To
load an existing Notebook, select
From existing notebook content.
-
Select
Next.
-
Select
Add Content to choose an existing Notebook to copy content from.
-
Select
Next. A window opens showing existing Notebooks.
-
Choose the Notebook to copy from and select
Next.
-
On the following screen, check the boxes next to material to import.
-
Select
Done.
- A screen will open with the name of the course populated in a text box.
- The next screen will show four sections for the Class Notebook:
-
Collaboration Space: This is where students and teachers can work together
-
Content Library: This section is for instructors to post materials
-
Teacher-Only Section: This section is restricted to thoe with instructor privileges, and provides a space for teaching materials or other resources for the instructor's eyes only.
-
Student Notebooks: This section is what students use individually.
- After reviewing these sections, select
Next.
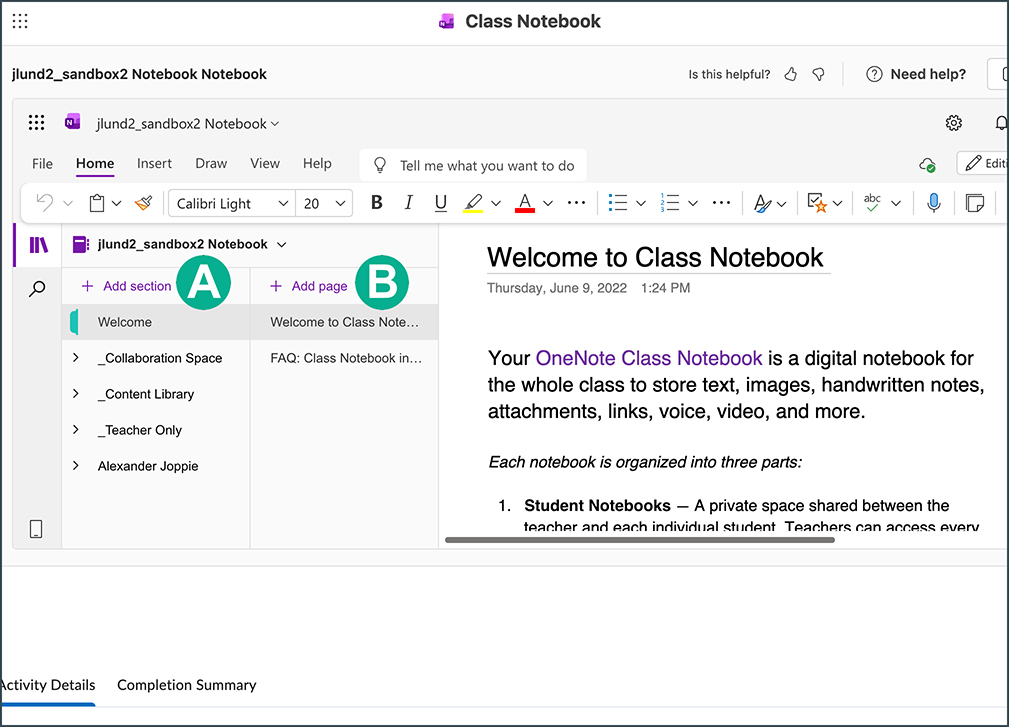
- Use the next screen to customize what students will have in their individual notebooks:
-
Select
Add Section [A] to add to the notebook or select the x next to a section to delete it.
-
Select Add Page [B] to create a new document to type or paste a message or other content into.
- Since this resource is linked directly to the instructor's account, any changes made to the Class Notebook are automatically saved, so the page can be closed without the fear of losing work.
Add Materials to a Class Notebook
Materials like readings, graphs, handouts, and homework assignments can be created and distributed within OneNote Class Notebook. Instructors can create new pages within the notebook or insert previously-created materials.
- From the course homepage in OneNote, select
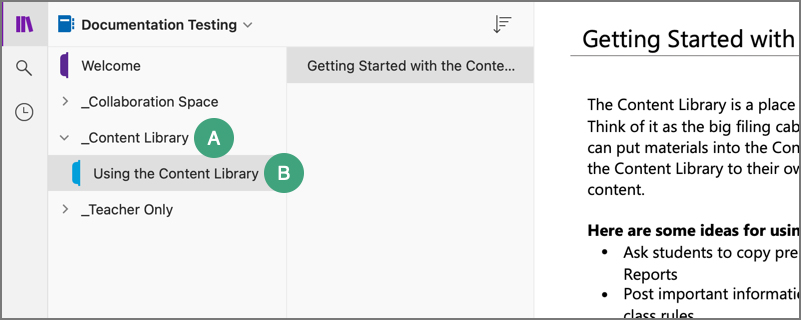
Content Library [A].
- Select the
tab under the heading [B].
- Select
Add Page.
- On the blank page that opens, enter a title for the page above the date.
- Enter the content of the page. Questions can be typed directly onto the page, copied and pasted from an outside document, or inserted. Images can also be inserted. (See the
OneNote documentation for more details about populating content.)
- When finished creating the page, select
Class Notebook from the top navigation bar.
- Select
Distribute Page.
- A dropdown menu will appear:
- Select
Distribute Page to distribute the page to all students.
- Select
Individual Distribution to distribute the page to select student(s).
- Select
Group Distribution to distribute page to separate groups.
Note: To create groups, after selecting
Group Distribution, select
+ New Group in the window that opens. Then, choose the students for the group using the checkboxes and select
Save.
- From the sidebar that appears, select the
section of the notebook to which the page should be distributed.
- Select
Distribute.
Collaborate Through a Class Notebook
In OneNote Class Notebook, instructors can set up collaborative activities, where students can add to documents with the whole class or within small groups.
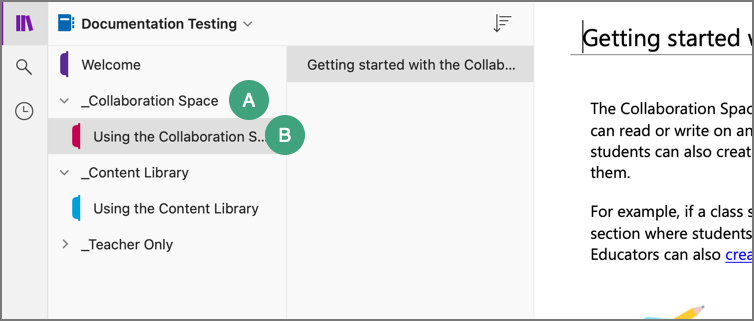
- From the course homepage in the Class Notebook, select
Collaboration Space [A].
- Select the
tab under the heading [B].
- Select
Add Page.
- On the blank page that opens, enter a name for the page above the date. This will be the title that students see.
- Enter the content of the page. Questions can be typed directly onto the page, copied and pasted from an outside document, or inserted. Images can also be inserted.
- When finished, select
Class Notebook from the top navigation bar.
- A dropdown menu will appear:
- Select
Distribute Page to distribute the page to all students.
- Select
Individual Distribution to distribute the page to select student(s).
- Select
Group Distribution to distribute page to separate groups.
Note: To create groups, after selecting
Group Distribution, select
+ New Group in the window that opens. Then, choose the students for the group using the checkboxes and select
Save.
- From the sidebar that appears, select the
section of the notebook to which the page should be distributed.
- Select
Distribute.
Lock a Collaborative Page
Instructors can lock a page to prevent students from further editing or annotating a collaborative area.
- Select
Class Notebook from the top navigation bar in OneNote.
- Select the
notebook icon (web) or
Manage Notebooks (OneNote app).
- Under the heading “Lock Collaboration Space” toggle the button to lock the Collaboration Space.
Review Student Work
When students put their work in their individual Class Notebooks, that work is accessible to instructors. Instructors can annotate submissions as well as add audio feedback and images.
- From the course homepage in OneNote Class Notebook, select
Class Notebook from the top navigation bar.
- Select
Review Student Work.
- From the menu that opens, select the
section under which the assignment is housed.
- Select
Next.
- Select the
page to review.
- Select
Next.
- Select the
name of the student to review.
- When the submission opens, select
Draw from the top navigation bar.
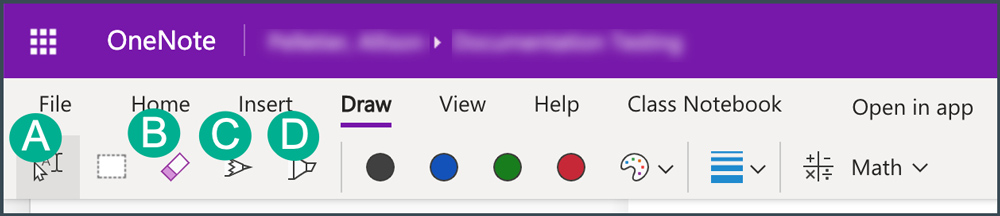
- Use the tools to annotate the submission and give feedback:
- Select the
cursor icon to enter a text box [A].
- Select the
eraser icon to erase annotations [B].
- Select the
pencil icon to draw on the submission [C].
- Select the
highlighter icon to highlight sections of the submission [D].
- When finished annotating, choose the next student. Feedback will sync automatically.
NEXT STEPS
Review the pages from OneNote on
Getting Started and
Getting the Most out of OneNote Class Notebook.